Summary:
The new Web Kiosk is the fastest way to create transactions on the web! This full screen kiosk has been designed to identify people, open orders, and items all from a single screen. Easy access from the menu makes it simple to access the kiosk anytime you need it! A few highlights include:
- Issue, Return, Receive, Remove, or Audit from a single screen.
- Quickly identify athletes, staff, or orders and start scanning.
- Scan barcodes or RFID tags to identify items.
- No barcodes? No problem. Use the quick search icon and find items fast.
- Return items directly from the Current Issue List.
- Issue items to any athlete/staff across all sports.
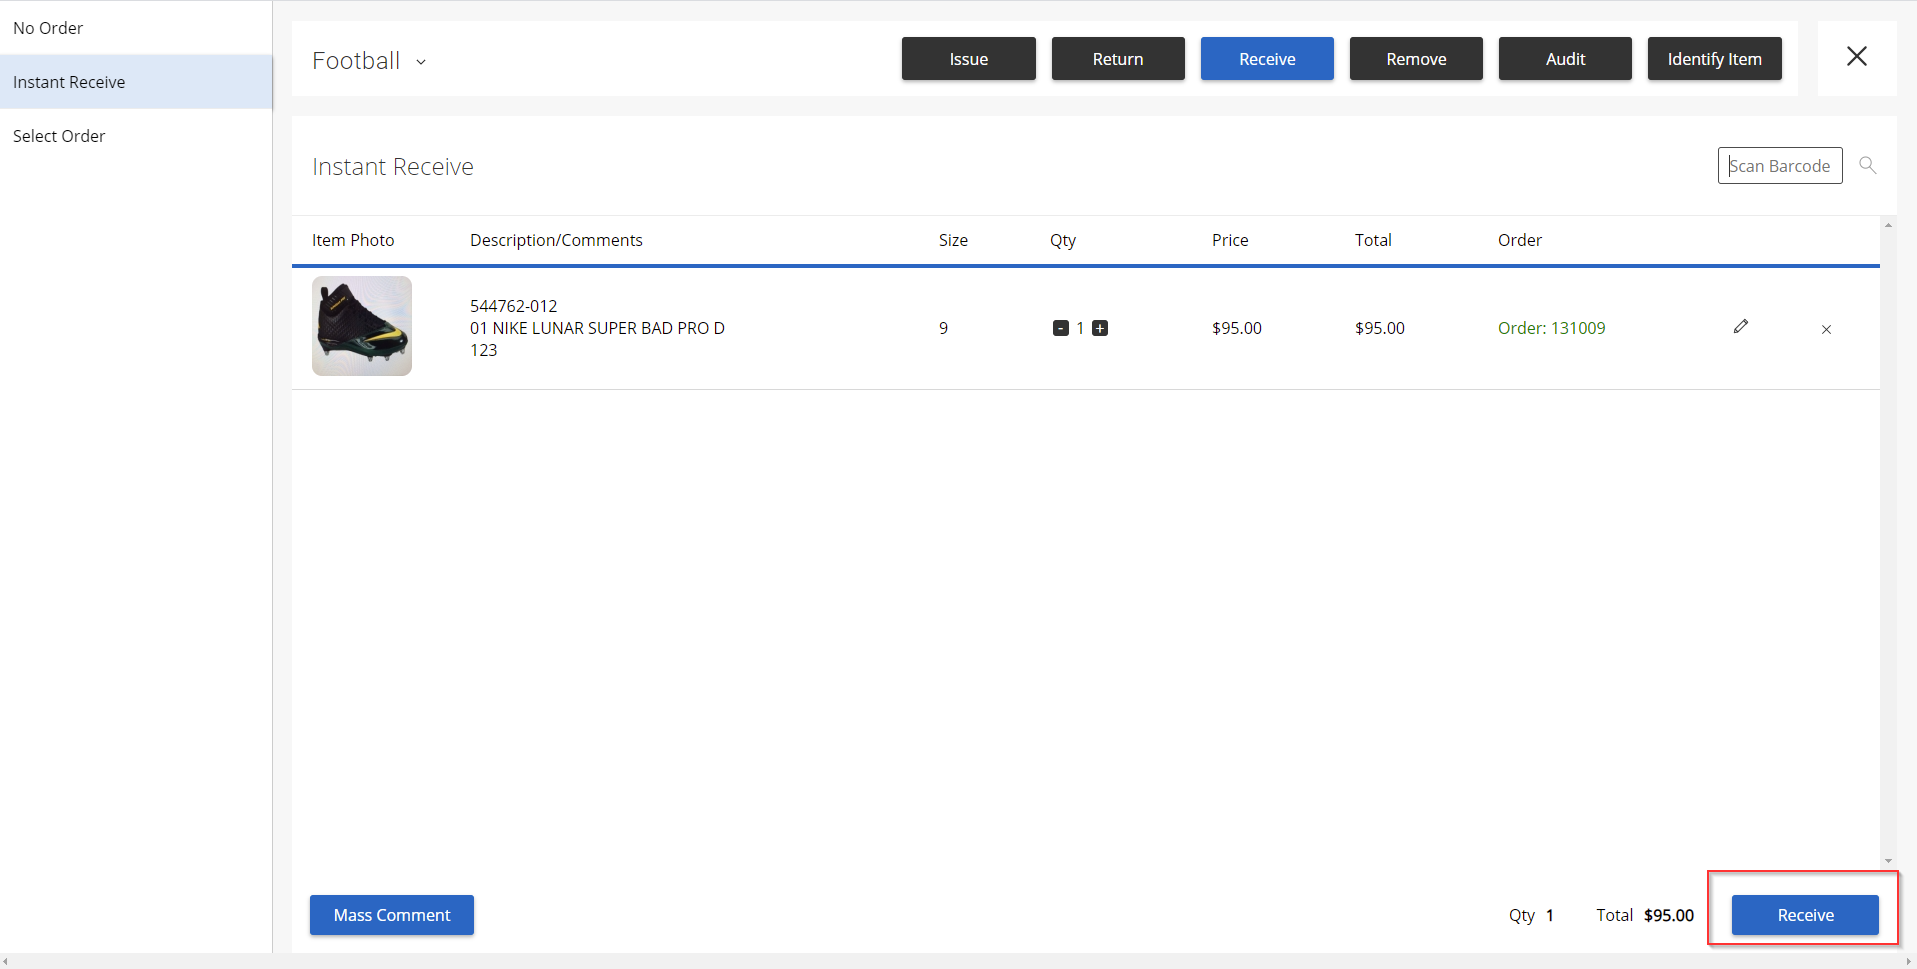
- Use the new Instant Receive function to automatically link receive transactions to open orders.
- Compatible with any scanner that already works with your Desktop or Laptop Computer (e.g. Blue tooth or USB scanner).
- Update size charts and review transaction history as needed.
Video:
Article:
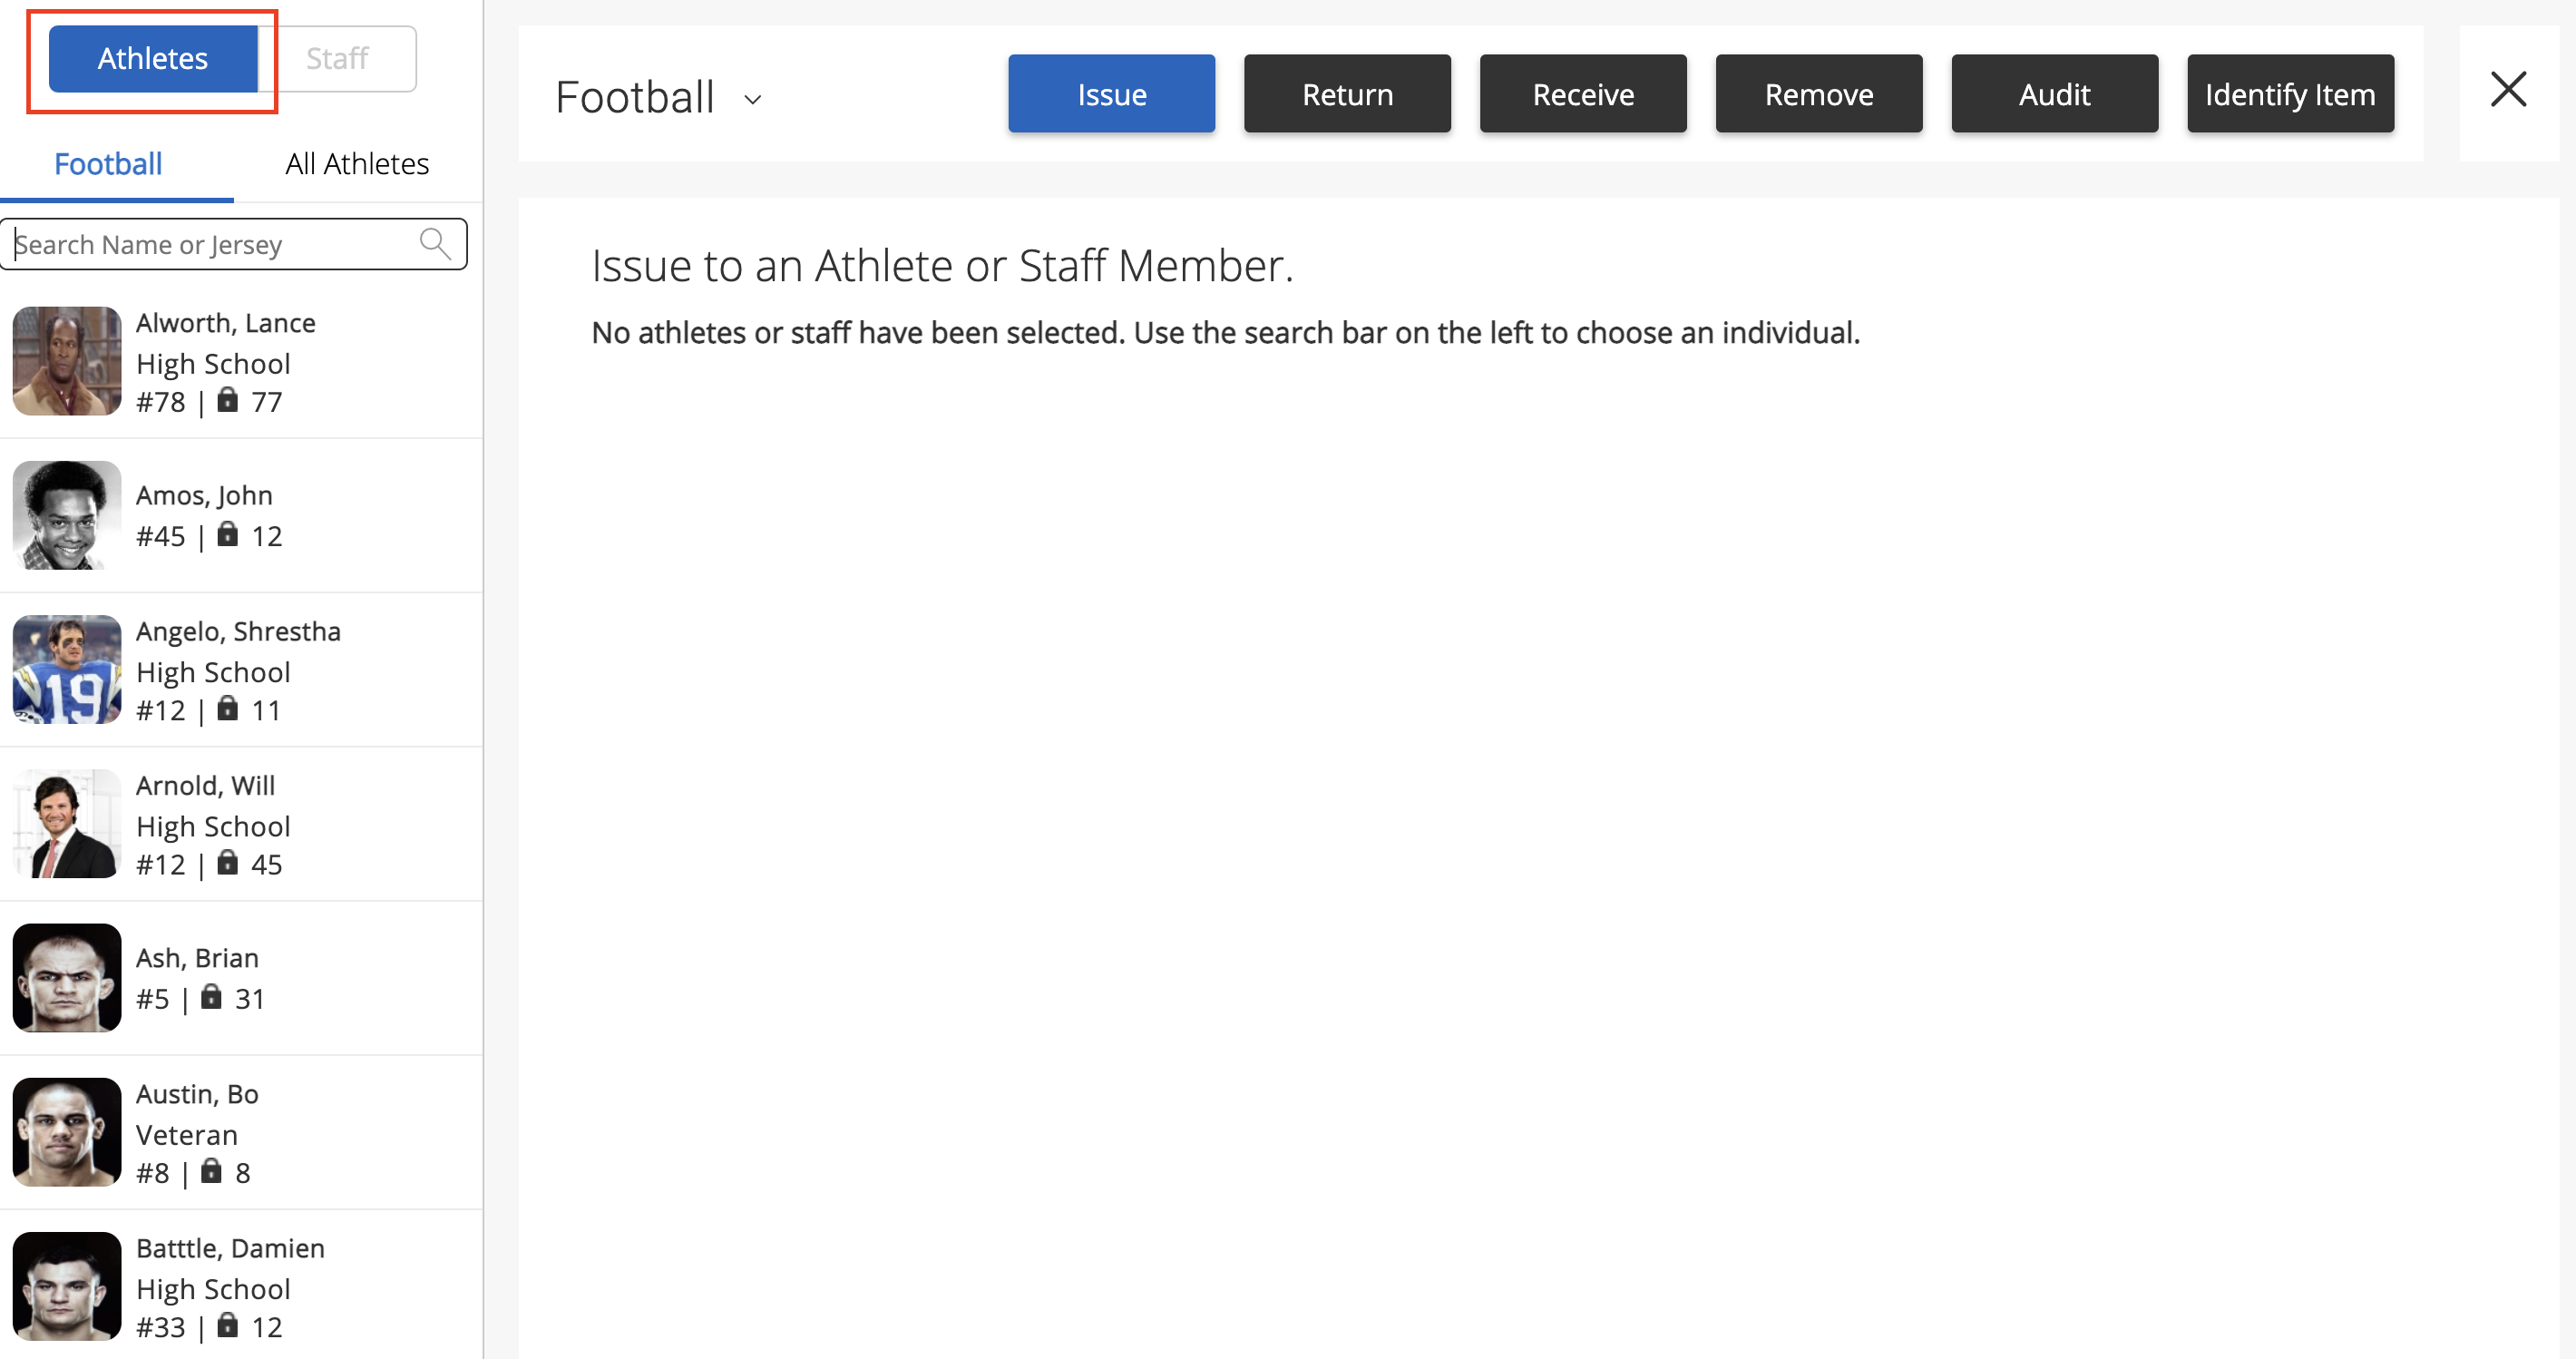
How to Access the Web Kiosk and Select Transaction Type:
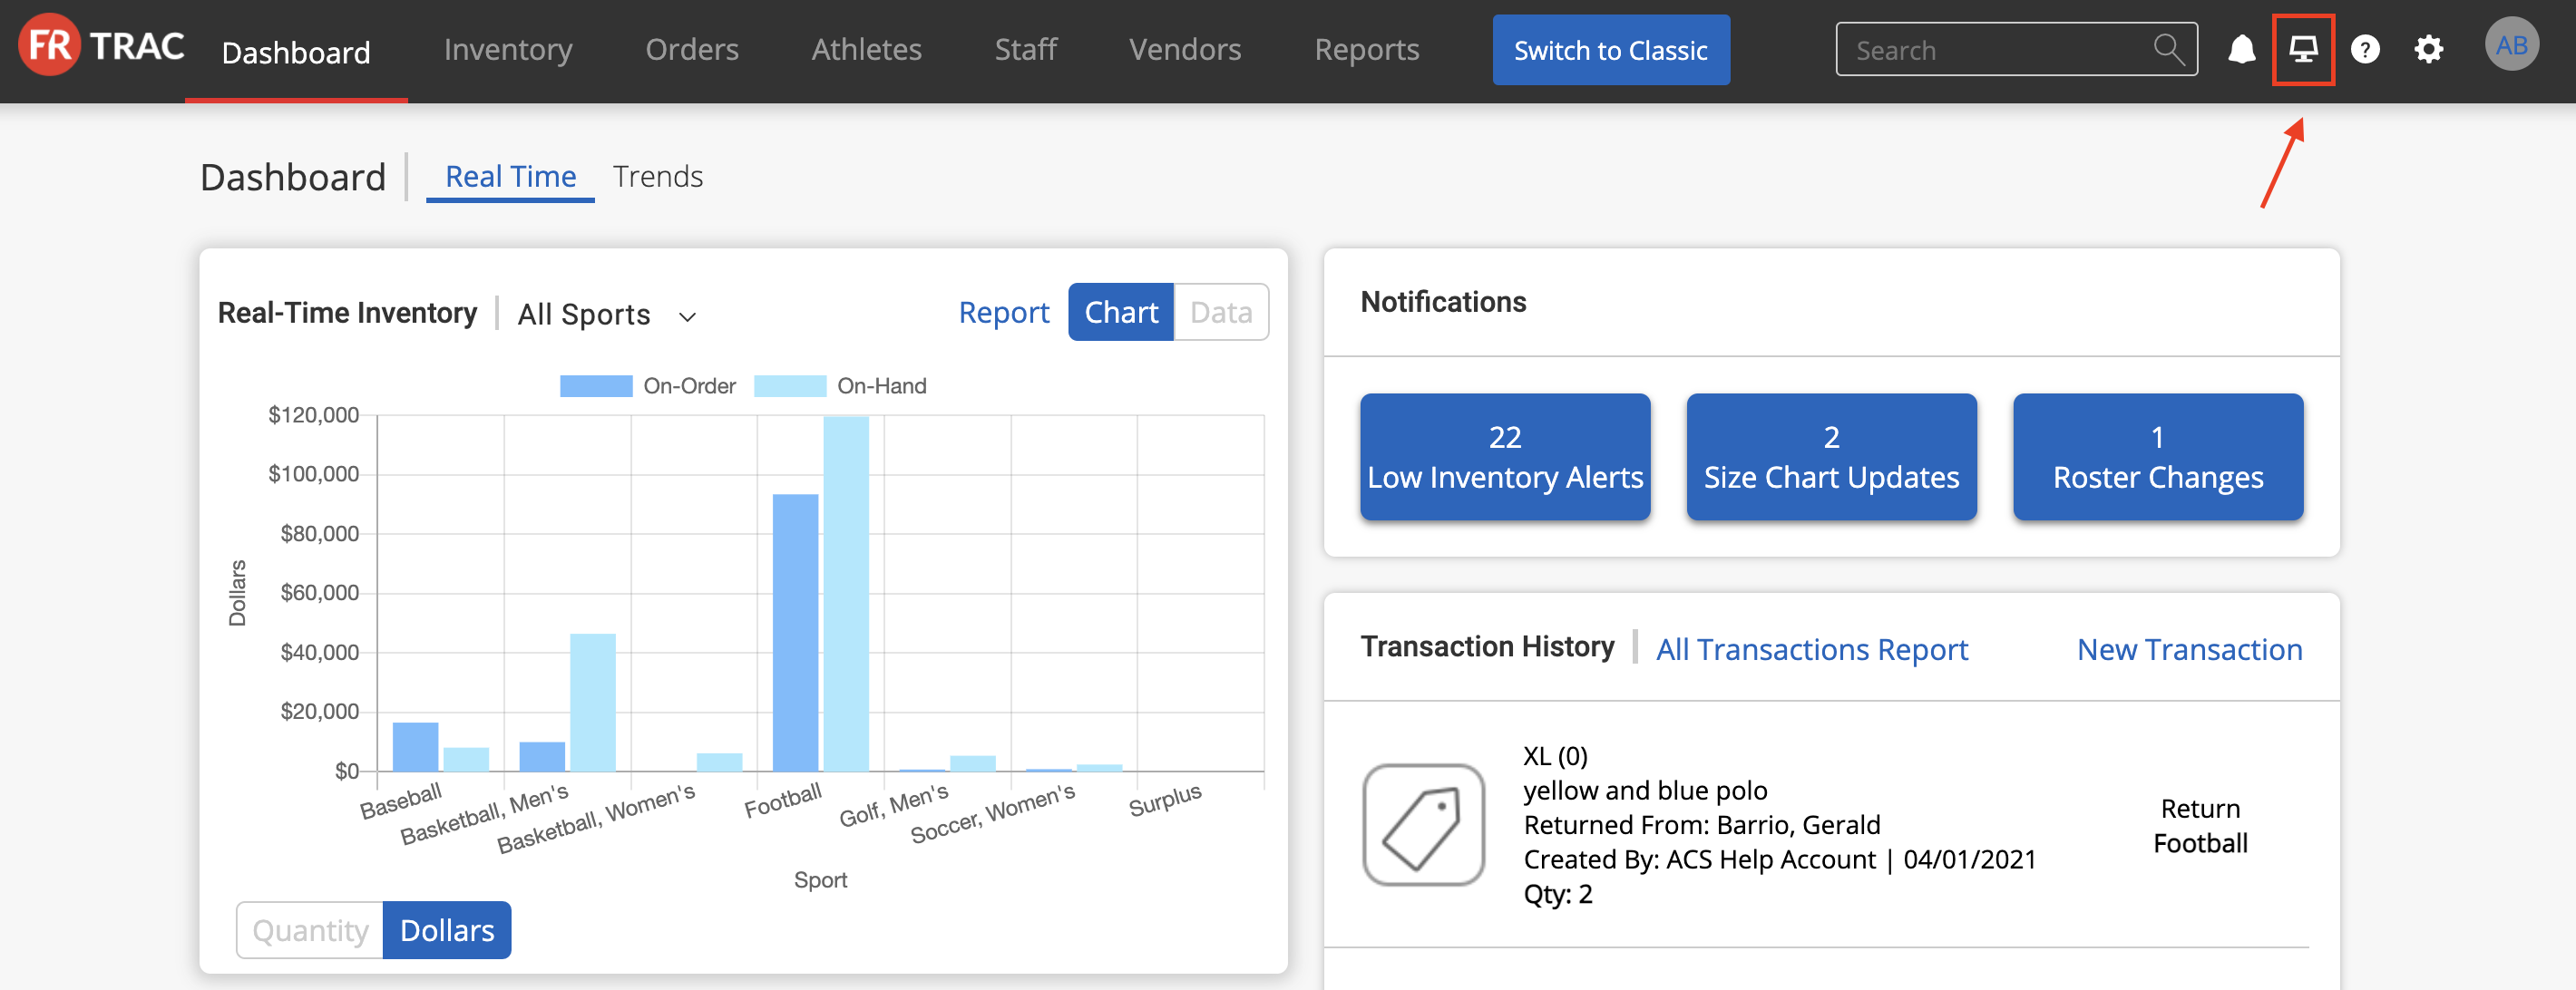
- Click the "Web Kiosk" icon in the top right corner.
- Select between the six transaction types (Issue, Return, Receive, Remove, Audit, Identify Item) at the top.

- To exit the kiosk view, select the X on the top right of the page.

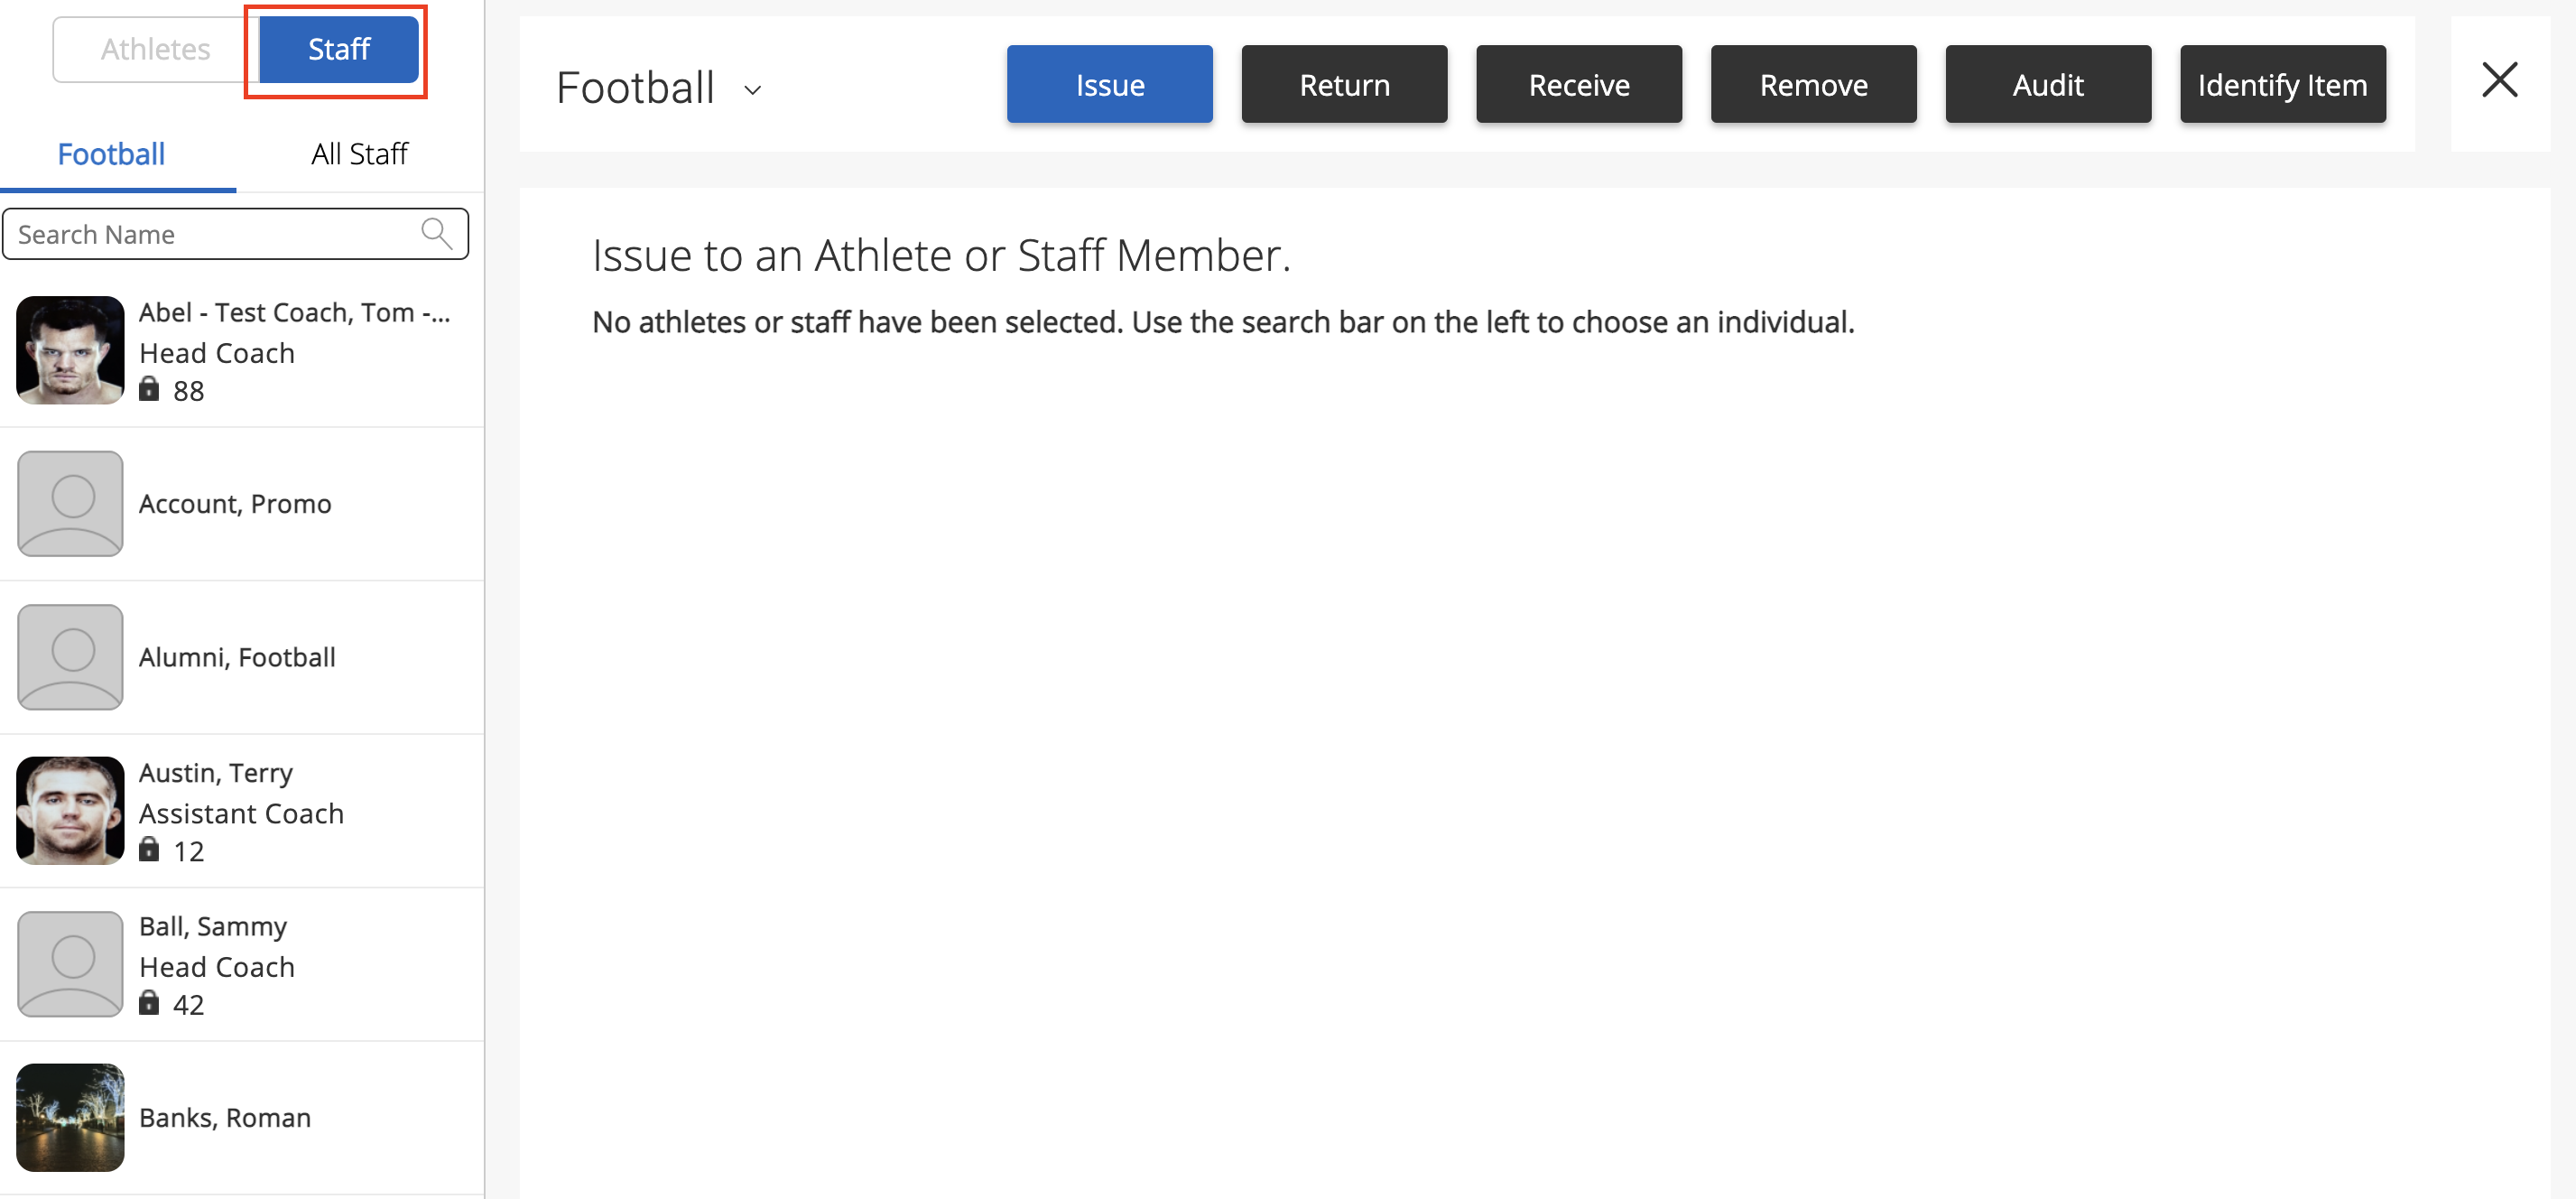
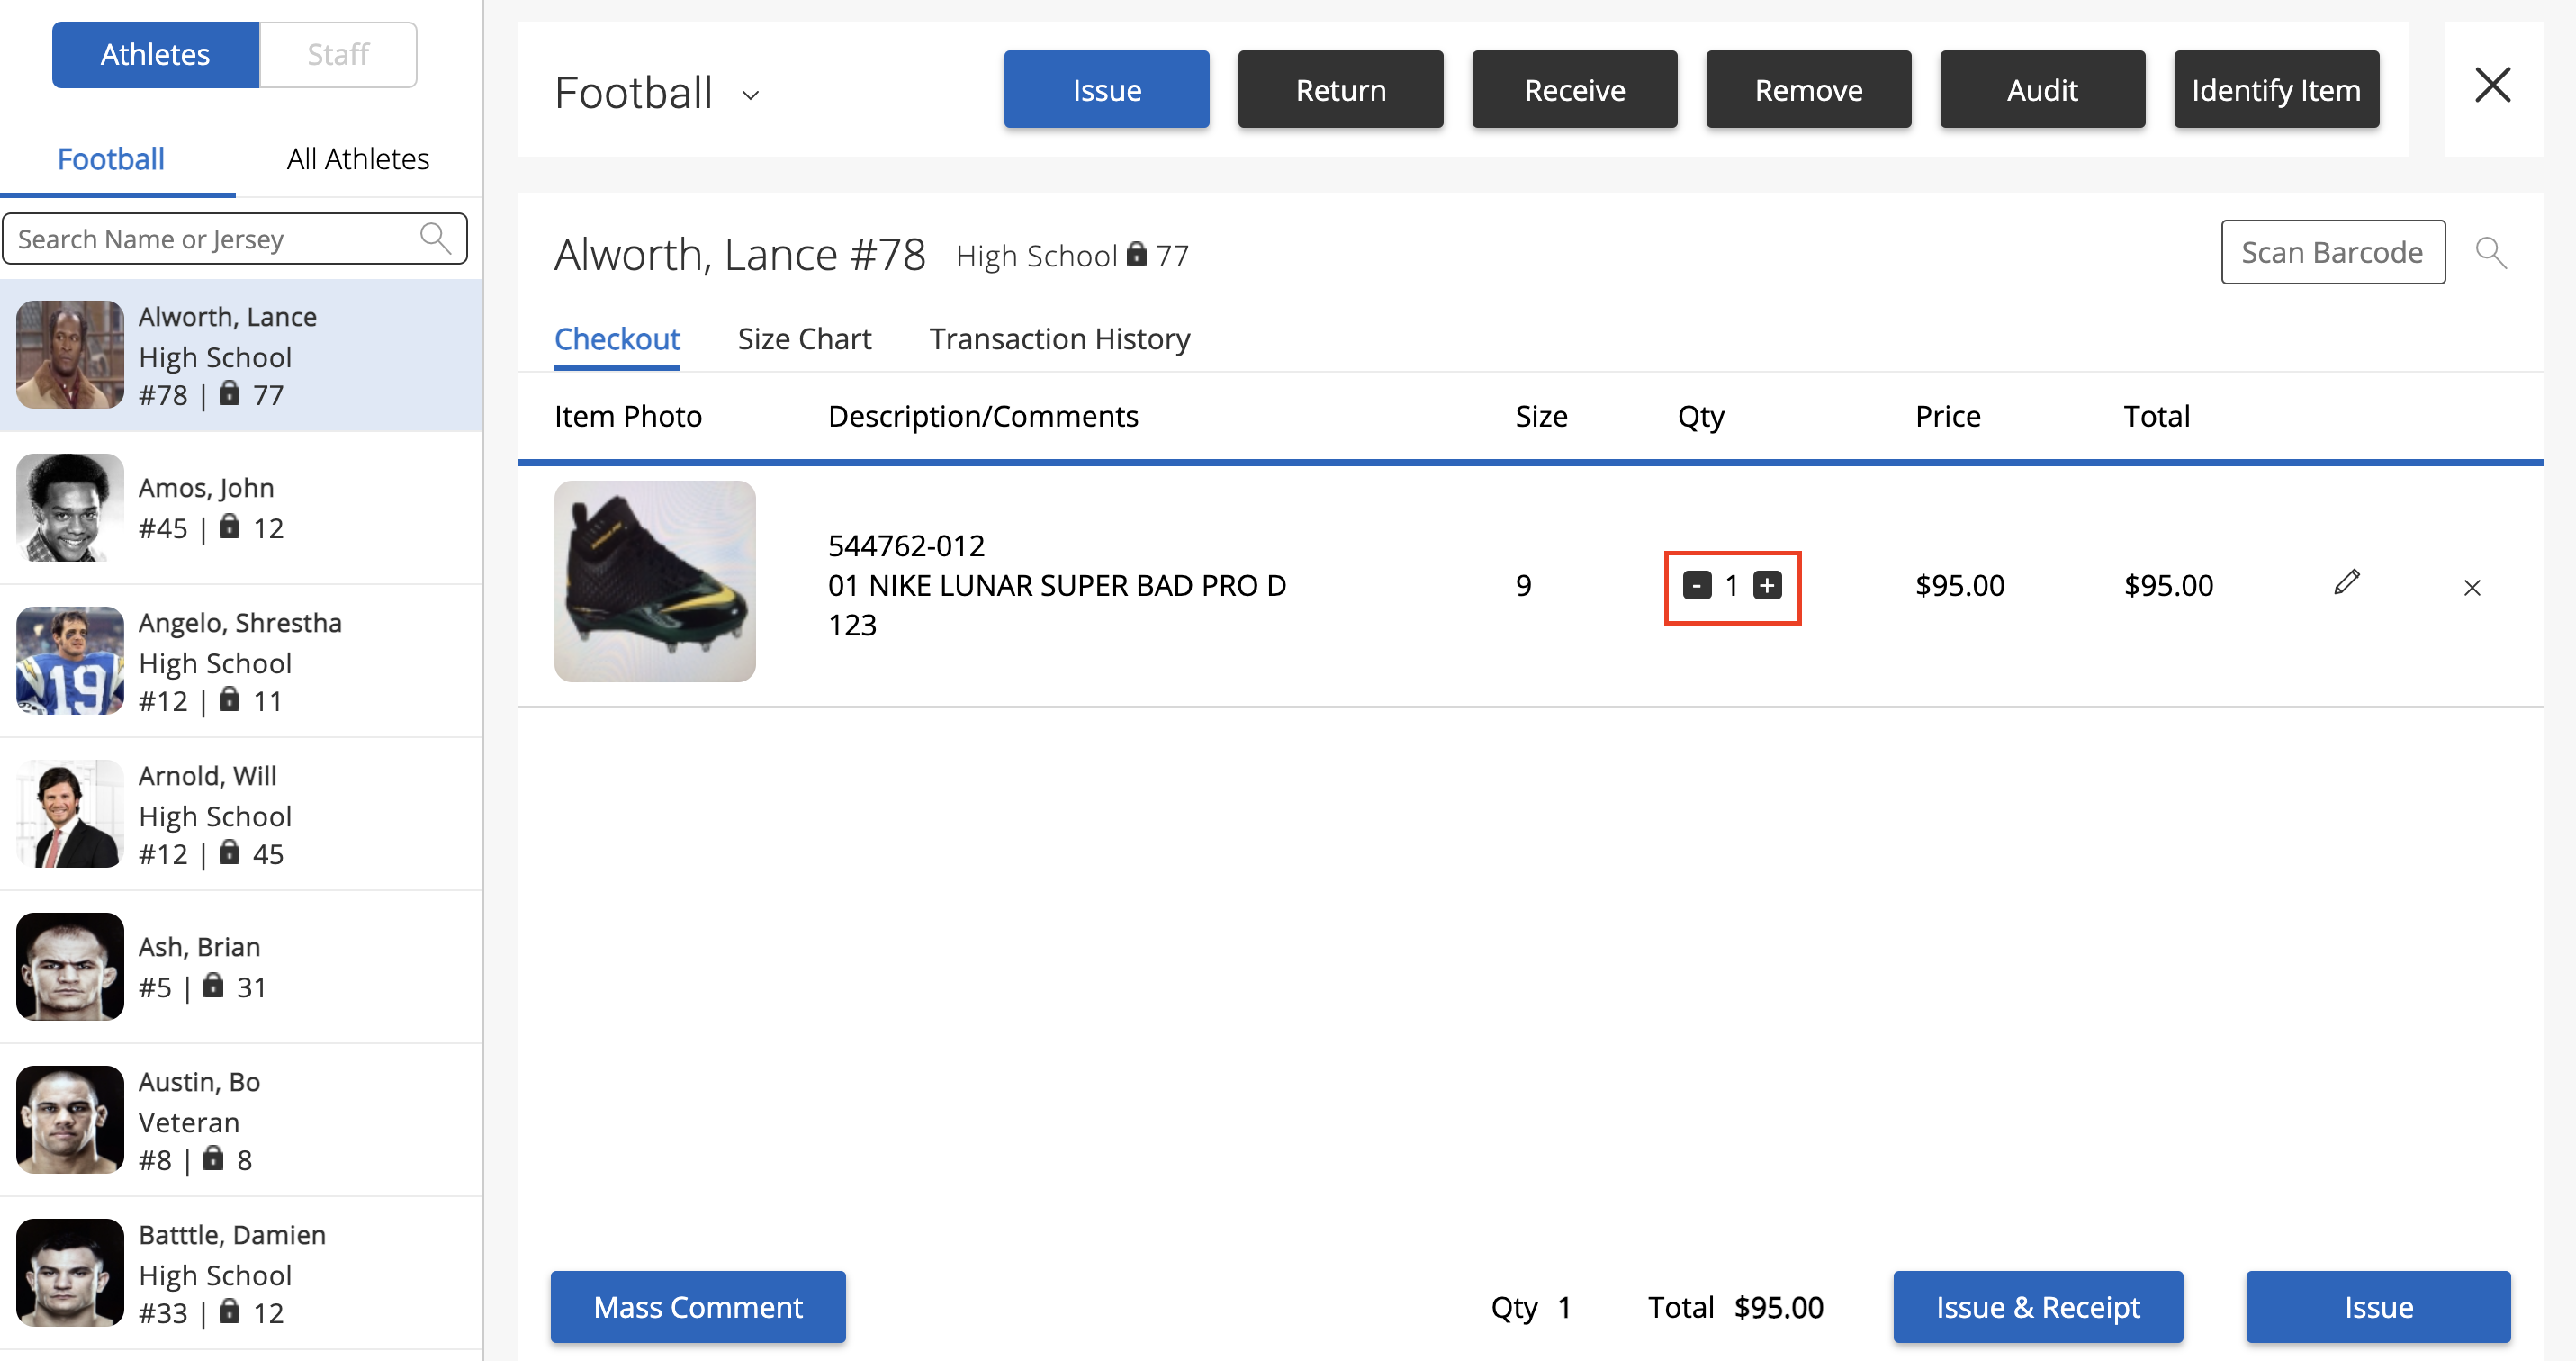
How to Select an Athlete or Staff Member for Issue/Return
- To select an athlete, choose the Athletes tab on the top left. Select from the athletes associated with a particular sport (i.e. Football) in the list below, or, search for the desired athlete by name or jersey number.
- To select from a list of all athletes, choose the All Athletes tab beside the sport name.

- To select a staff member, choose the Staff tab on the top left. Then, select from staff associated with a particular sport or from a list of all staff.
How to Issue an Item:
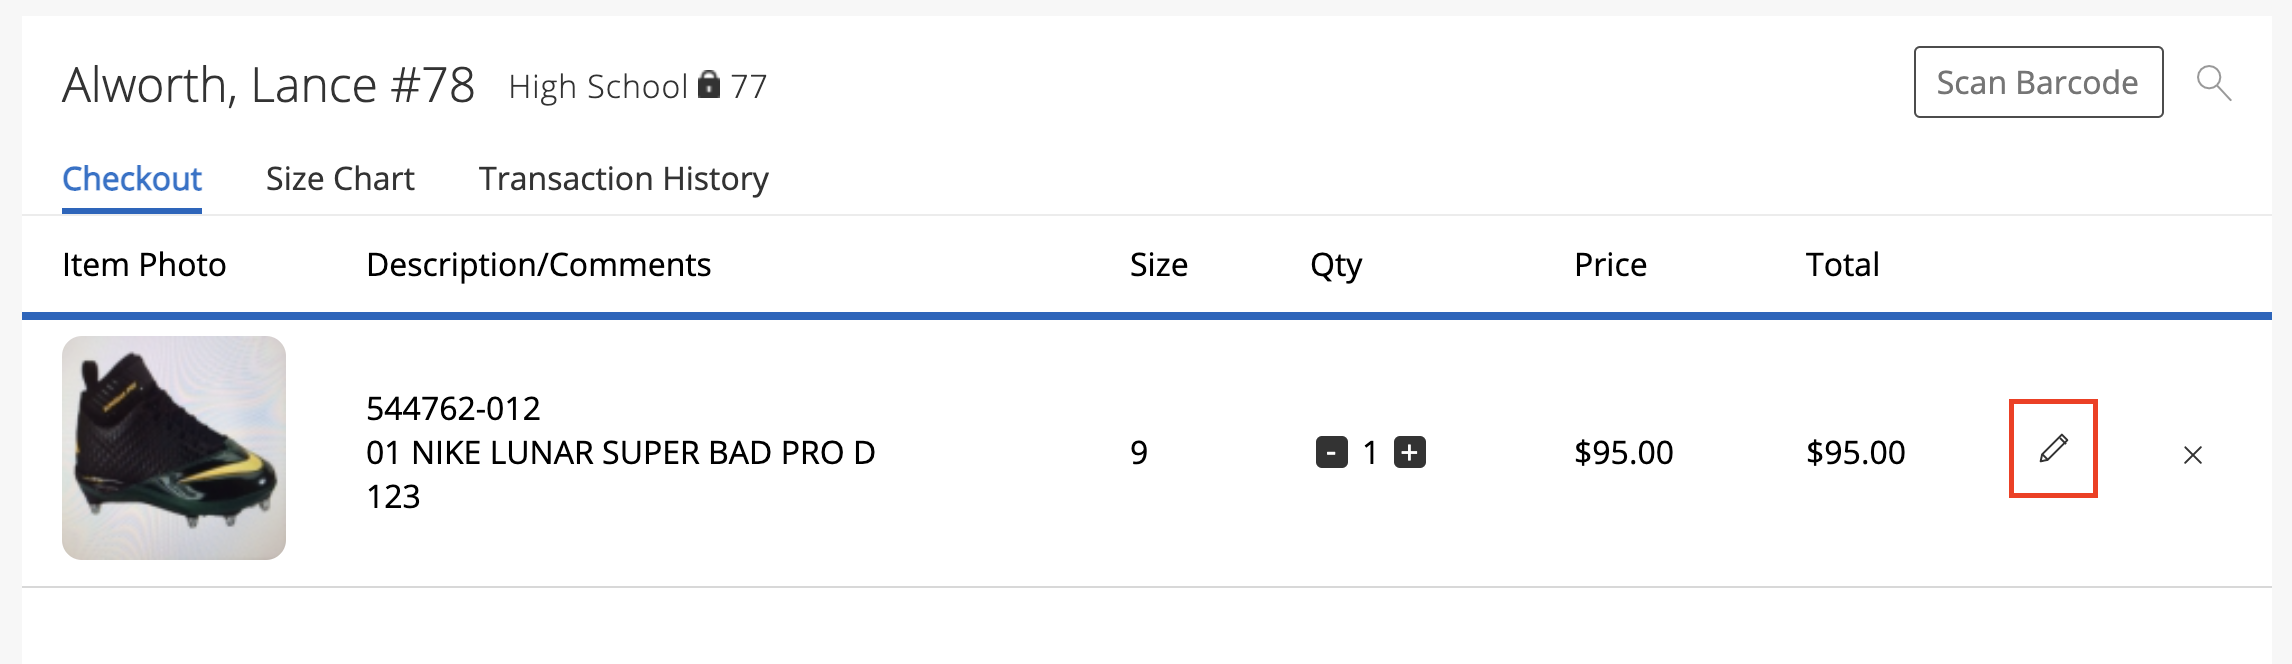
- Select the Issue tab. Then choose an athlete or staff member and use the Scan Barcode function on the right to add an item to the checkout list.

- Use the + and - buttons under the Qty column to change the item quantity.
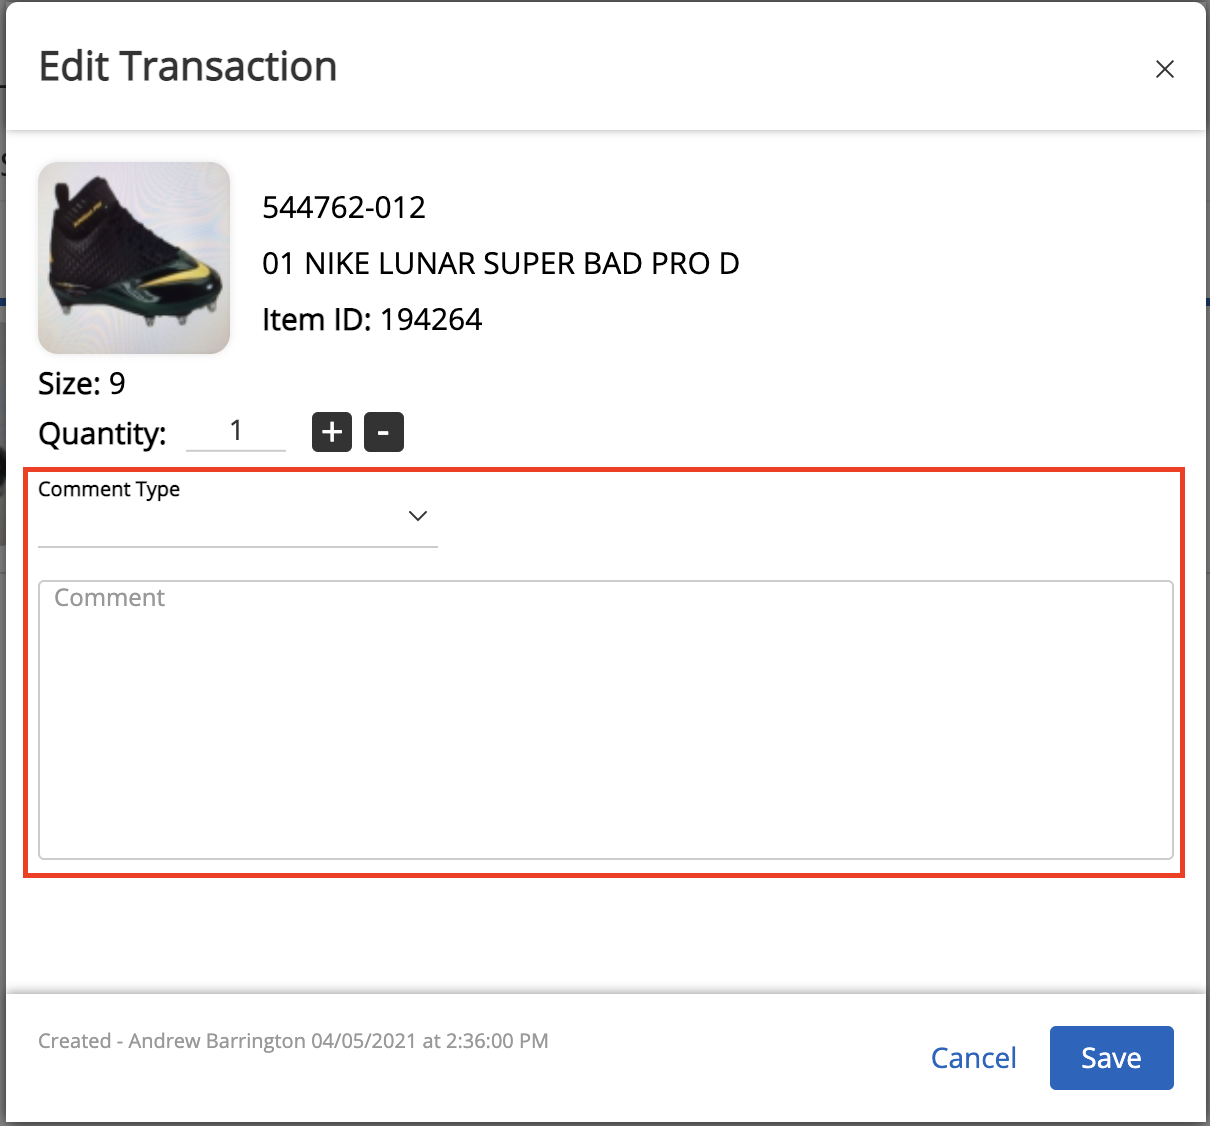
- Click the pencil icon on the right to edit the transaction and add a comment type/comment.
- Click the Mass Comment button to mass update the comment type/comment for the items in the cart.
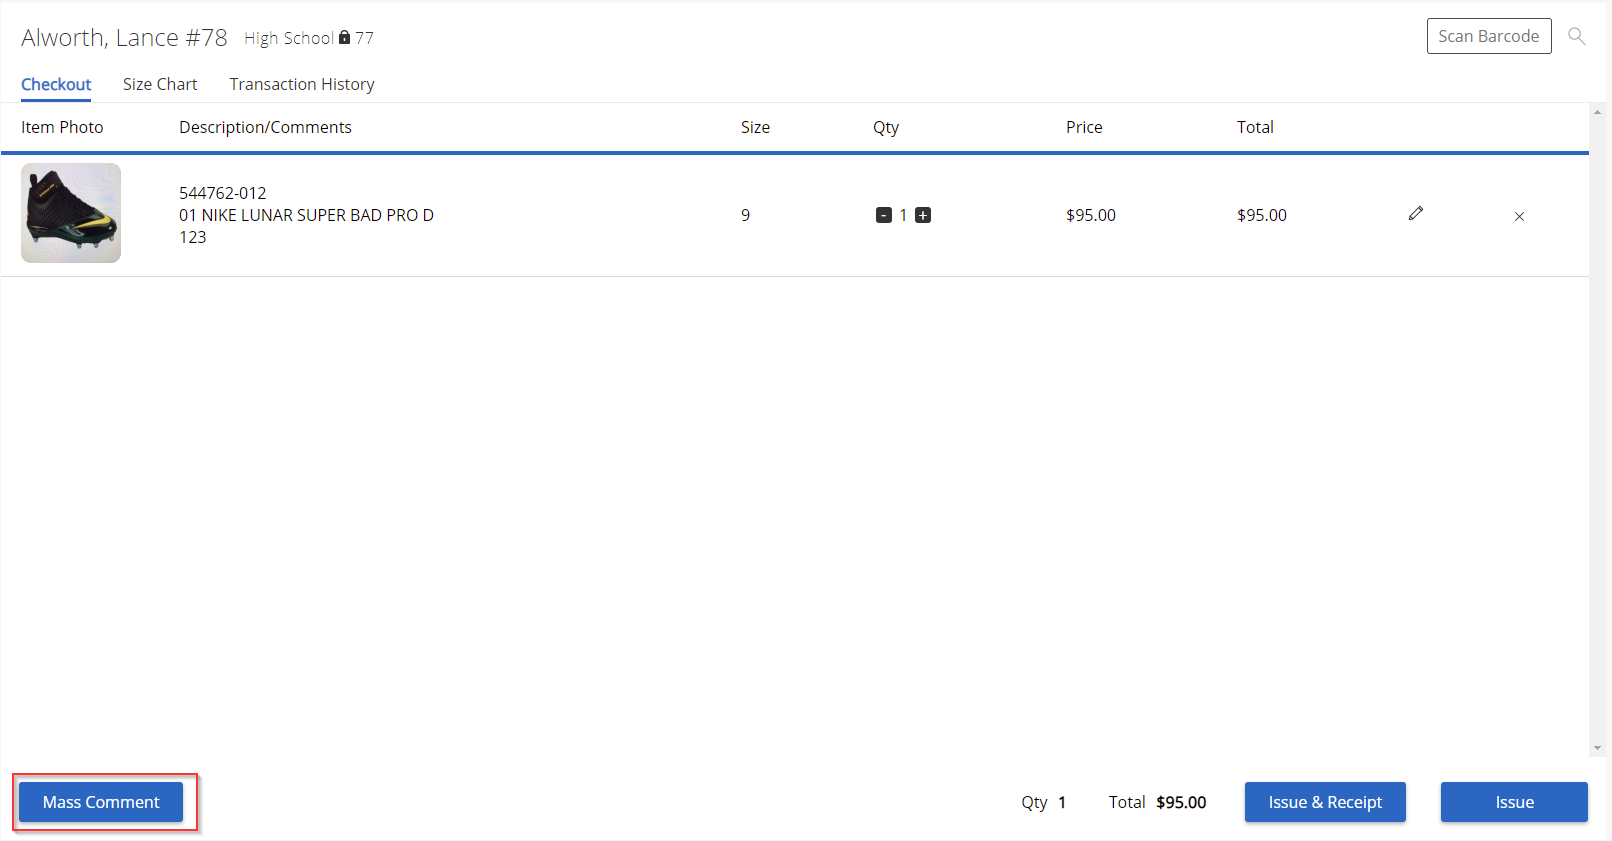
- Click the Issue & Receipt or Issue button to issue the item to an athlete or staff member.
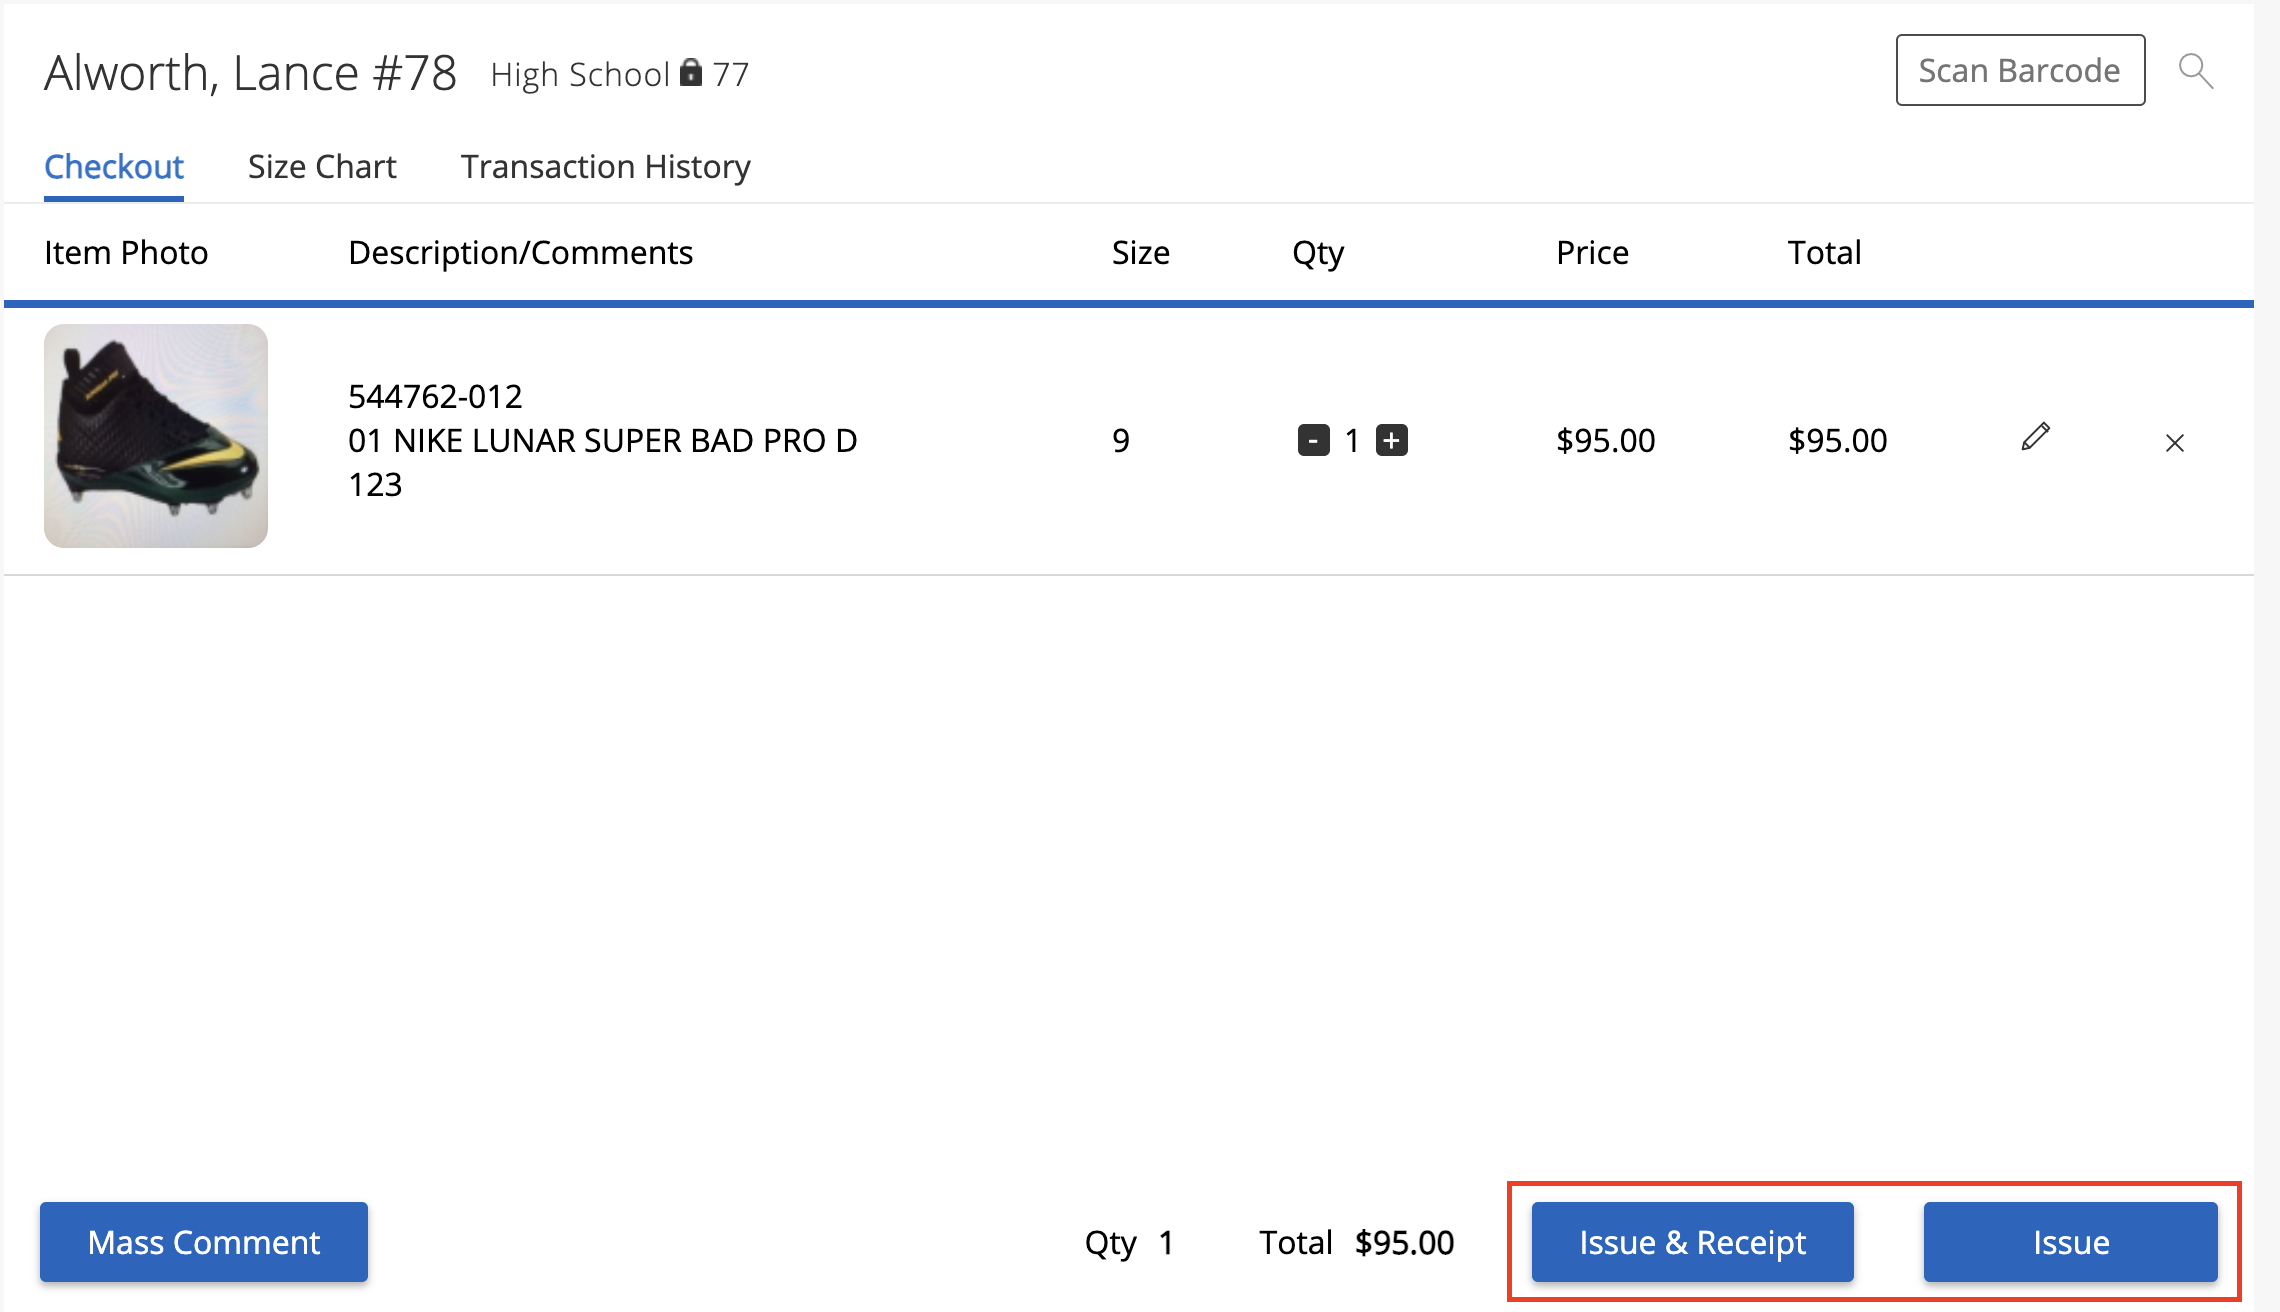
- Press the search icon in the right corner to find an item to add to the checkout list.

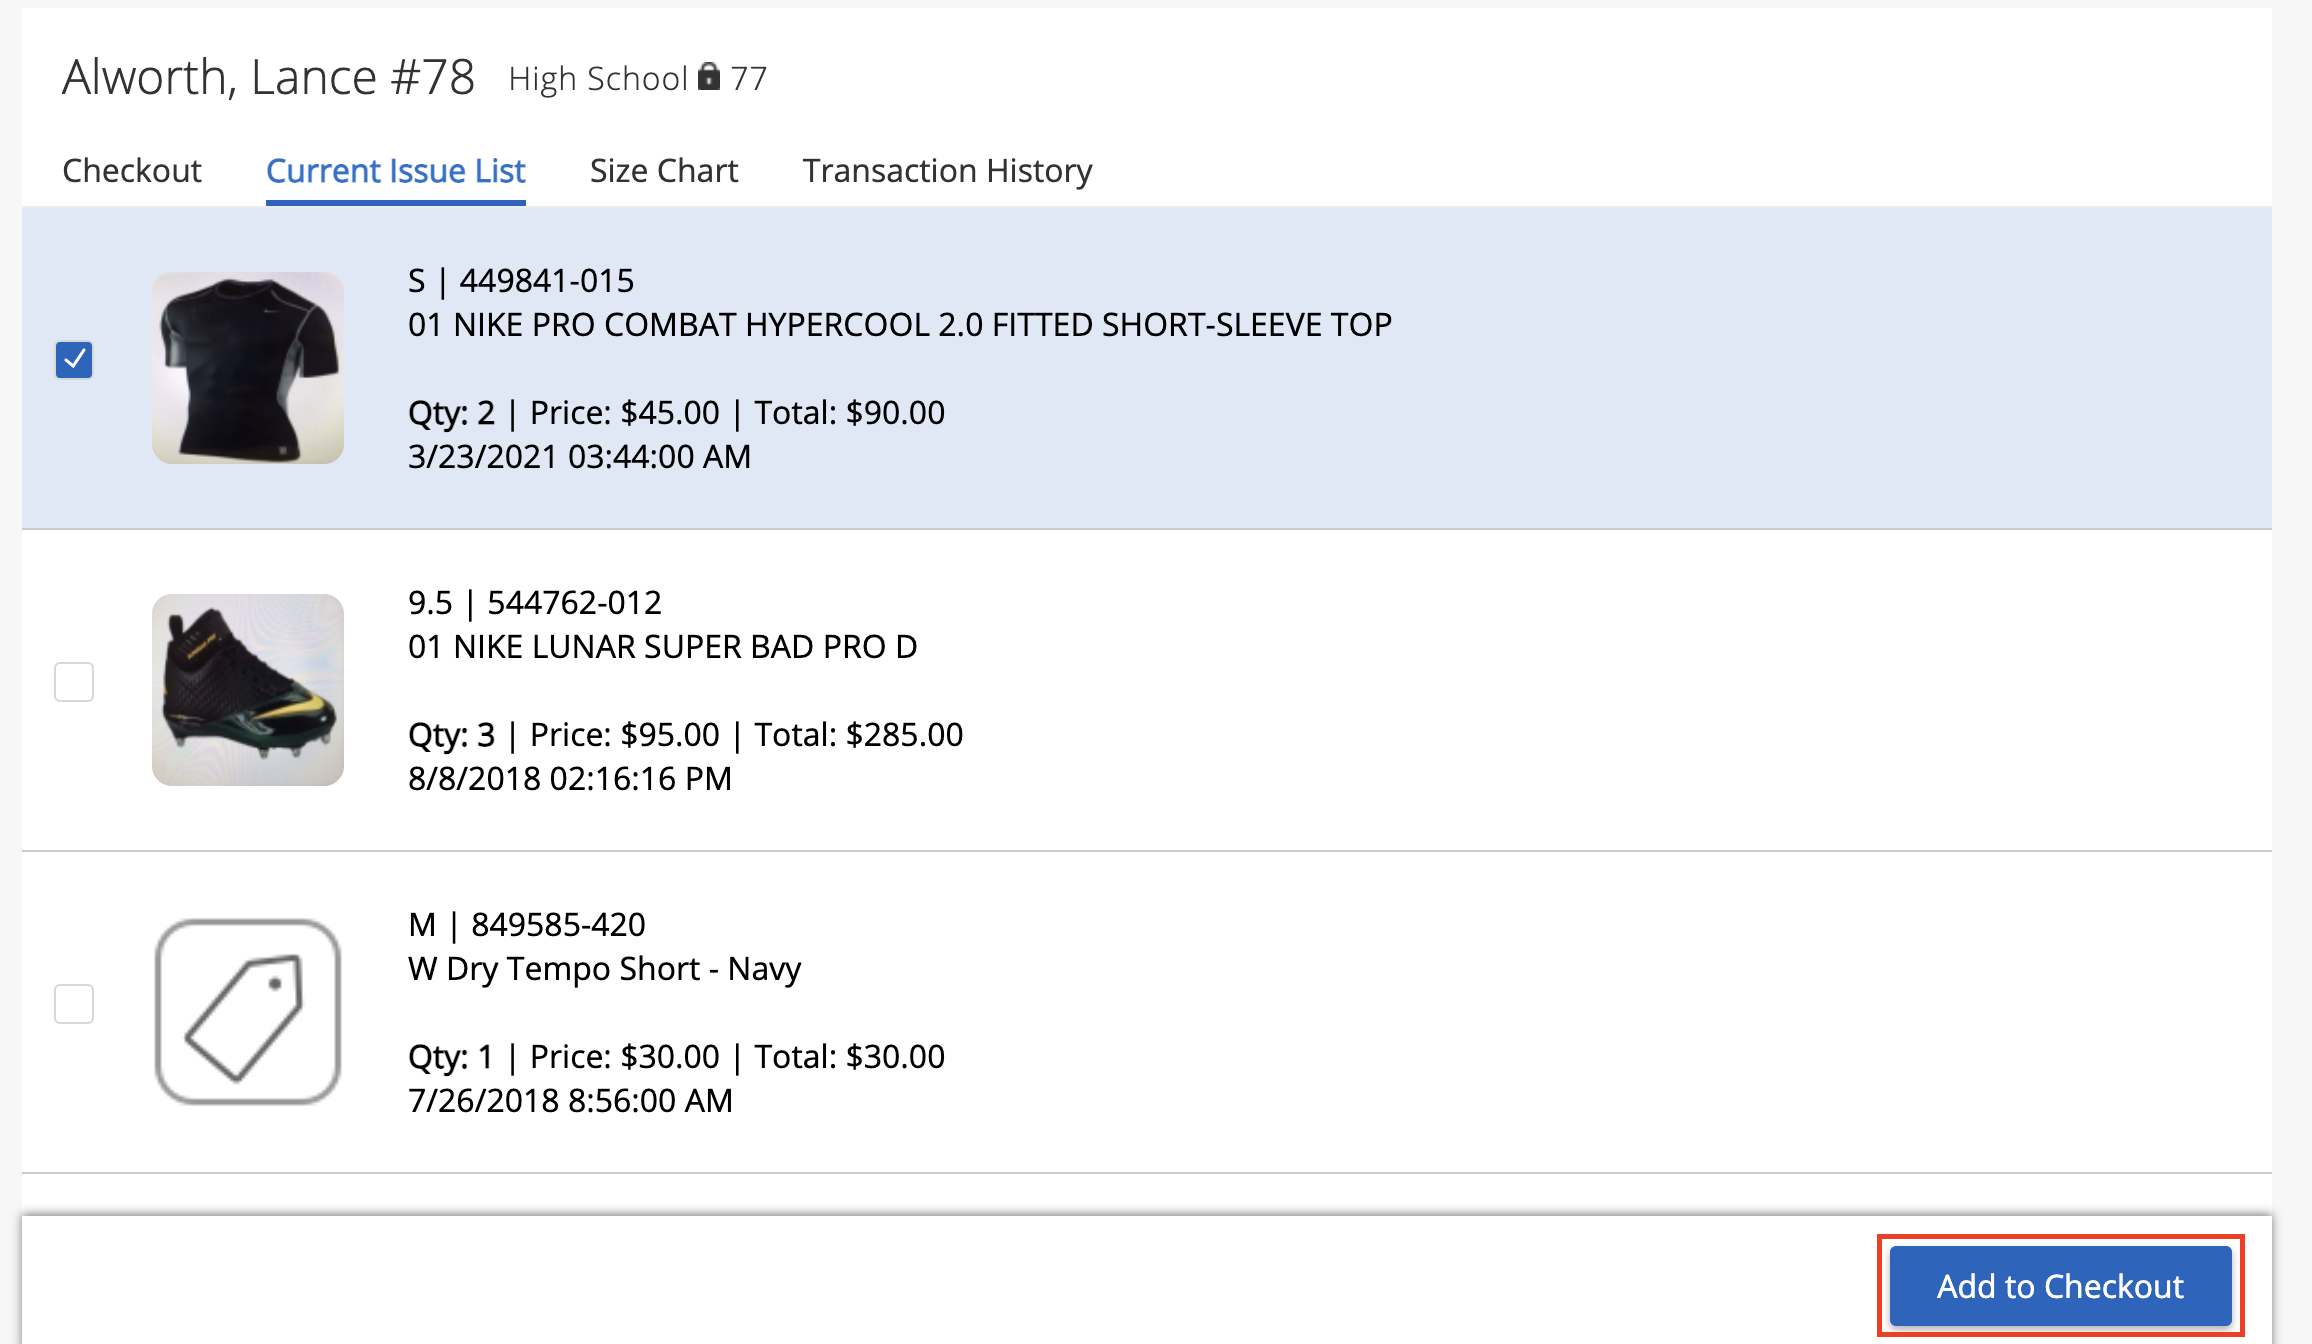
How to Return an Item:
- To return an item by scanning a barcode, ensure that the Return tab is selected and follow the same steps as above for issuing an item. Click the Return & Receipt or Return button to return the item to an athlete or staff member.

- To return items that have previously been issued, select the Current Issue List. Then, check the items to be returned and click Add to Checkout.
How to Remove, Audit, and Identify an Item:
- To remove or audit an item, select the Remove or Audit tabs at the top and scan a barcode.
- Click the Remove or Audit buttons to perform the transaction(s).
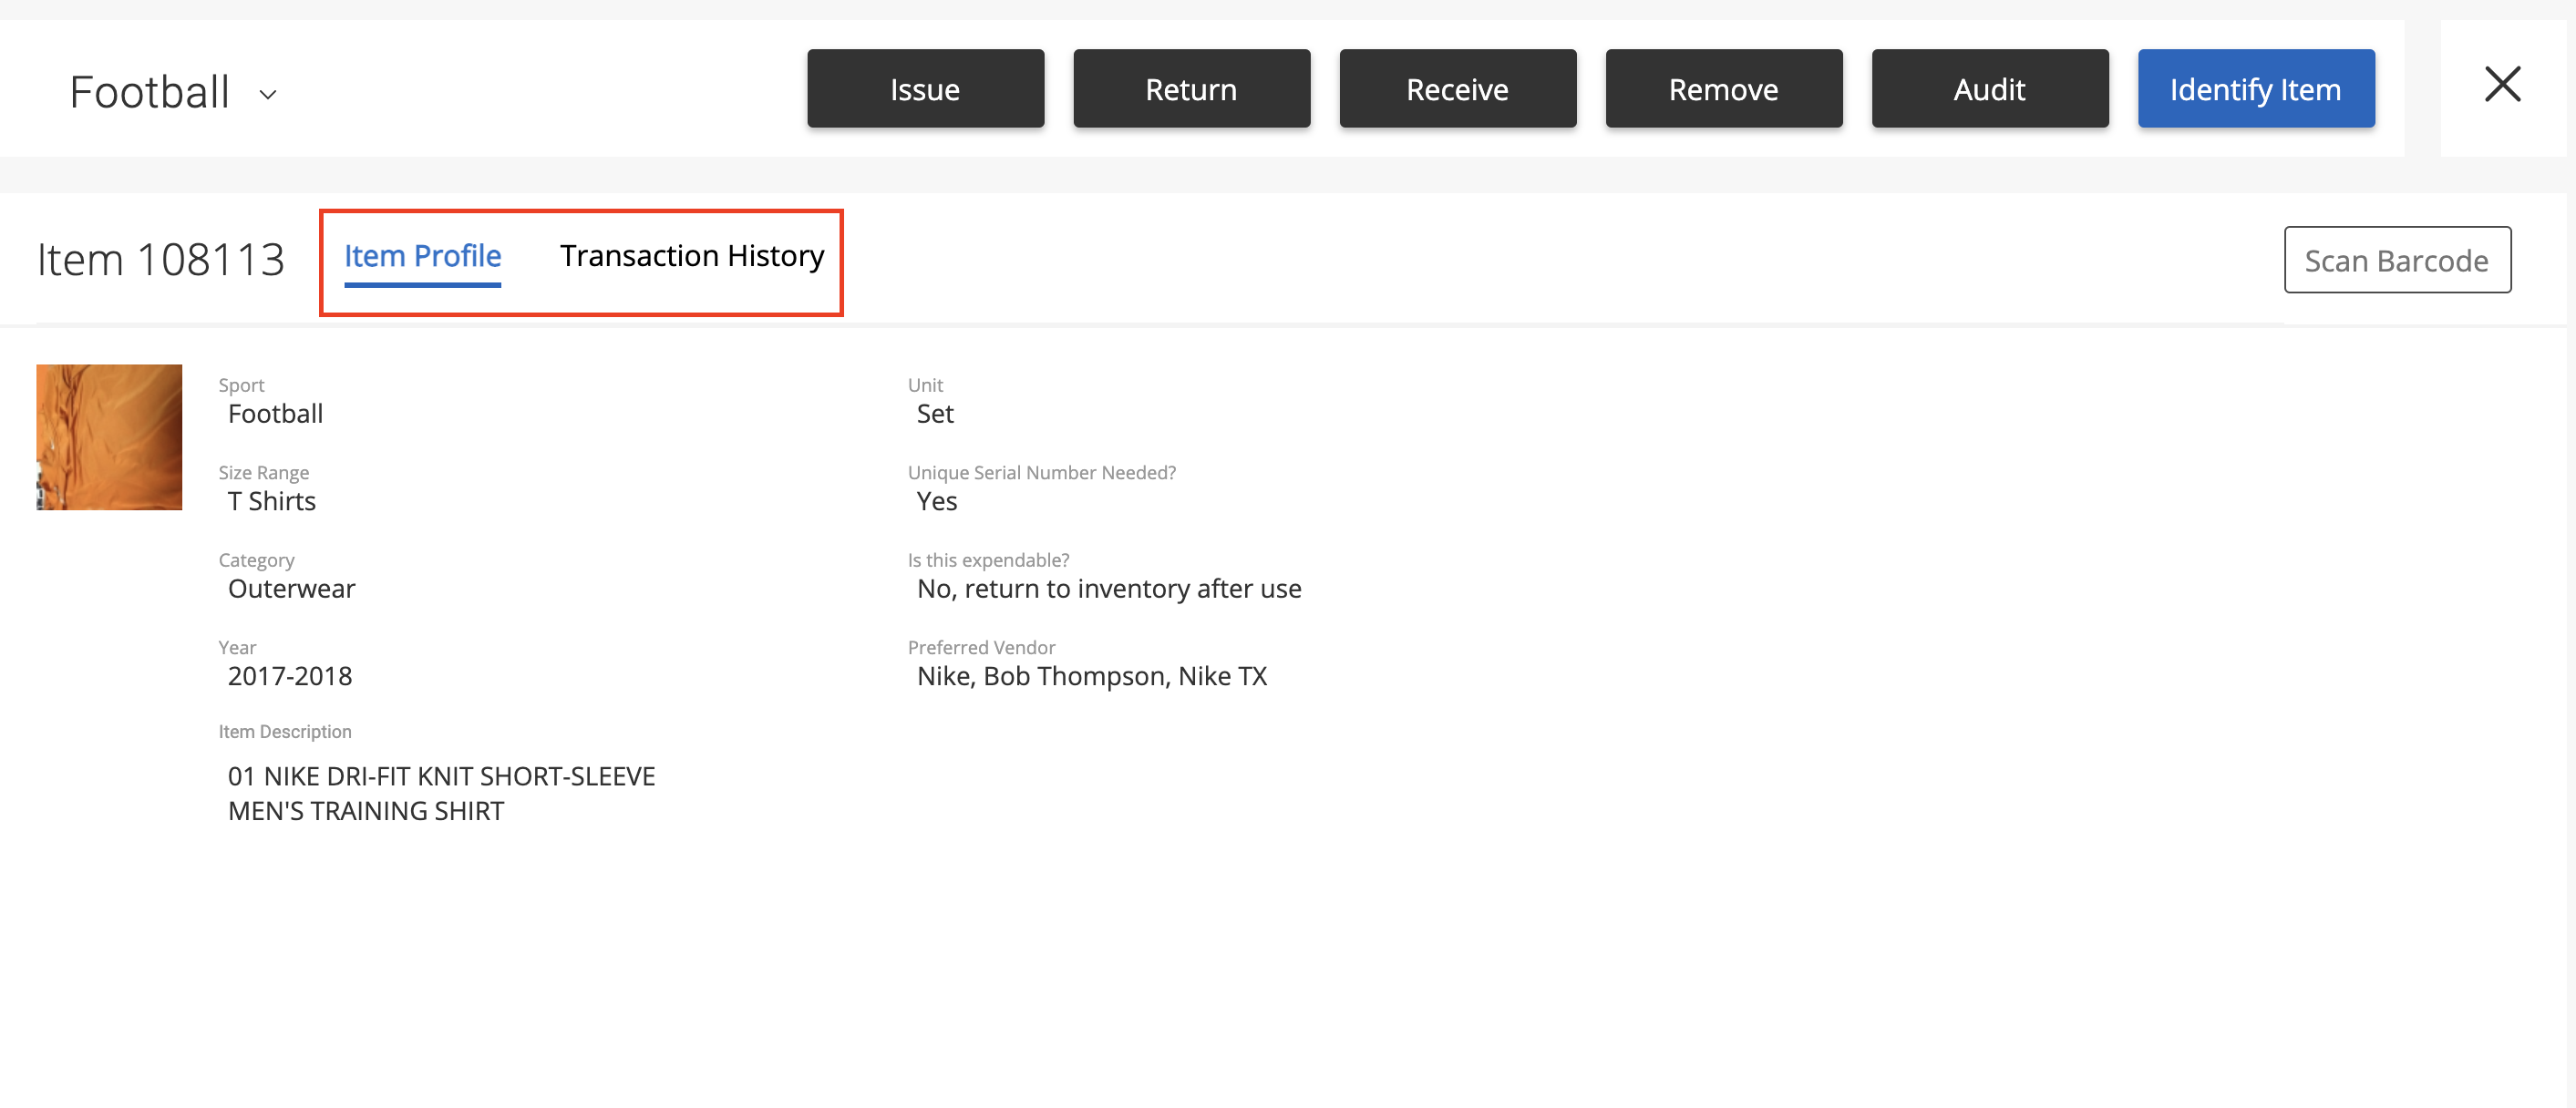
- To identify an item, select the "Identify Item" tab and scan a barcode to bring up all information for the serialized item. To view a list of detailed transactions, switch to the "Transaction History" tab to the right of "Item Profile".
How to Receive an Item:
- To receive an item on a particular order, choose Select Order at the top left and select an order.
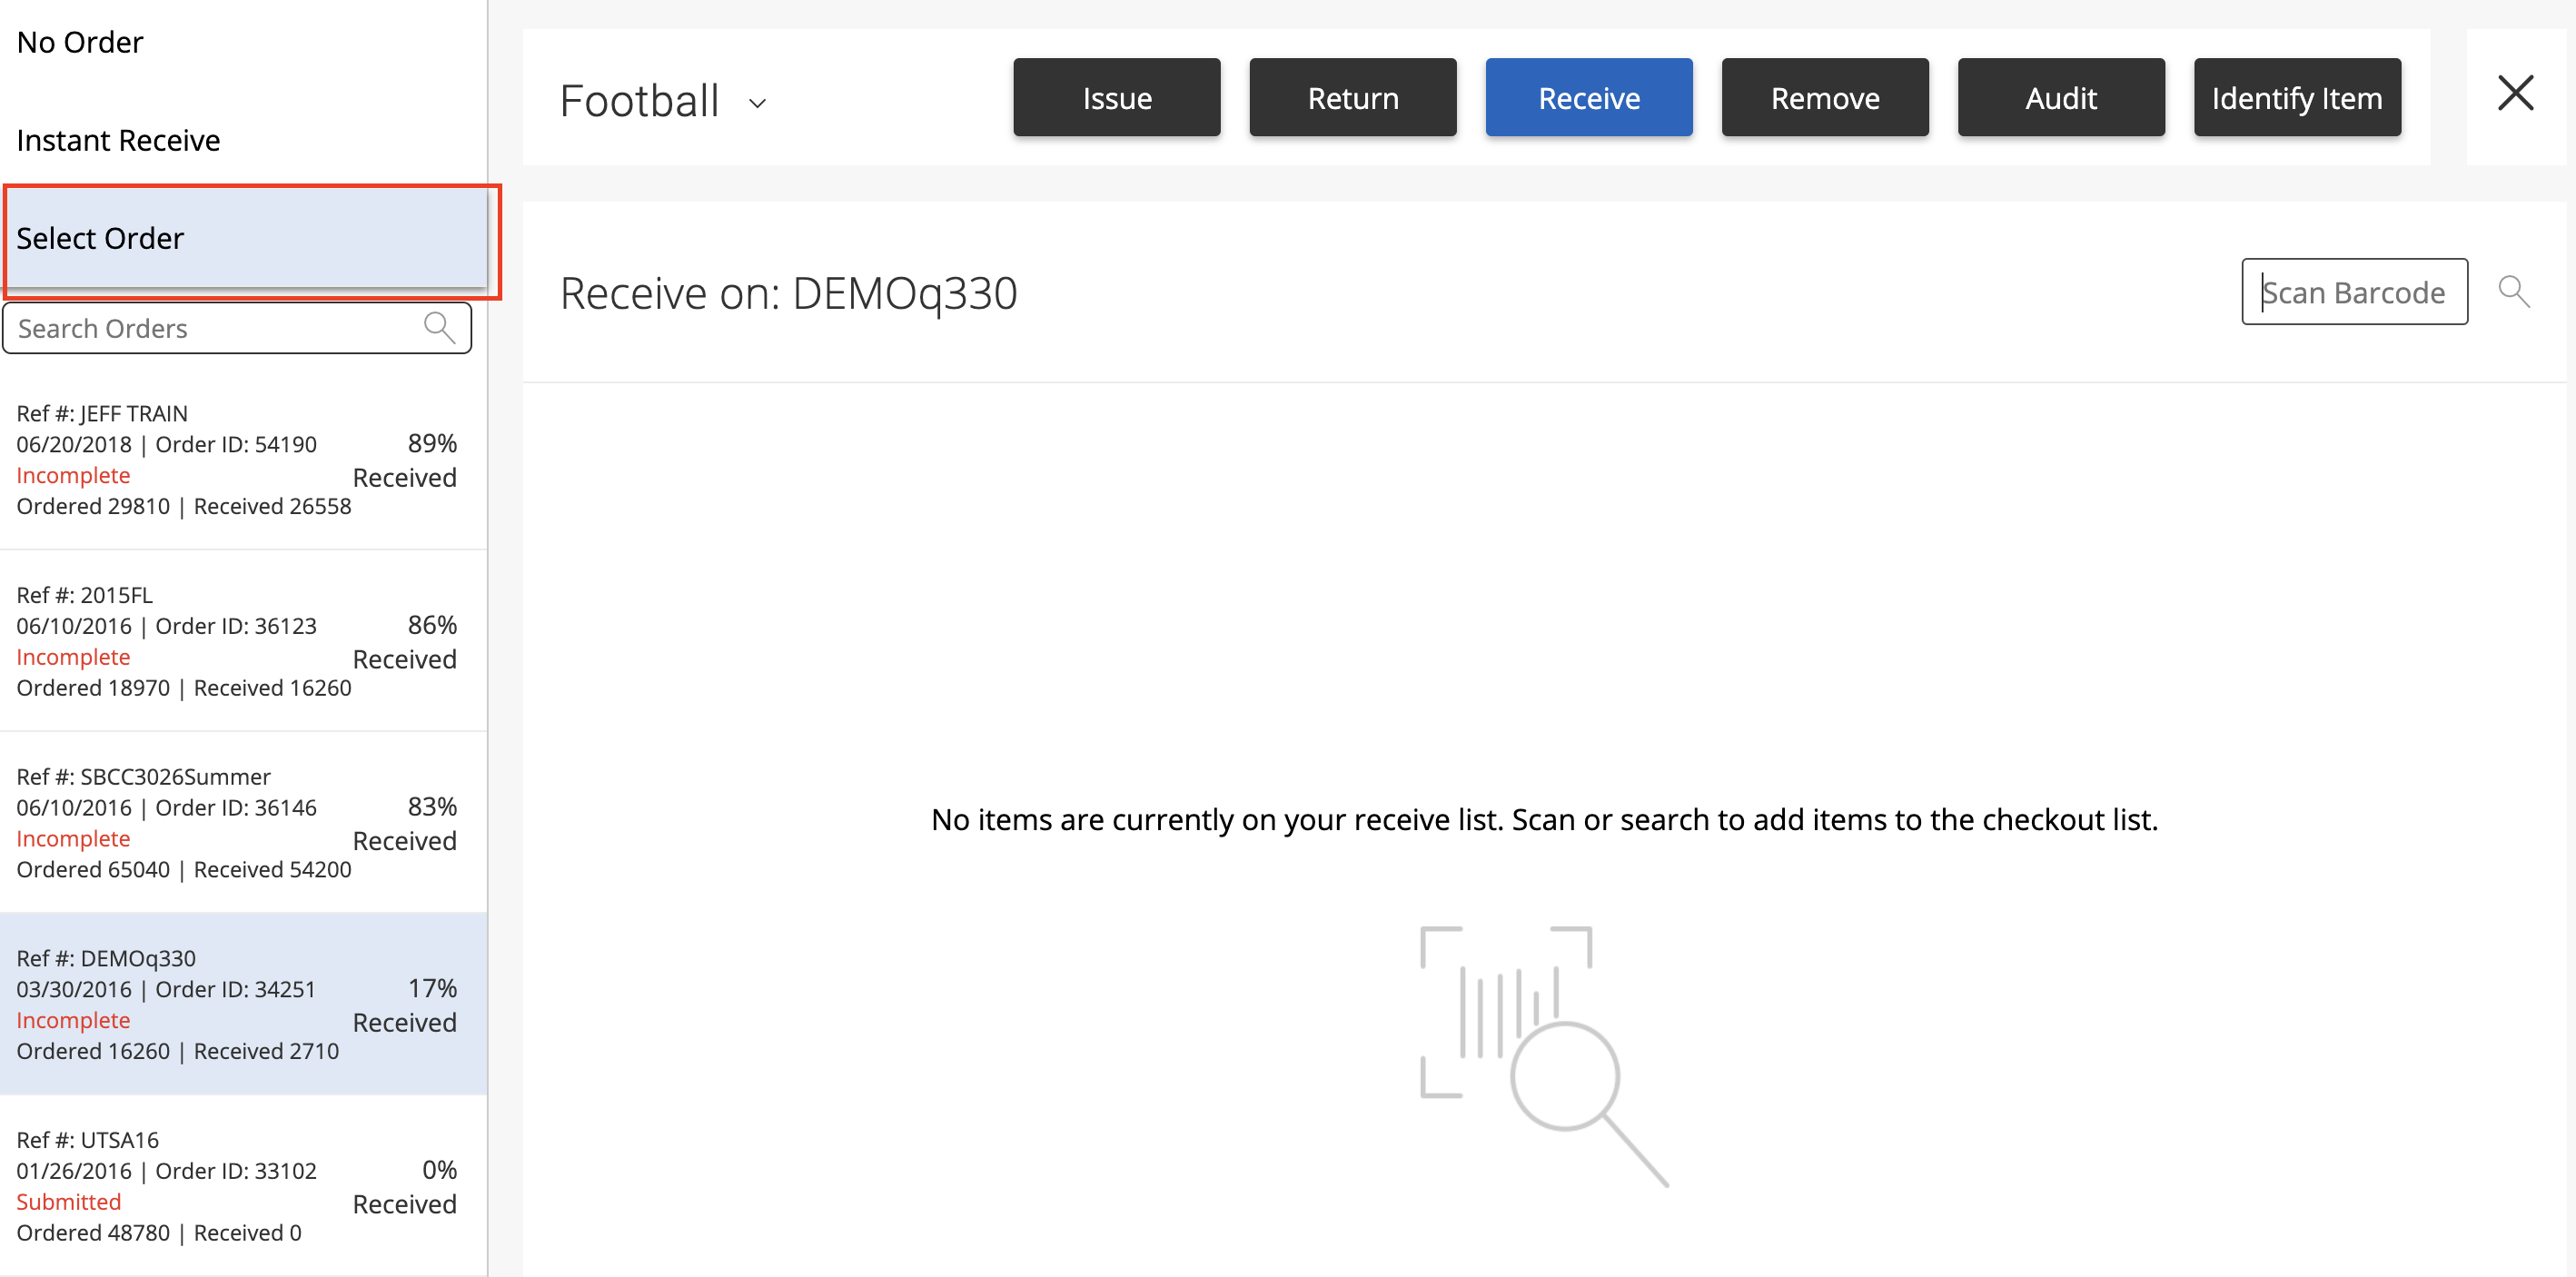
- Scan a barcode to determine whether an item is or is not on an order. This will be displayed in the Order column.
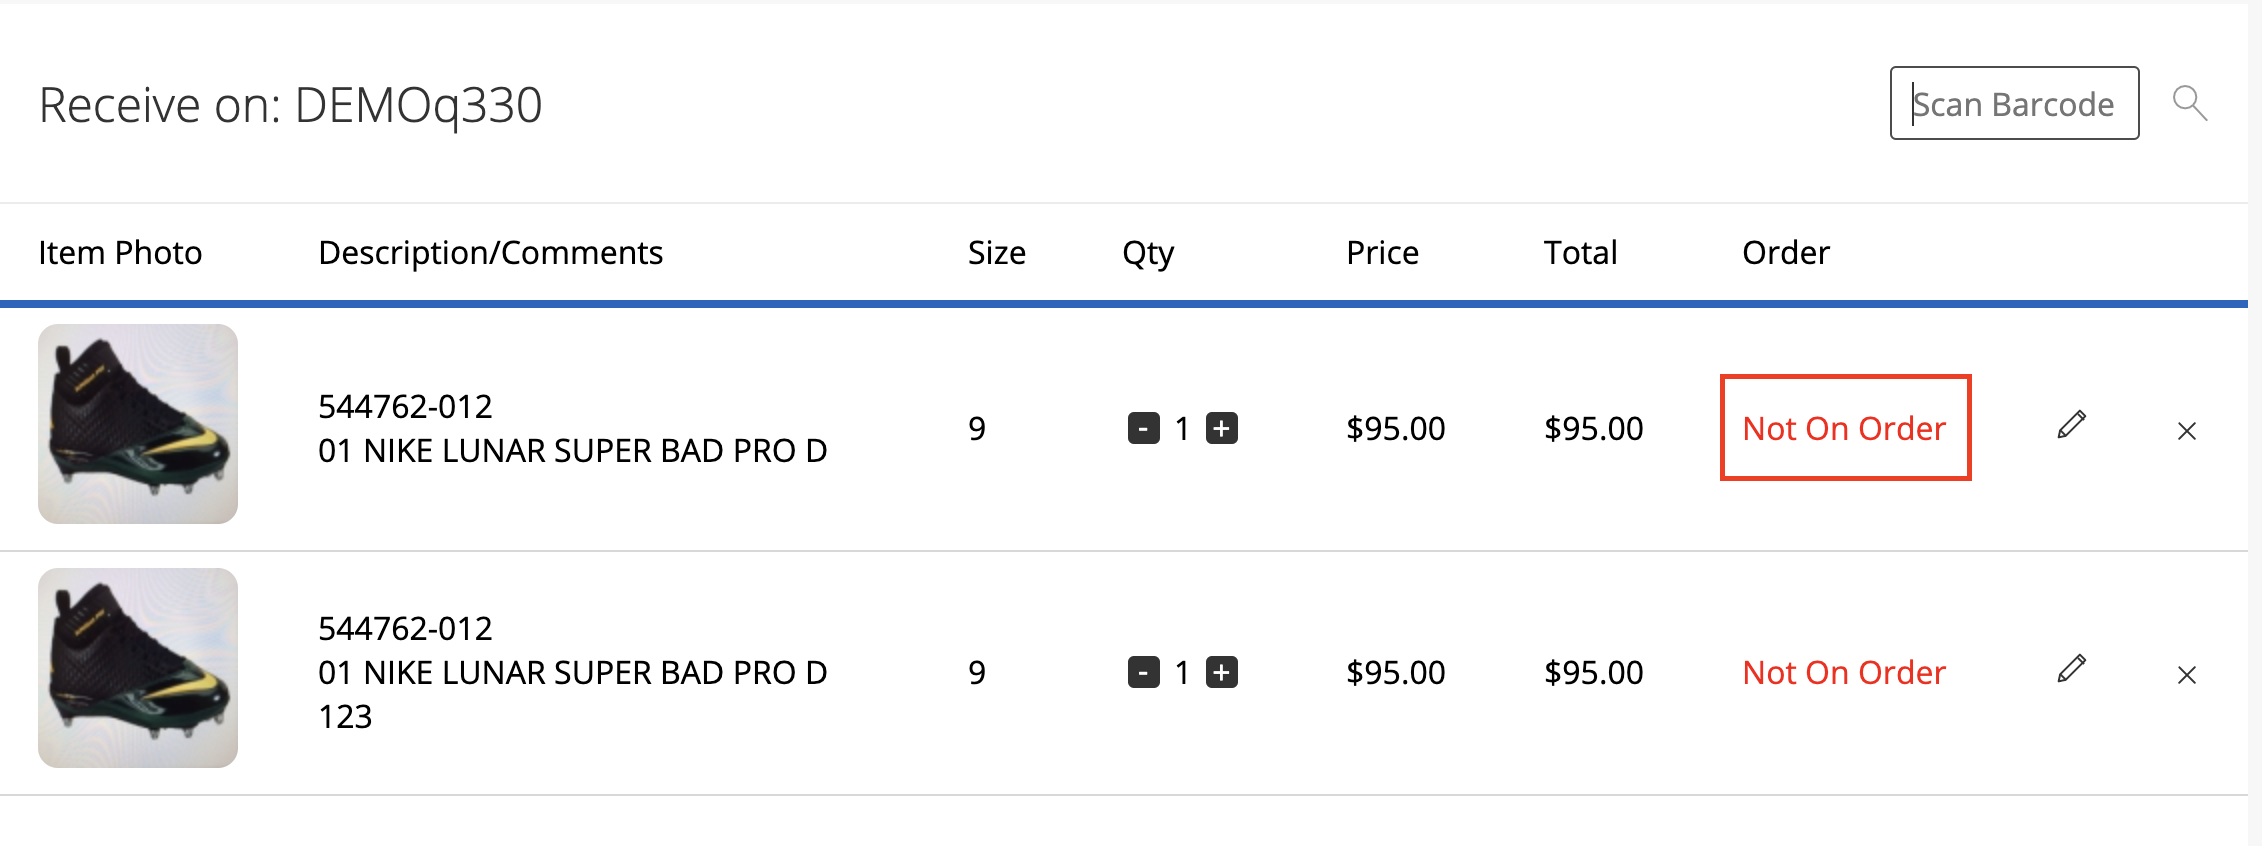
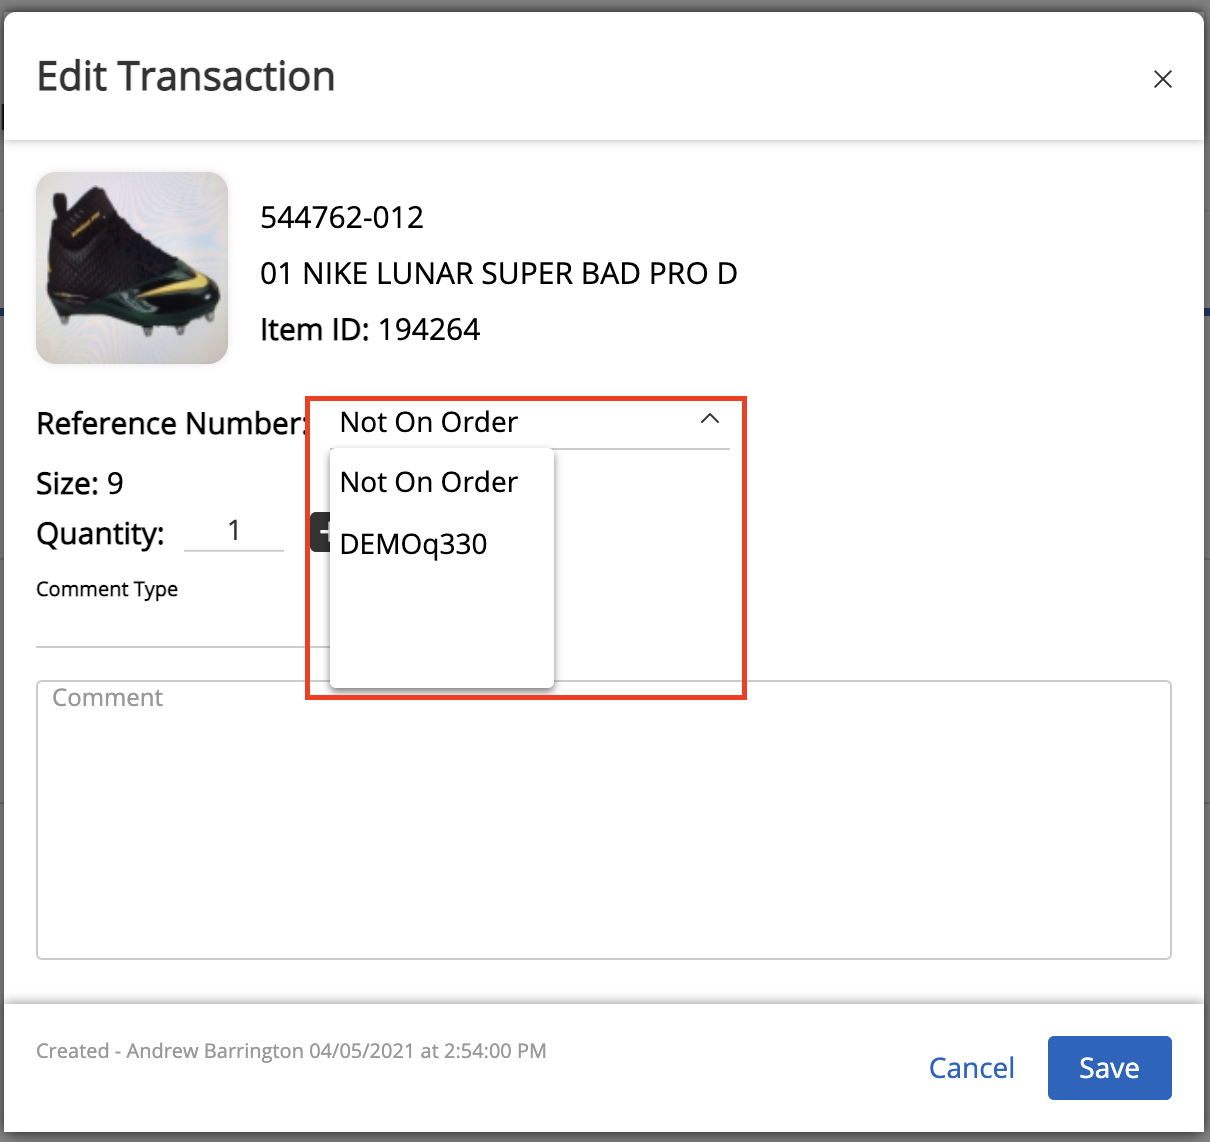
- Click the pencil icon to choose an order to add the item to or to remove the item from an order. This can be selected via the dropdown menu beside Reference Number.
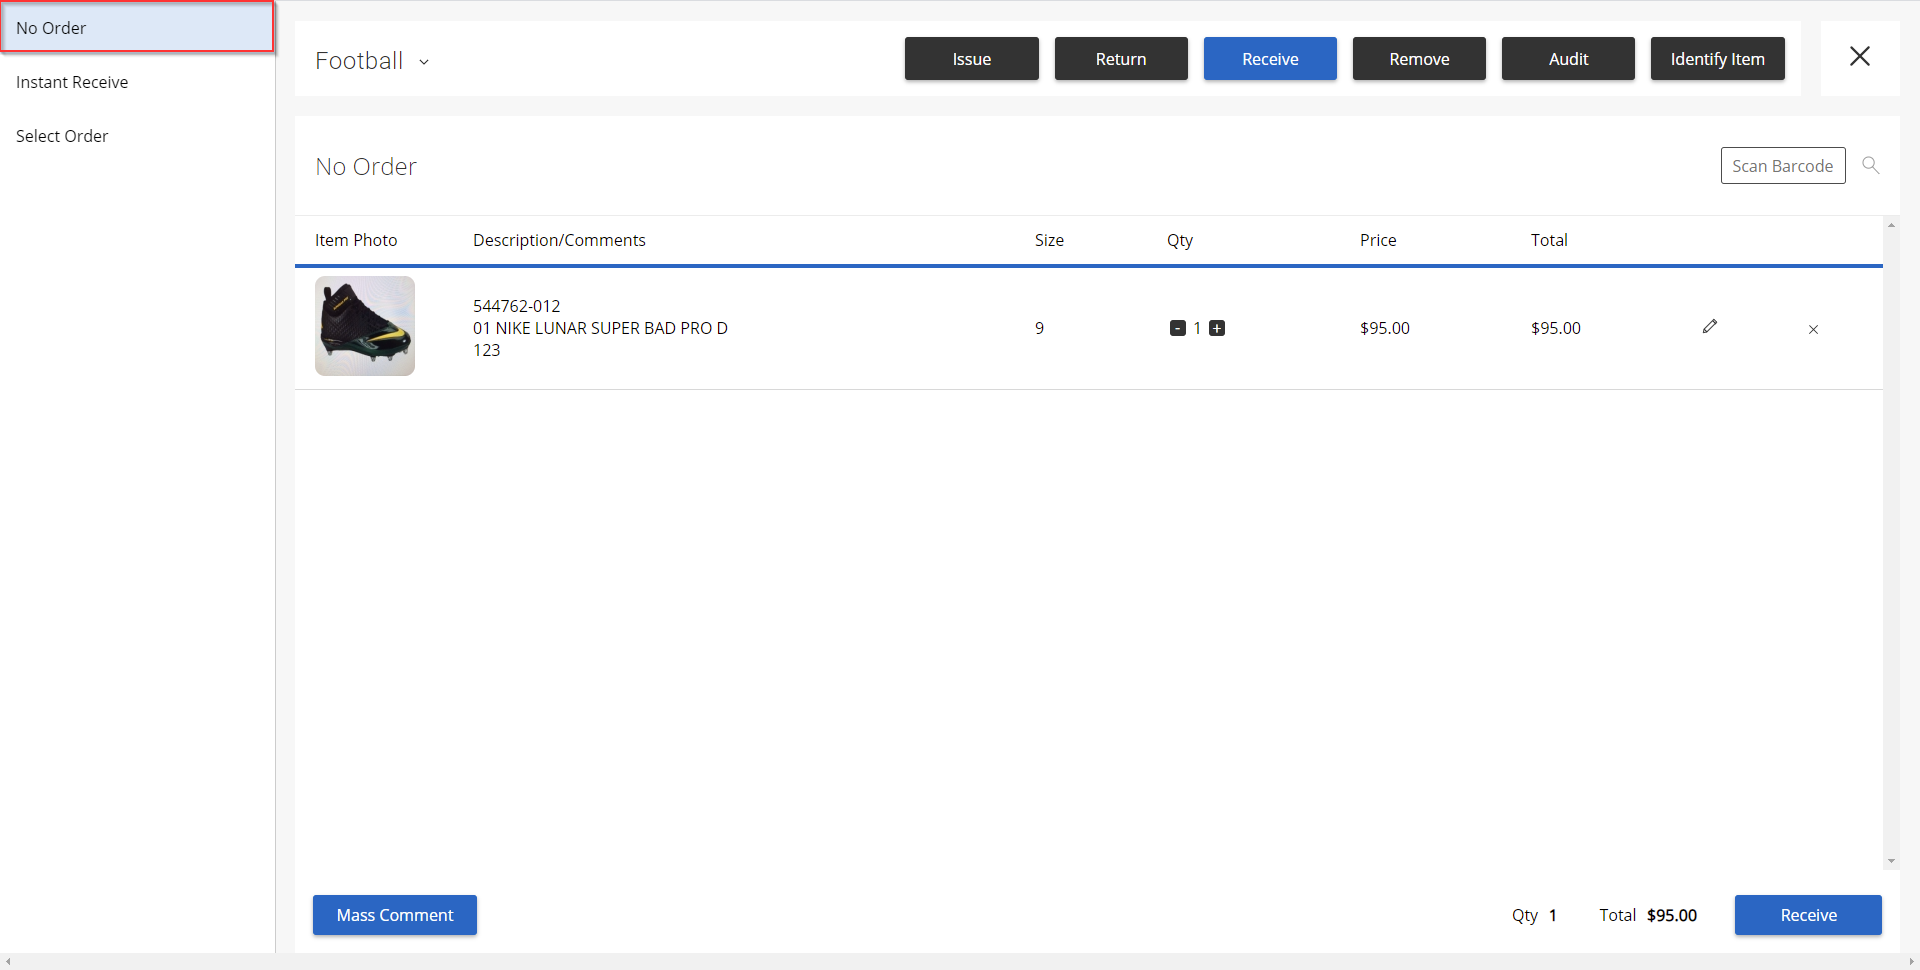
- Select No Order at the top left and scan a barcode to receive an item that is not on any order.
- Select Instant Receive at the top left and scan a barcode to receive an item from the latest order that the item is on. The order number that the item will be deducted from is displayed under the Order column.

- Click the Receive button to receive the displayed item(s).