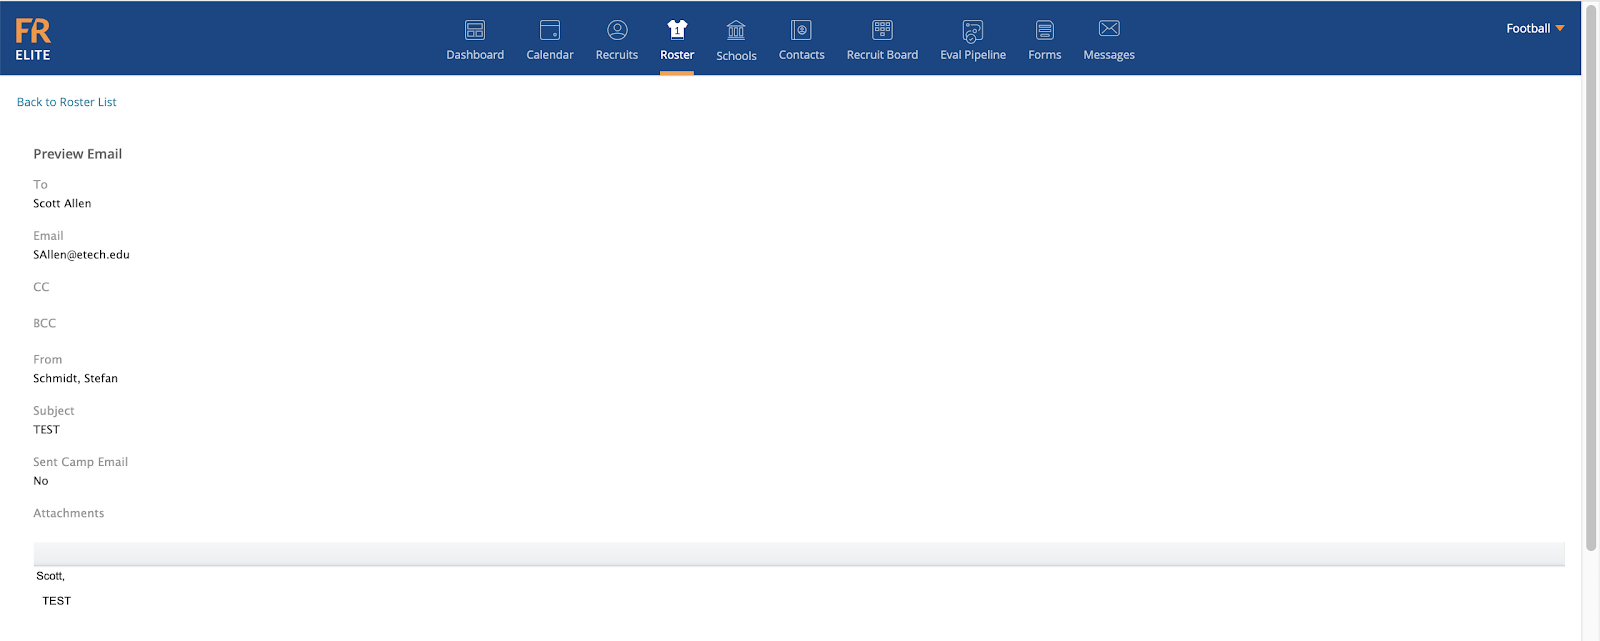
Sending an Email Message to Your Roster
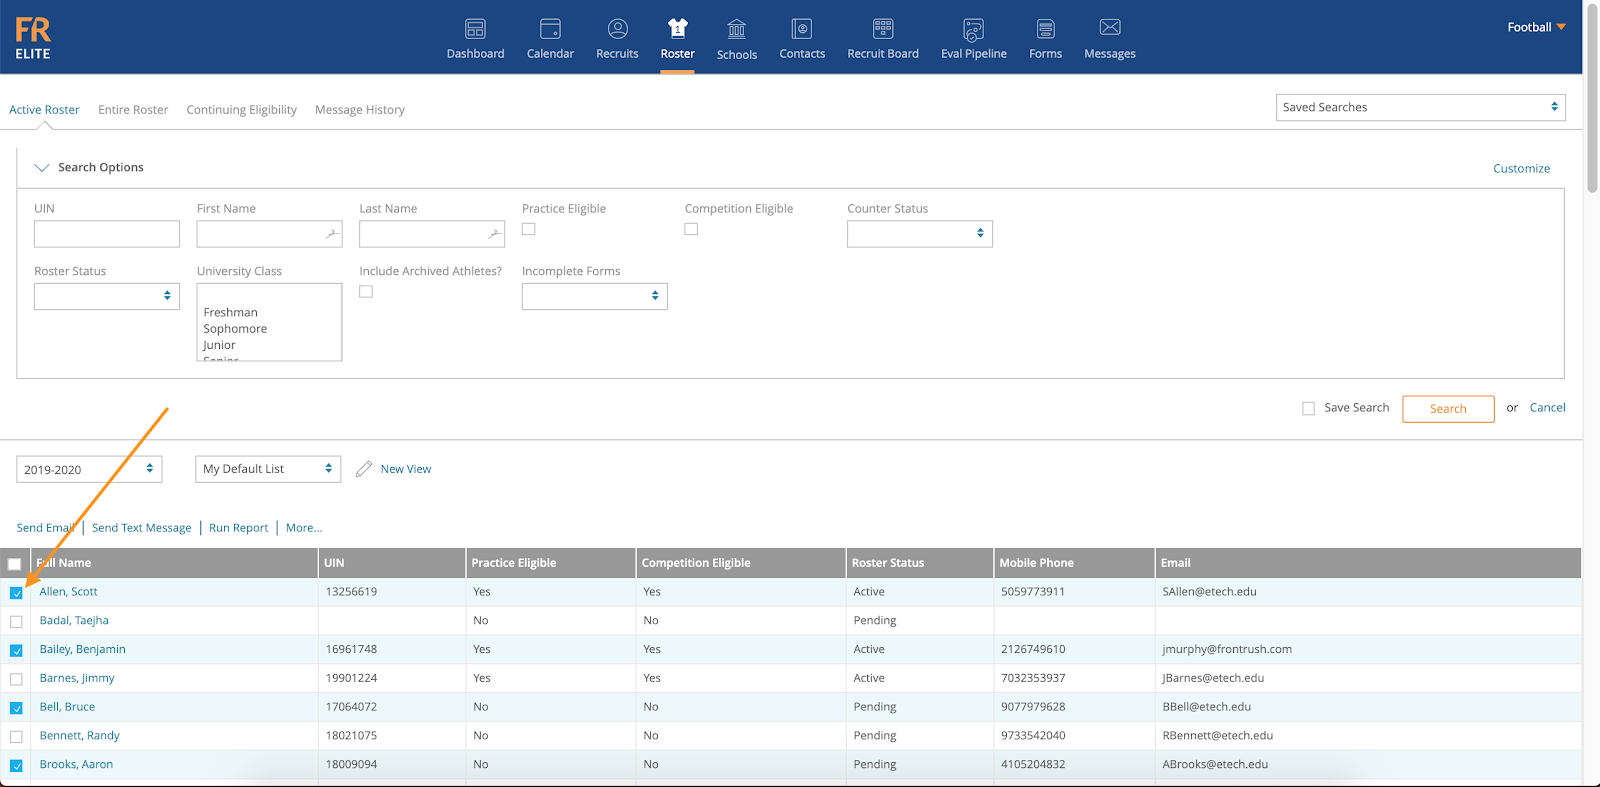
1. Click on the Roster tab

2. Click the checkboxes to the left of athletes to emailed
Note: Select multiple checkboxes to send the email to multiple student-athletes
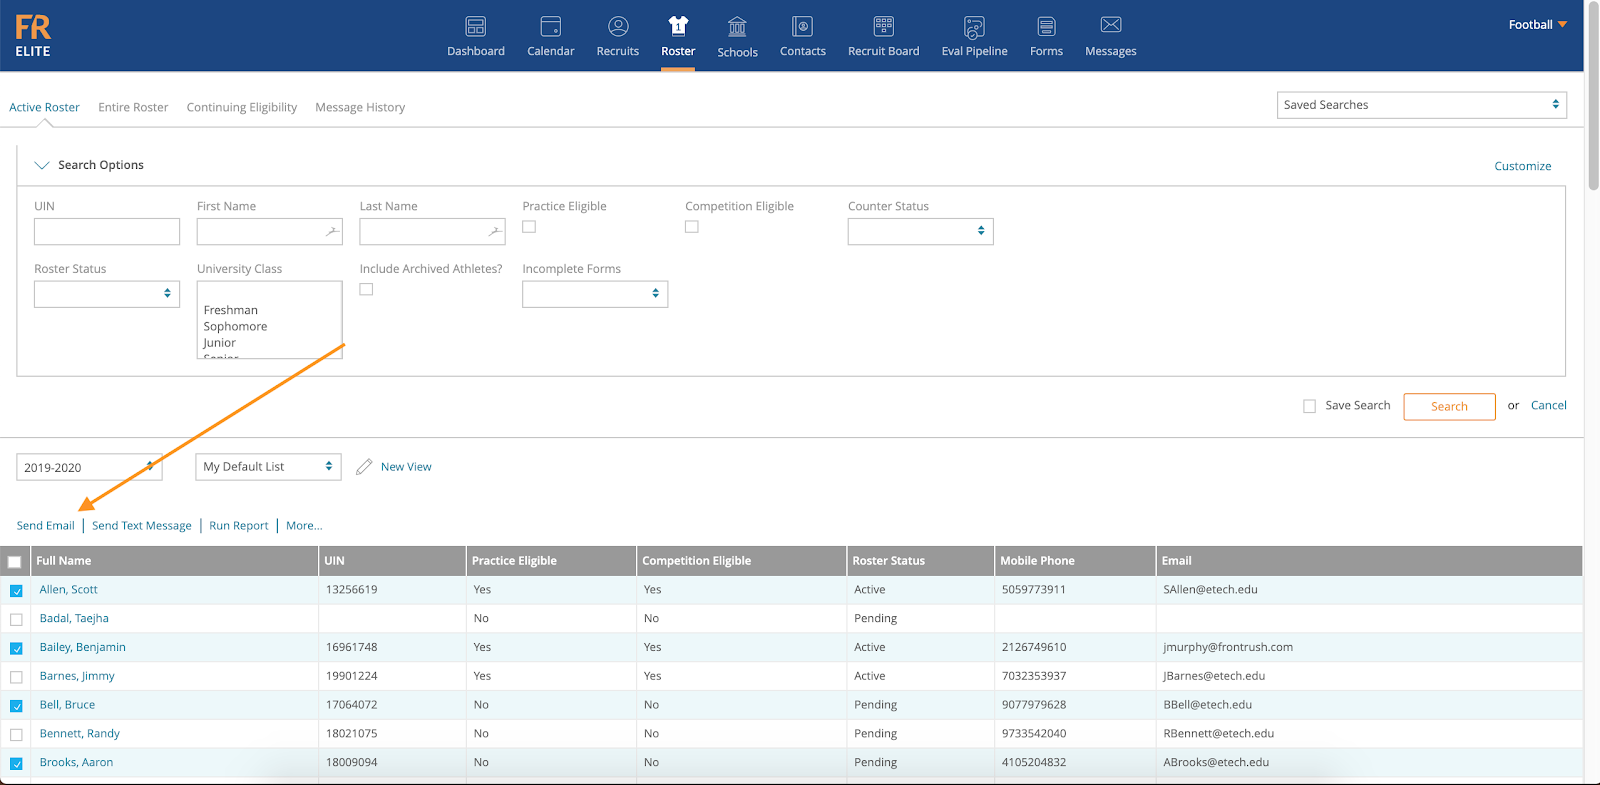
3. Click Send Email
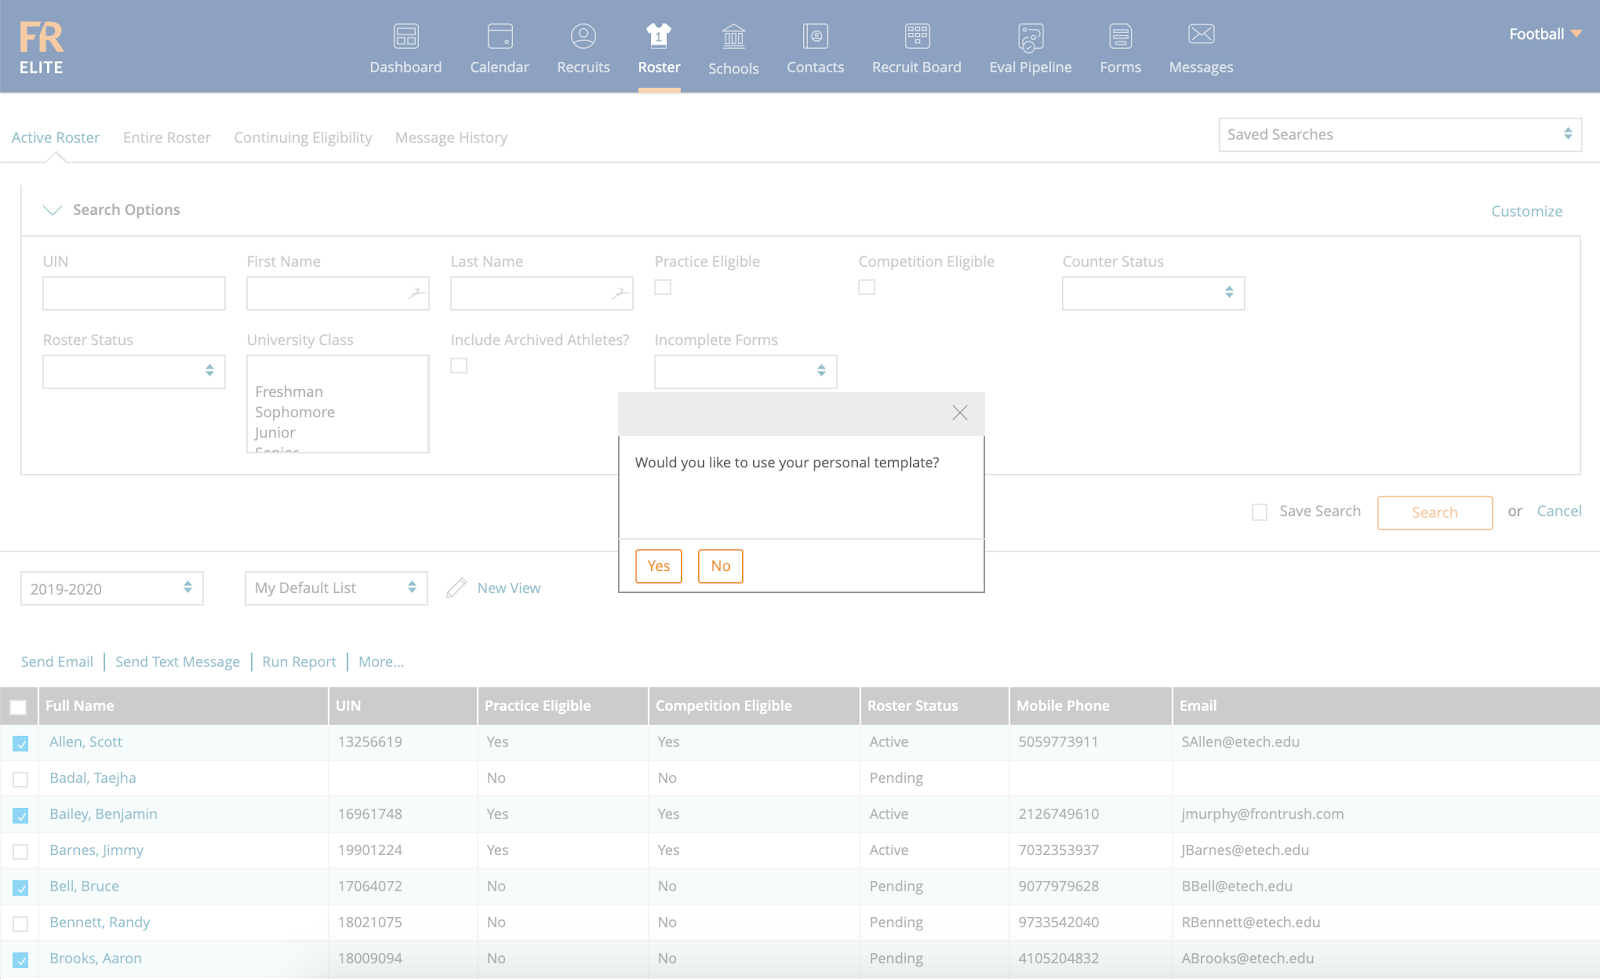
4. Next It Will Ask If You Would Like To Use Your Personal Template
Note: If you choose to use your personal template you will be brought directly to the page to create your email, skip to Step 9
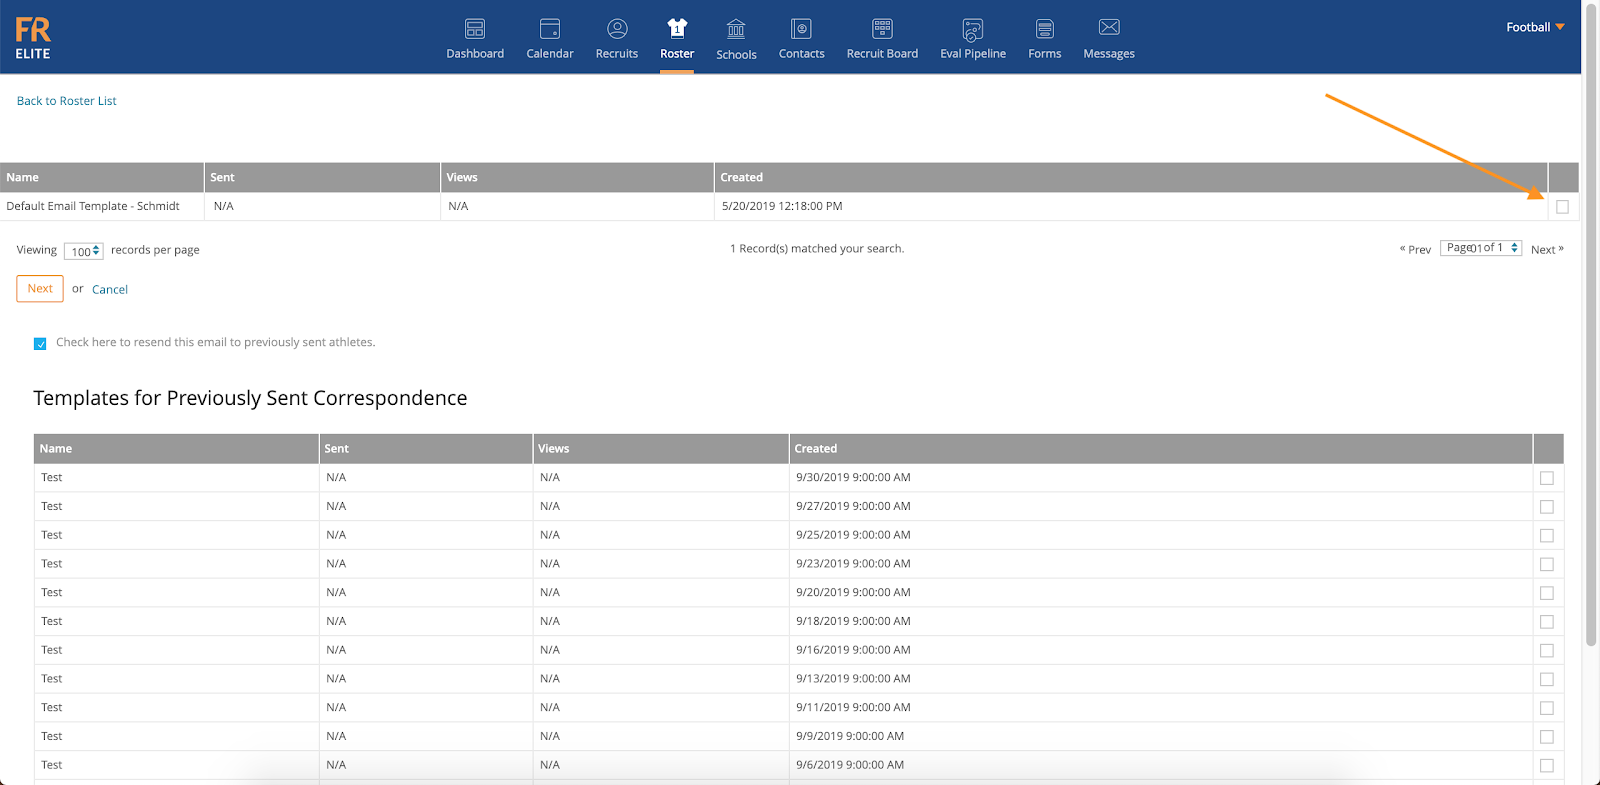
5. If You Choose No, You Will Next Be Asked to Choose your Template
Note: Your message templates will populate here, select the template you would like to use by checking the box to the right of the template
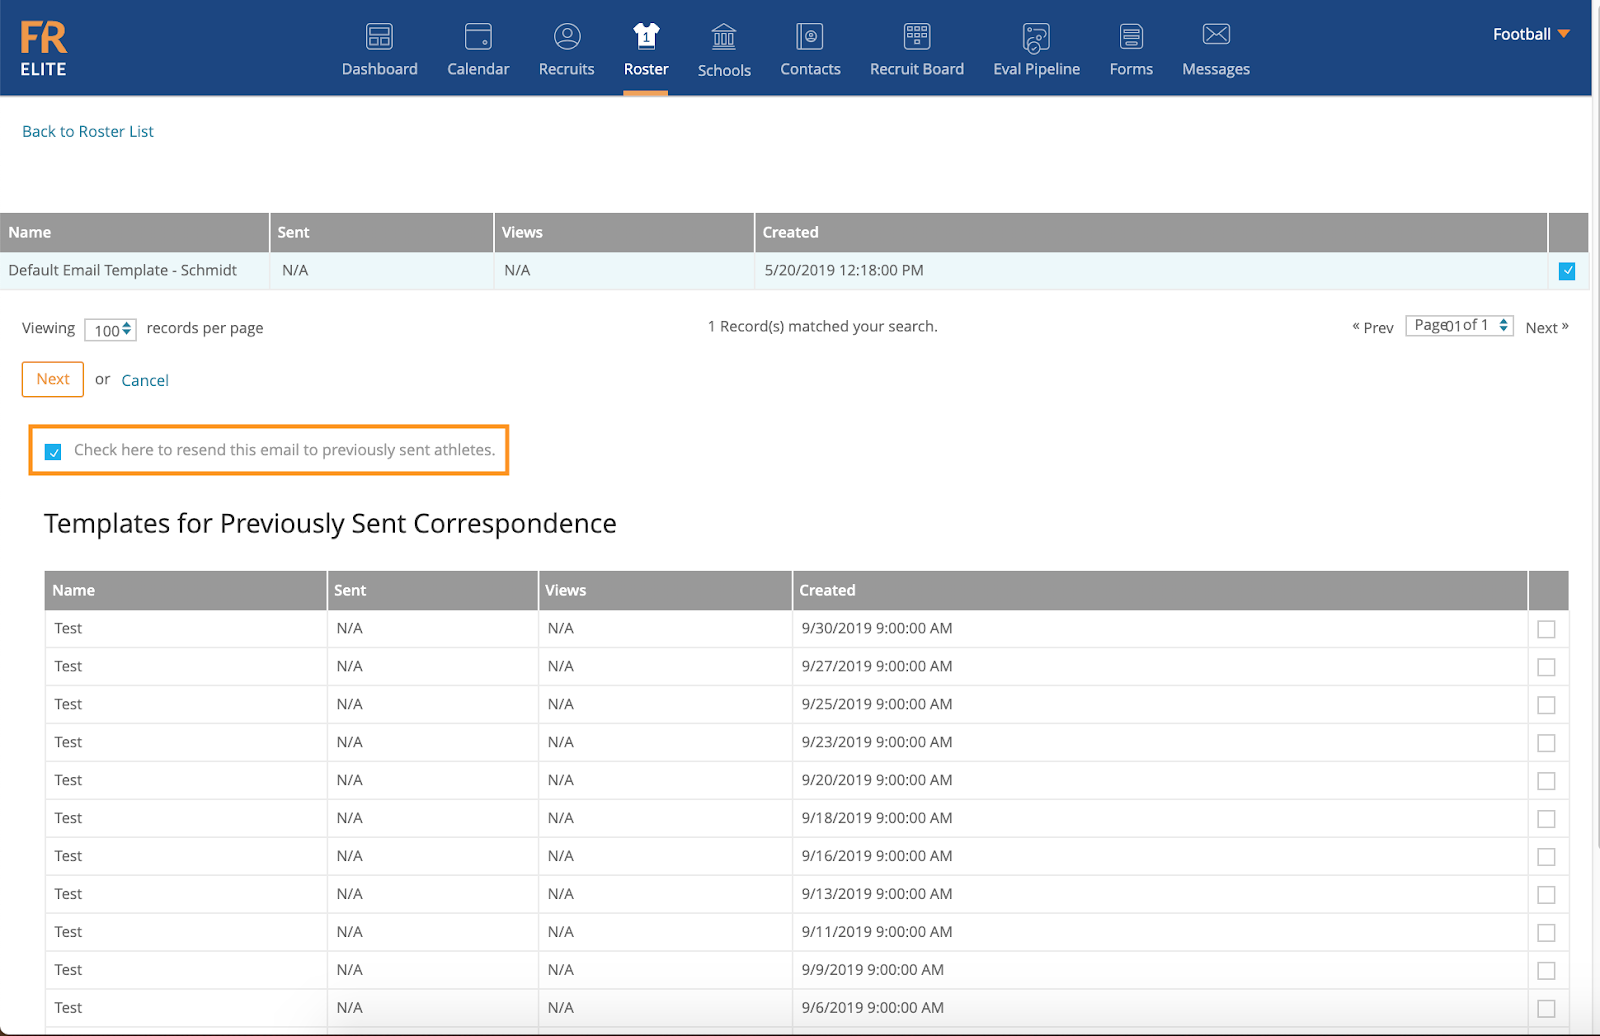
6. You Will Also Have The Option To Resend This Email To Previously Sent Athletes
Note: When checking this box, the system will auto-populate the body of the email with your previously sent email, even if it was not saved as a template. If they do not want to send the same email again to athletes/recruit they have has already gotten the email previously, this is when they uncheck it. This helps if you are managing large list of recruits and don’t want to send the email again if you have already sent the same email in the past.
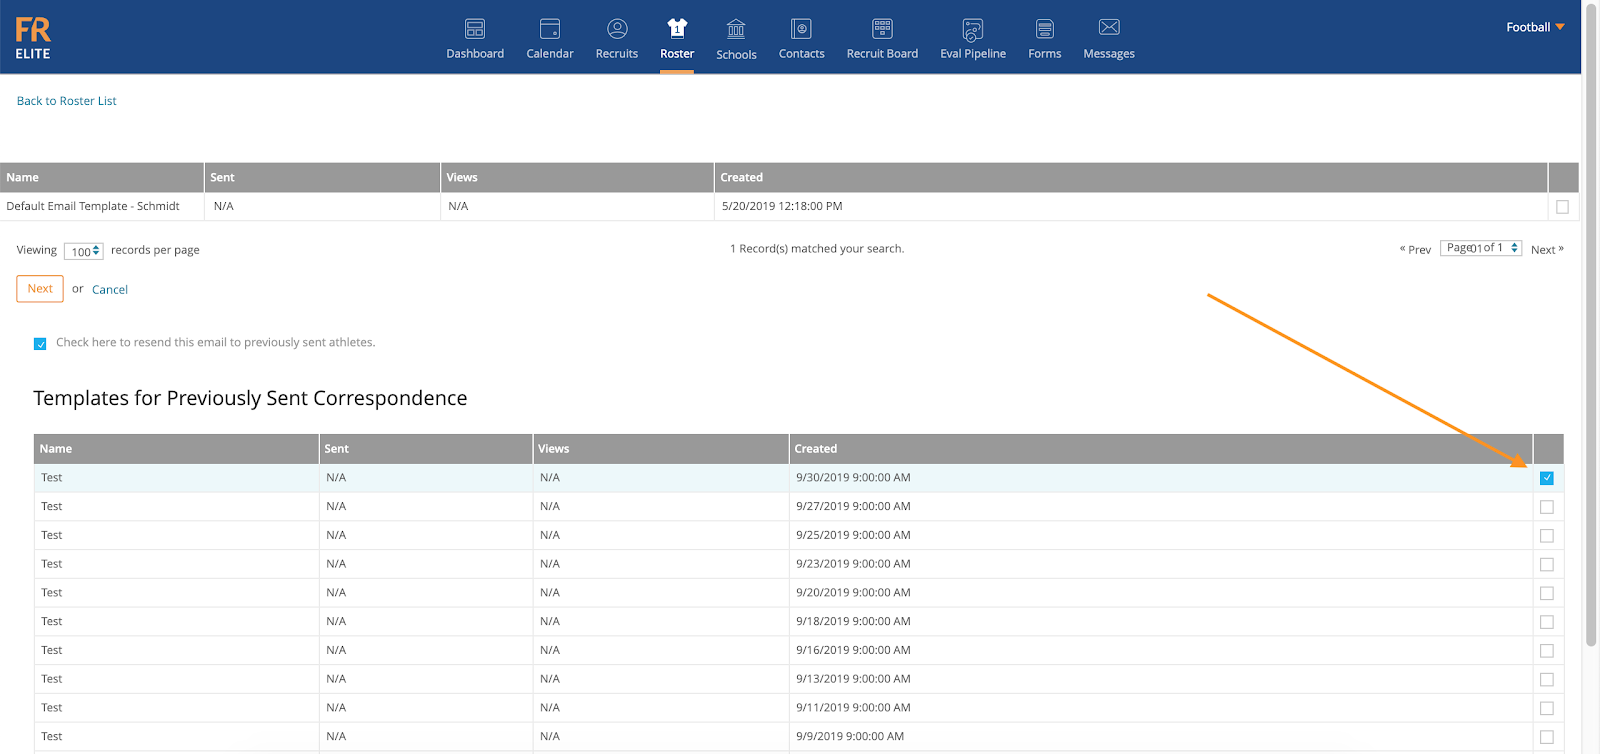
7. You Also Have The Ability To Use A Template You Previously Sent
Note: Your email history will populate on the bottom of the page, if you would like to use a template you used in the past, check the box to the right of the template.
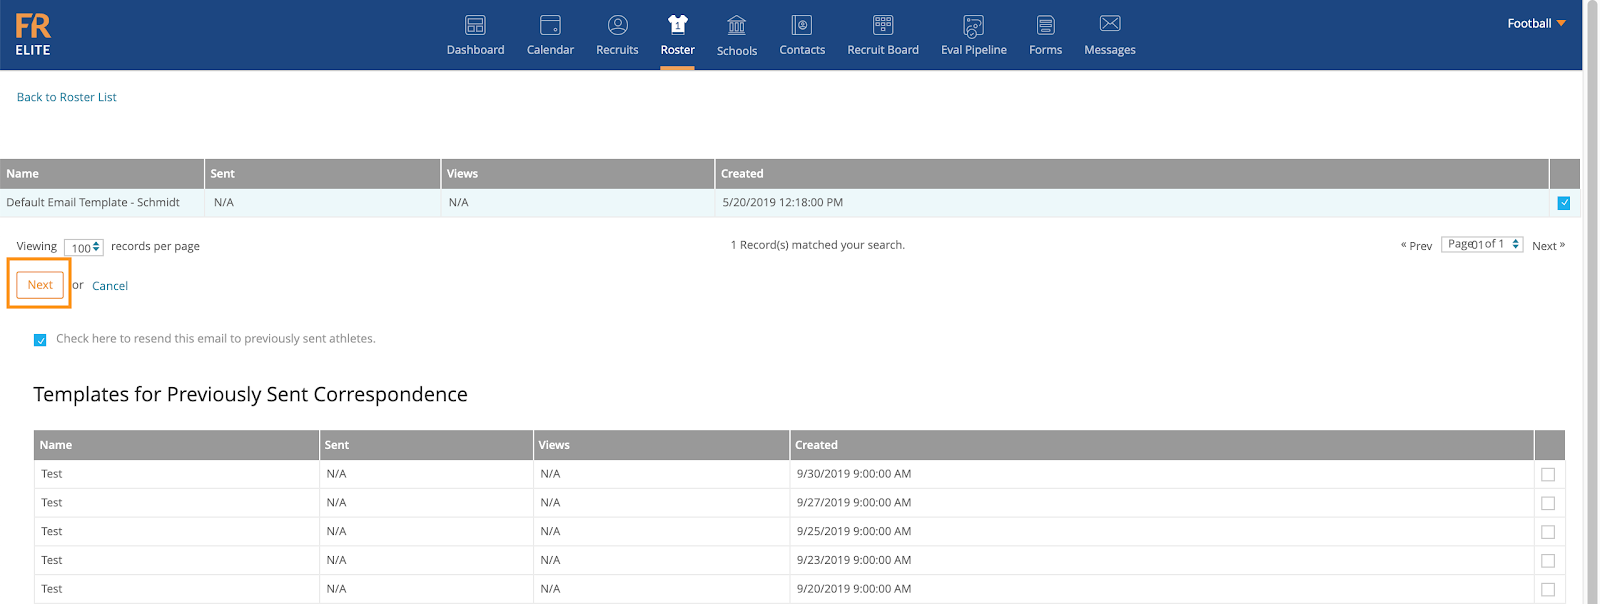
8. Once You Have The Template You Would Like To Use, Click Next
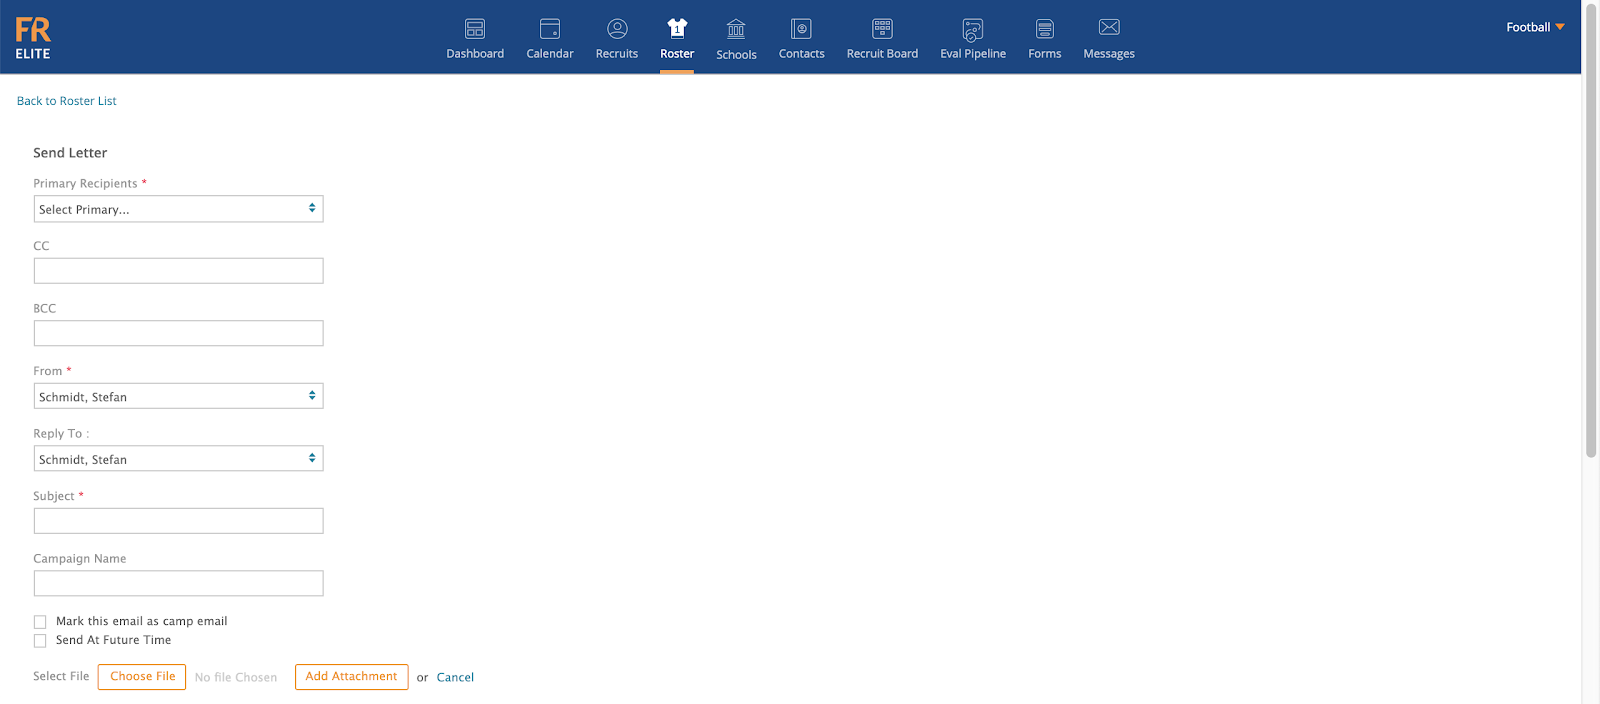
9. The Next Screen Is Where You Will Select Your Recipients, CC, BCC, Set Who You Would Like The Email To Come From, Who You Would Like The Recipients To Reply To, Add The Subject, A Campaign Name, Mark The Email As A Camp Email, Send At A Future Date, Add Files Or Attachments, And Craft Your Email
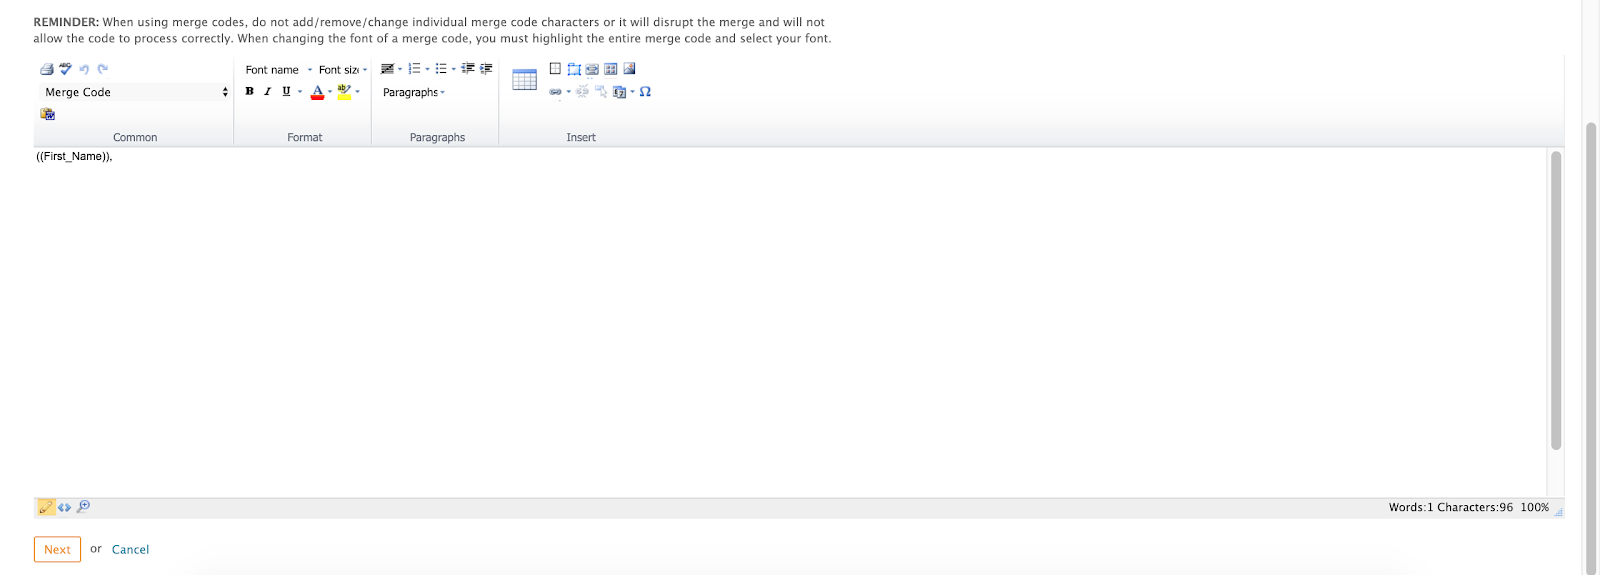
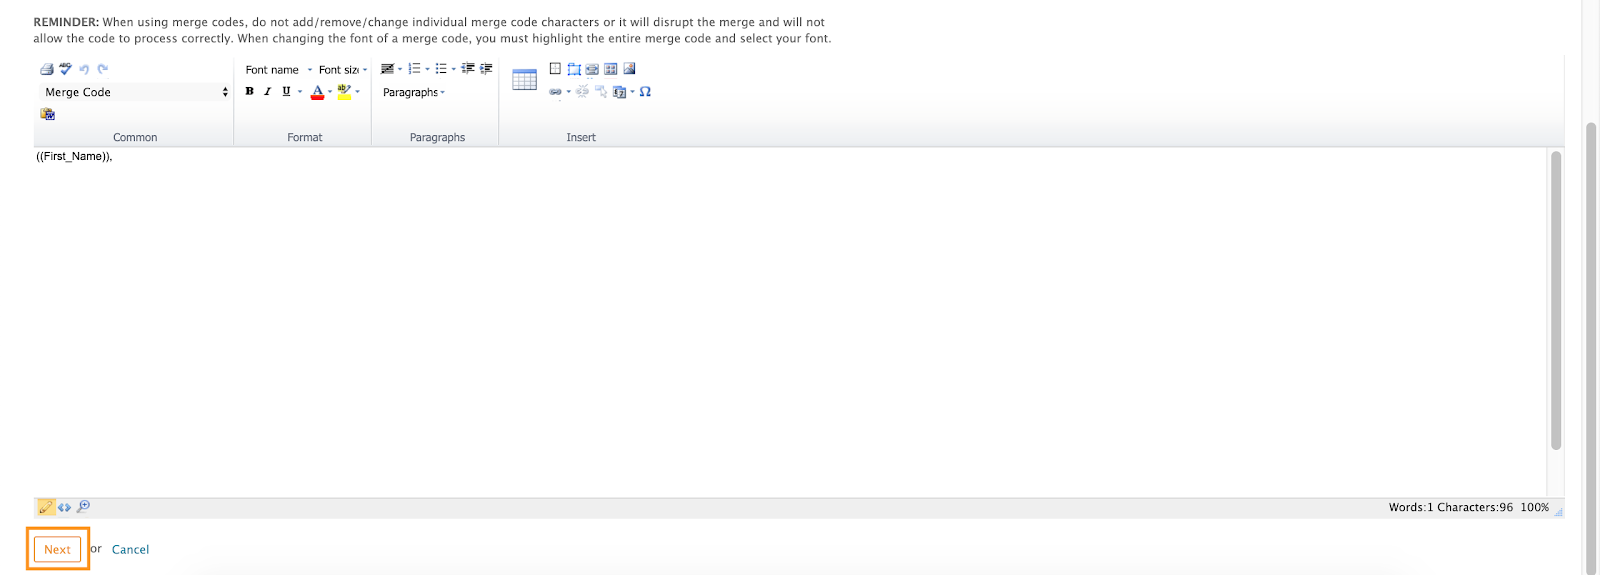
10. Once You Have Crafted Your Message, Click Next
11. The Next Page Will Be A Preview Of The Email, At The Bottom Of The Screen, You Will Either Be Able To Send Or Edit
Note: Hitting Send Will Send Your Email, Hitting Edit Will Bring You Back To The Previous Page
