-
Front Rush Essentials Coach
- Questionnaires
- Training
- Essentials Mobile App
- Discover
- Customize Fields
- Search
- Tracking Personal Contacts (Recruiting & More)
- Data Imports into Front Rush
- Managing Staff in Front Rush
- Practice Logs
- Forms
- Student-Athlete Portal
- Customizing Front Rush
- Archiving / Deleting
- Dashboard
- Duties
- Calendar
- Group Board
- Recruit Tab
- Roster Tab
- Alumni Tab
- Contact Tab
- SMS / Texting
- Exporting Tab
- Reporting Tab
- Admissions
- Messaging Tab (Email/SMS)
- Gmail Plugin
- Templates
- Third Party Websites & Integrations
- Coach Packet
- Billing
- Tricks
-
Front Rush Essentials Compliance
-
Front Rush ELITE Coach
- Student Athlete Portal
- Recruits
- Dashboard
- Settings: Compliance Activities
- Settings: Recruiting Events
- Topic Focused Trainings
- Settings: Recruit Settings
- Recruit Board
- Eval Pipeline
- Calendar
- Contacts
- Messages
- Roster
- Schools
- Forms
- ELITE Mobile App Training
- Settings: Questionnaires
- Saving Emails
- How to Log in for the first time
-
Front Rush ELITE Compliance
-
FR TRAC Inventory Management
Managing Personal Contacts
Managing Personal Contacts
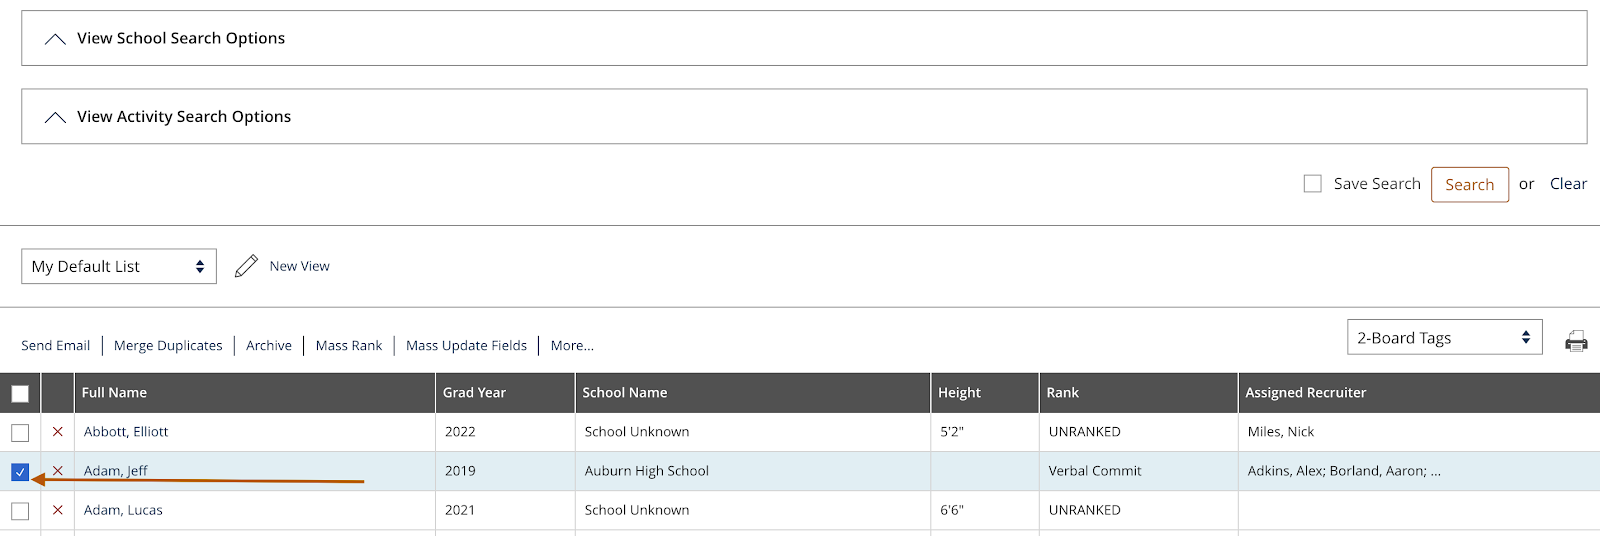
1. Click on the Recruits tab

2. Click the checkbox to the left of the recruit. Select More, Scroll to the bottom and select View Recruit Profiles to pull up their profile
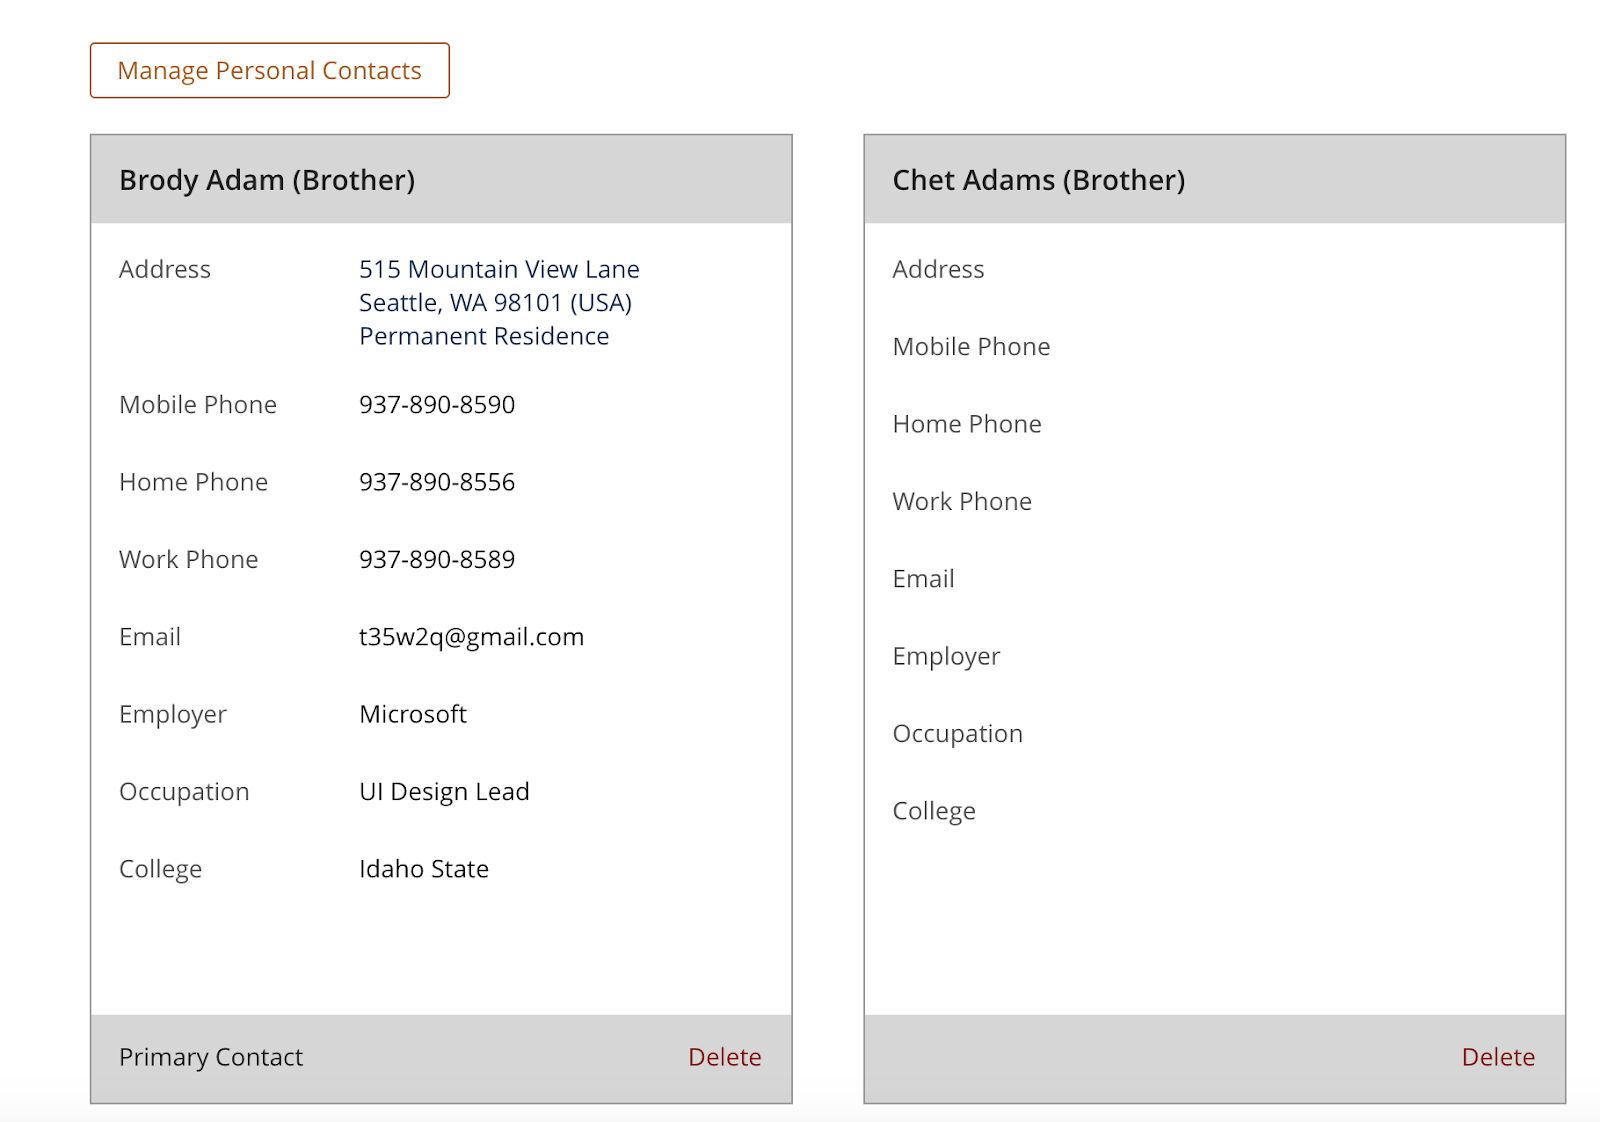
3. In the Recruit’s Profile, click on Priority Fields and select Personal Contacts

4. Here, you can review the previously entered Personal Contacts and you can edit their information by selecting Manage Personal Contacts
5. To add a new Personal Contact, select New Contact

Note: The max number of personal contacts you can have is 5.
6. From here, at a minimum, you will need to indicate Contact Type, First and Last Names
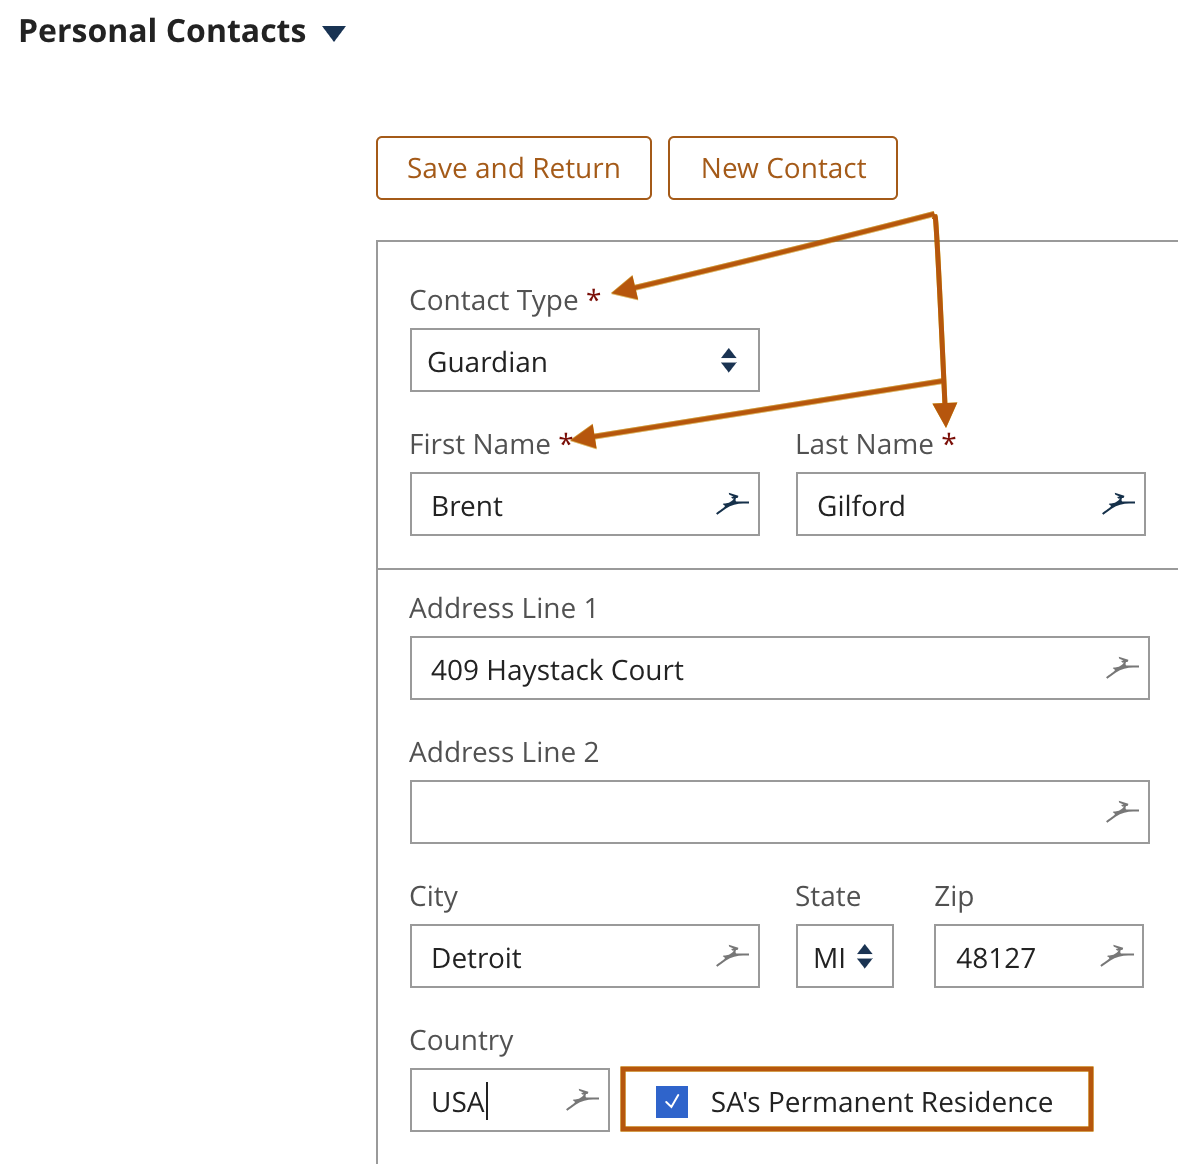
While Contact Type, First & Last Name are required there are a few items to consider:
- SA’s Permanent Residence: This option allows you indicate that this contact lives at the recruit’s permanent address, too.
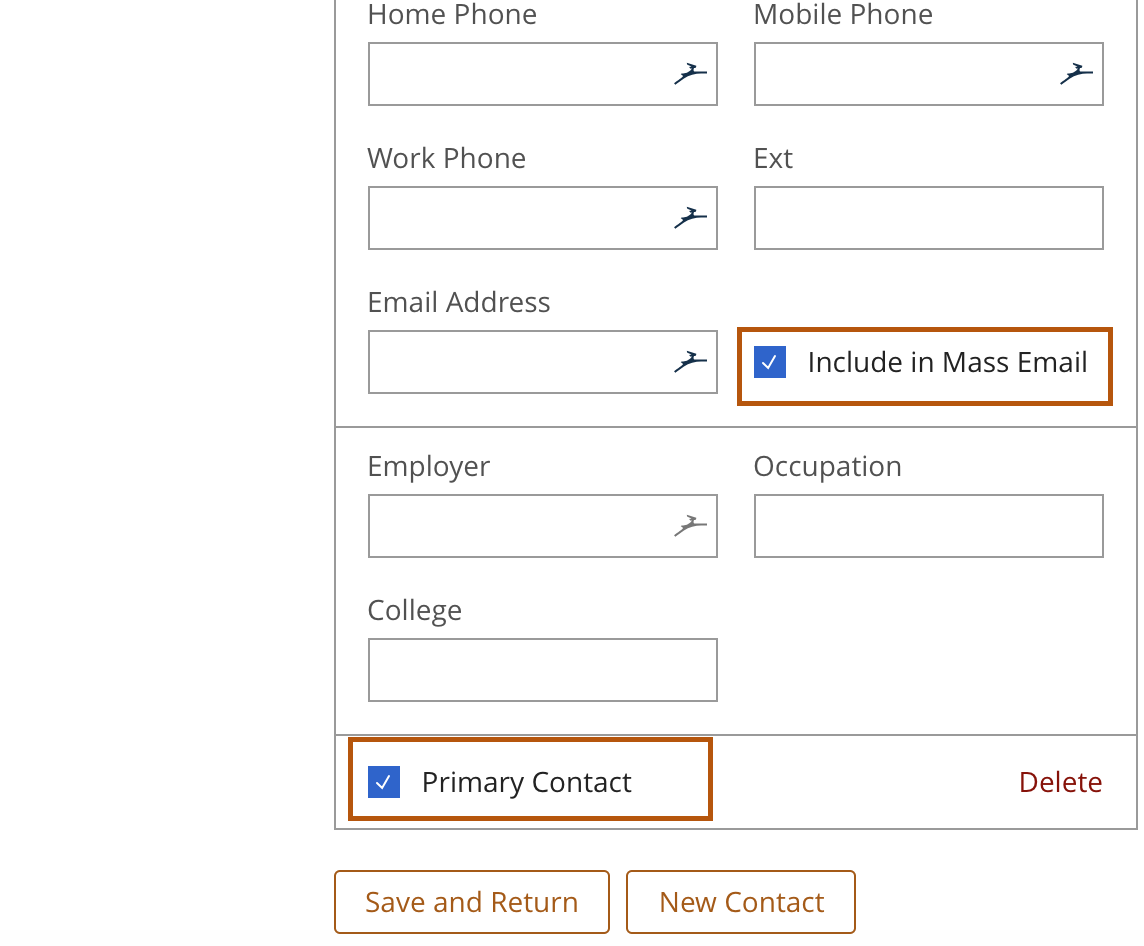
- Include in Mass Email: Clicking this box will allow you to include this contact when emailing in mass, elsewhere in the system (see messaging..)
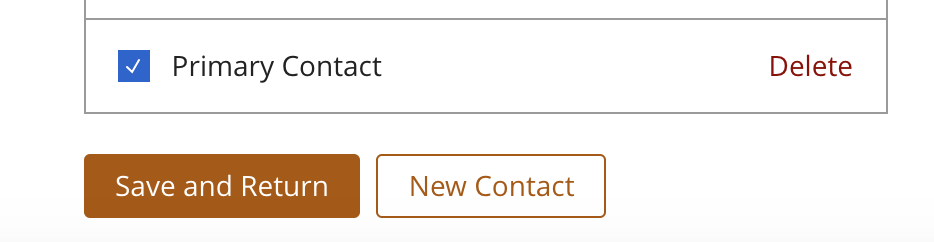
- Primary Contact: Selecting primary contact will allow you to indicate that the contact is the go-to individual in the recruit’s recruitment. Elsewhere in the system, you can also indicate that this selected contact and only this contact can receive email correspondence (see messaging..)
Note: You can only select one primary contact at a time.
7. Click Save & Return and your Personal Contact addition is complete.
Note: If this recruit is added to the roster, the contacts will remain with them.