-
Front Rush Essentials Coach
- Questionnaires
- Training
- Essentials Mobile App
- Discover
- Customize Fields
- Search
- Tracking Personal Contacts (Recruiting & More)
- Data Imports into Front Rush
- Managing Staff in Front Rush
- Practice Logs
- Forms
- Student-Athlete Portal
- Customizing Front Rush
- Archiving / Deleting
- Dashboard
- Duties
- Calendar
- Group Board
- Recruit Tab
- Roster Tab
- Alumni Tab
- Contact Tab
- SMS / Texting
- Exporting Tab
- Reporting Tab
- Admissions
- Messaging Tab (Email/SMS)
- Gmail Plugin
- Templates
- Third Party Websites & Integrations
- Coach Packet
- Billing
- Tricks
-
Front Rush Essentials Compliance
-
Front Rush ELITE Coach
- Student Athlete Portal
- Recruits
- Dashboard
- Settings: Compliance Activities
- Settings: Recruiting Events
- Topic Focused Trainings
- Settings: Recruit Settings
- Recruit Board
- Eval Pipeline
- Calendar
- Contacts
- Messages
- Roster
- Schools
- Forms
- ELITE Mobile App Training
- Settings: Questionnaires
- Saving Emails
- How to Log in for the first time
-
Front Rush ELITE Compliance
-
FR TRAC Inventory Management
Grouping Inventory Items
Summary:
Video:
Article:
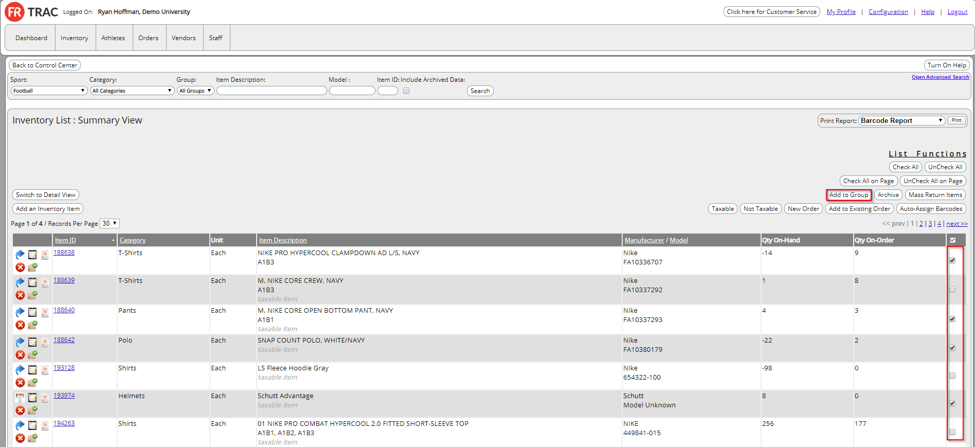
Creating Item Groups
1. To create a group of inventory items, select the items you wish to group and clickthe Add to Group button
2. Click on + New Group
 3. Give the group a name and click on Add

4. Change the “Default Mass Issue Qty" if necessary, then click on Save & Continue

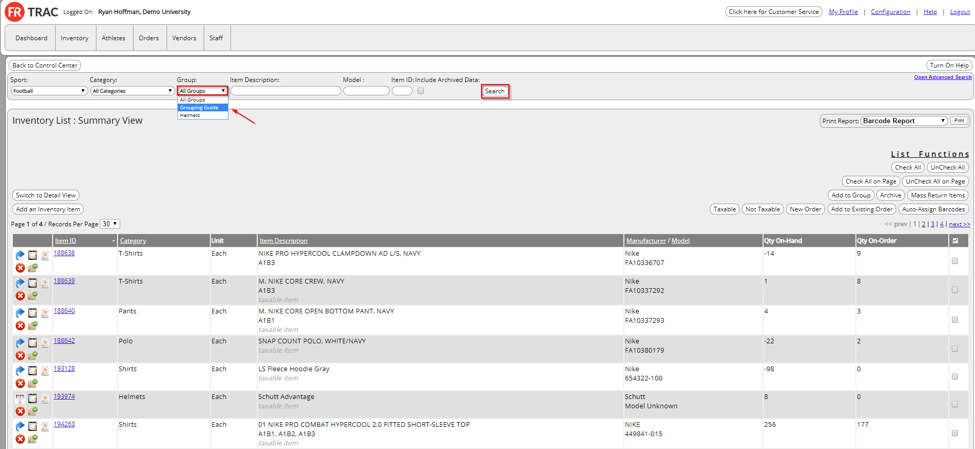
5. To use a group, select a group from the All Groups filter and click Search
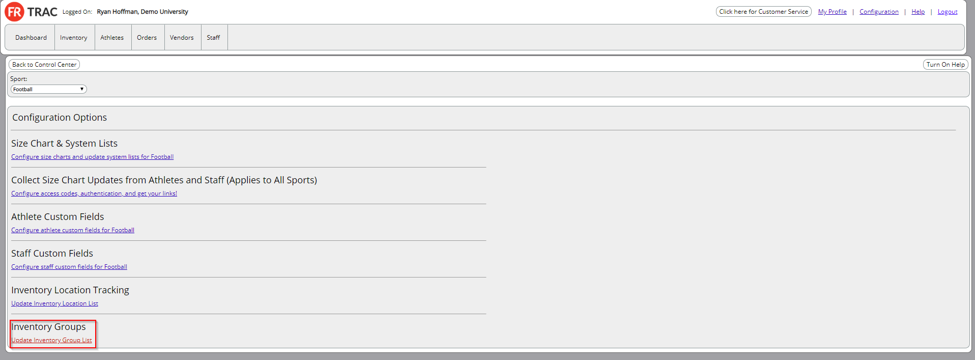
Managing Groups from Configuration
1. Select Configuration located at the top right of the screen

2. Click on Update Inventory Group List
3. Give the group a name and click on Add to List

Renaming a Group
1. Select Configuration located at the top right of the screen

2. Click on Update Inventory Group List

3. Click on the group name you wish to revise

4. Give the group a new name and click on Save

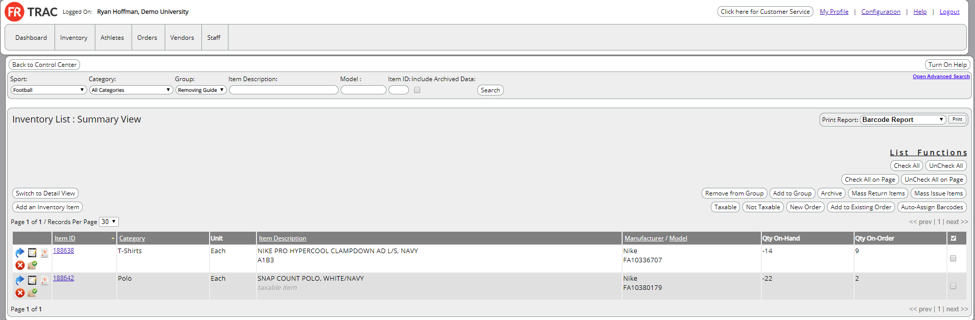
Removing an Item from a Group
1. Select the group you wish to remove an item from at the top left of the screen

2. Select the check boxes on the right side of the screen followed by clicking Remove from Group to remove the checked items.
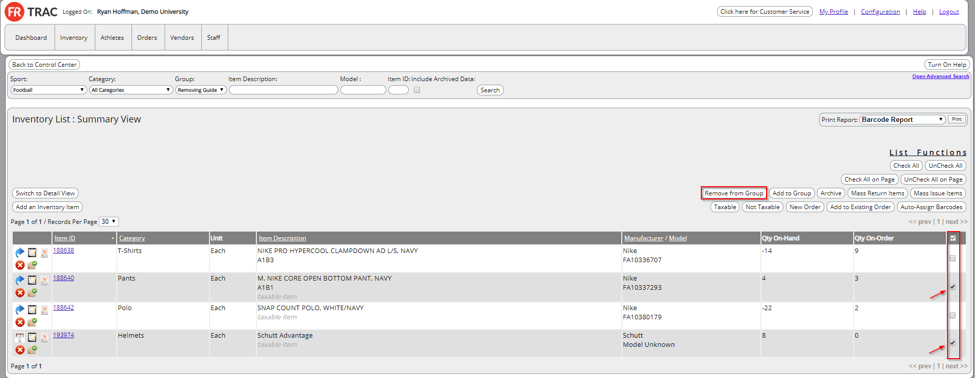
3. The items have now been successfully removed and the group size has been reduced