- Help Center
- Front Rush ELITE Coach
- Settings: Questionnaires
-
Front Rush Essentials Coach
- Questionnaires
- Training
- Essentials Mobile App
- Discover
- Customize Fields
- Search
- Tracking Personal Contacts (Recruiting & More)
- Data Imports into Front Rush
- Managing Staff in Front Rush
- Practice Logs
- Forms
- Student-Athlete Portal
- Customizing Front Rush
- Archiving / Deleting
- Dashboard
- Duties
- Calendar
- Group Board
- Recruit Tab
- Roster Tab
- Alumni Tab
- Contact Tab
- SMS / Texting
- Exporting Tab
- Reporting Tab
- Admissions
- Messaging Tab (Email/SMS)
- Gmail Plugin
- Templates
- Third Party Websites & Integrations
- Coach Packet
- Billing
- Tricks
-
Front Rush Essentials Compliance
-
Front Rush ELITE Coach
- Student Athlete Portal
- Recruits
- Dashboard
- Settings: Compliance Activities
- Settings: Recruiting Events
- Topic Focused Trainings
- Settings: Recruit Settings
- Recruit Board
- Eval Pipeline
- Calendar
- Contacts
- Messages
- Roster
- Schools
- Forms
- ELITE Mobile App Training
- Settings: Questionnaires
- Saving Emails
- How to Log in for the first time
-
Front Rush ELITE Compliance
-
FR TRAC Inventory Management
Configuring Auto Reply

First, you will create a new Email Template. To create the template, follow the steps here: Creating a New Email Message Template
Next, you will set up which email template gets sent out in your Questionnaire Auto Reply Emails. To do this, follow the steps below:
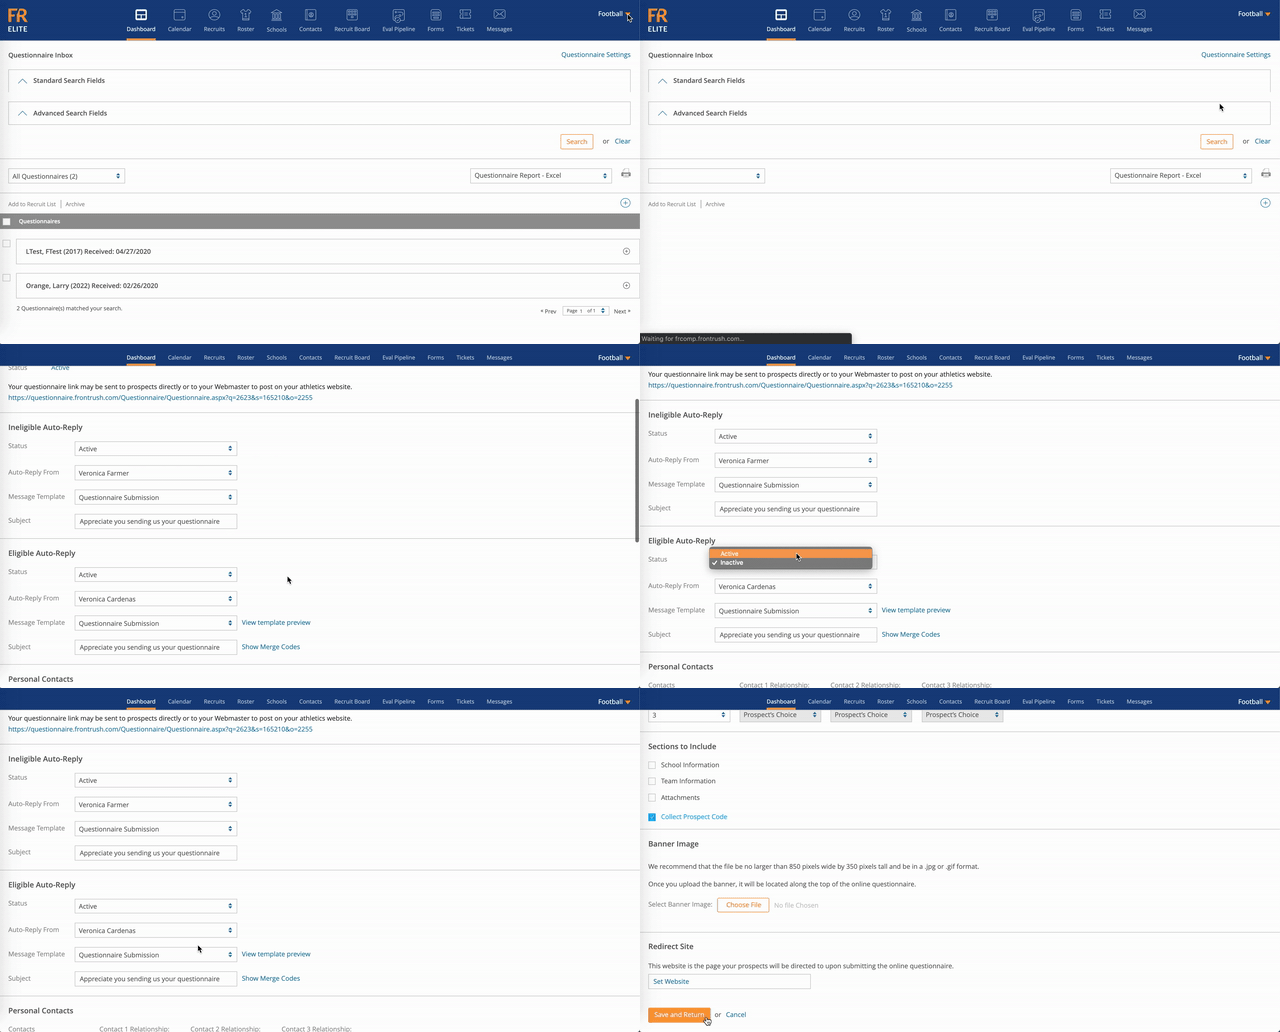
- Click Top Right Menu
- Click on Questionnaire
- Click on Questionnaire Settings
- You have two options to set up:
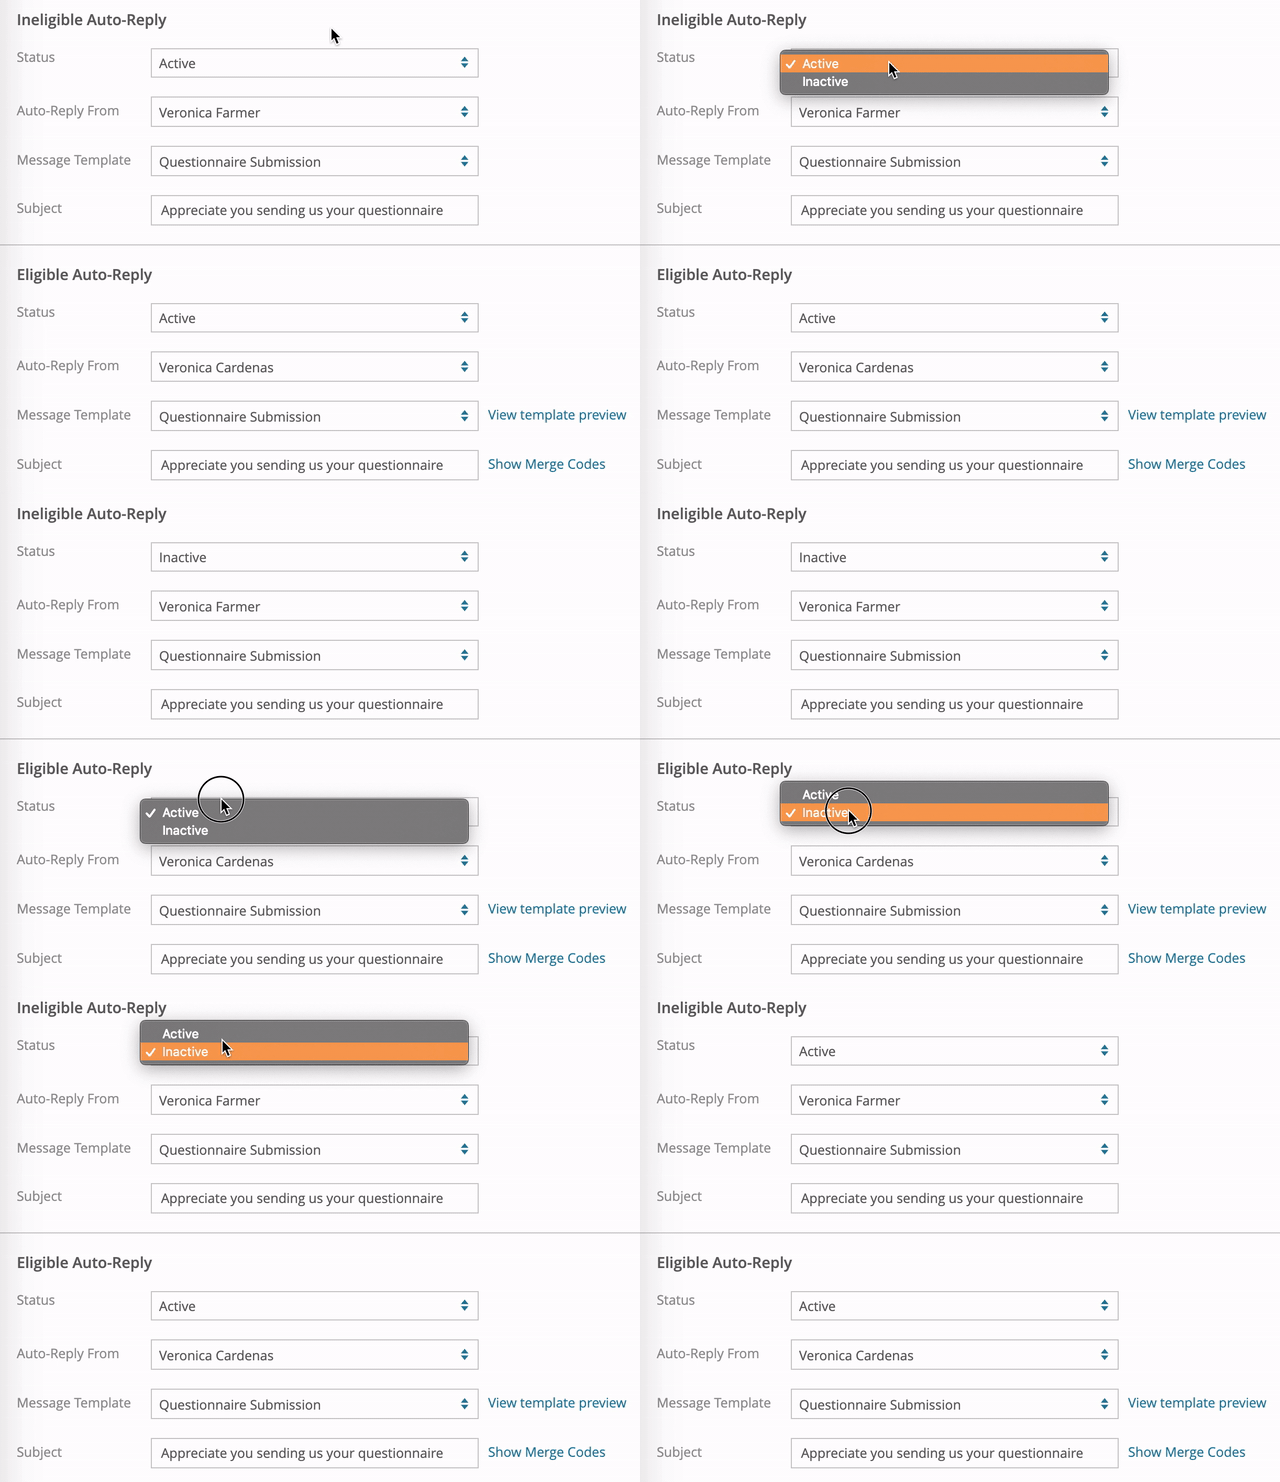
Ineligible - This email will go to prospects whose graduation year is ineligible for correspondence.
Eligible - This email goes to prospects who are eligible to receive correspondence
5. STATUS: You will first select the Status of the Auto-reply. Active means it is actively sending a reply to every submission.

6. FROM: Determine which email address you want this auto-reply to be delivered

7. TEMPLATE: Select the template that you want to be used for each of the auto-reply options

8. SUBJECT: Determine the subject of your message.

9. Click the Save and Return button at the bottom to confirm your changes.
