Customize List View
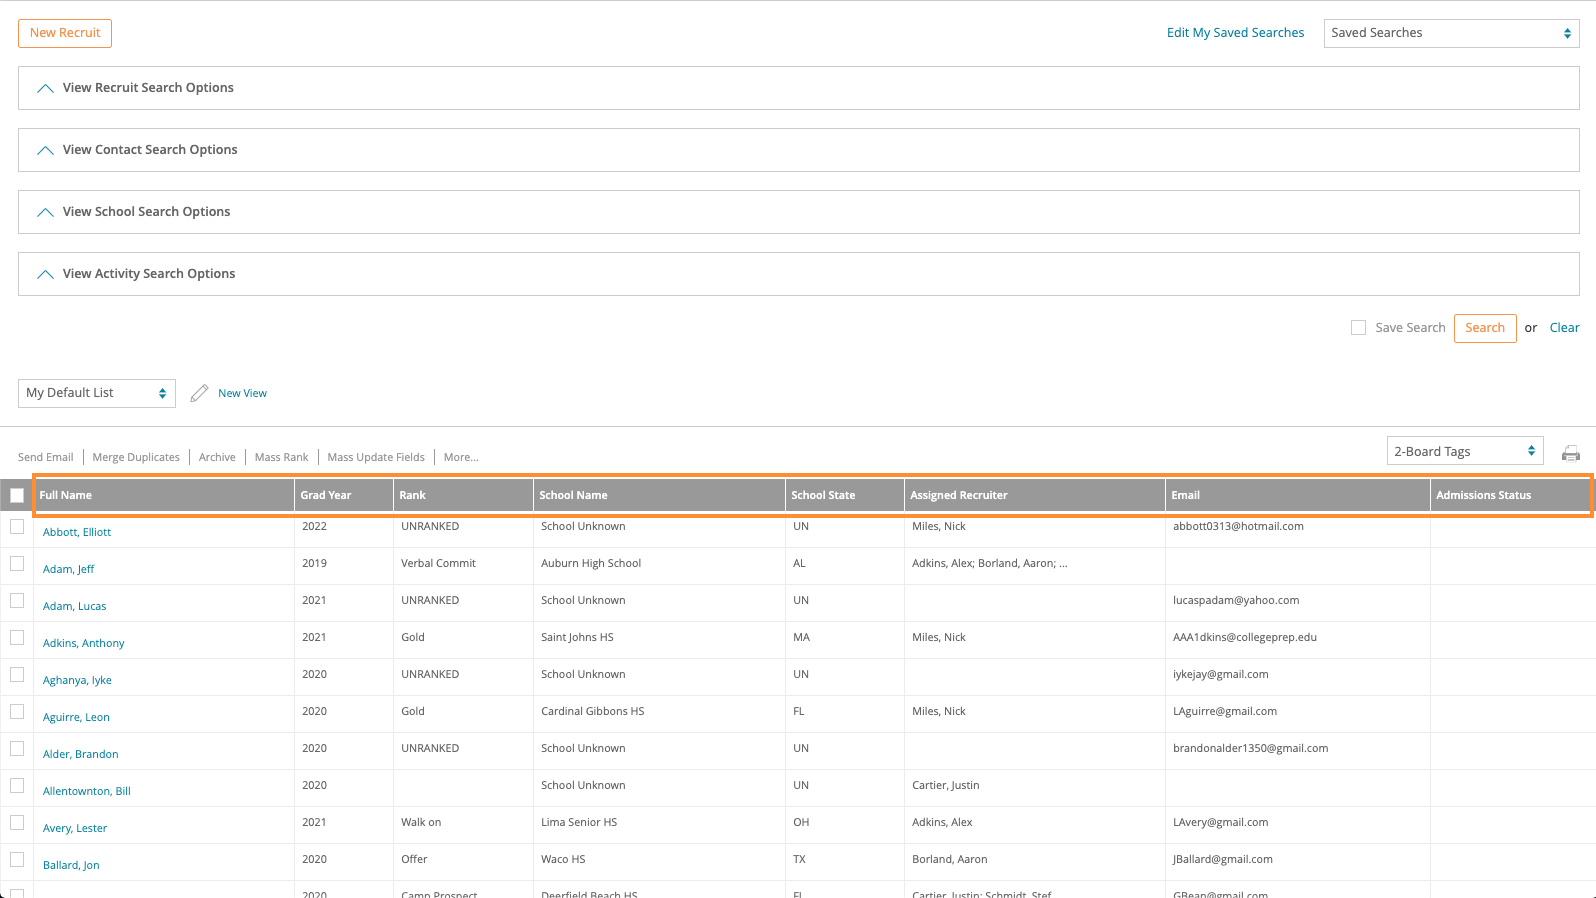
Your list view is shown on the Recruits, Roster, Schools/Teams, Contacts tabs. You can customize this view by changing your default or creating a new view.
Changing your Default
1. Click on the Desired Tab at the Top of the page
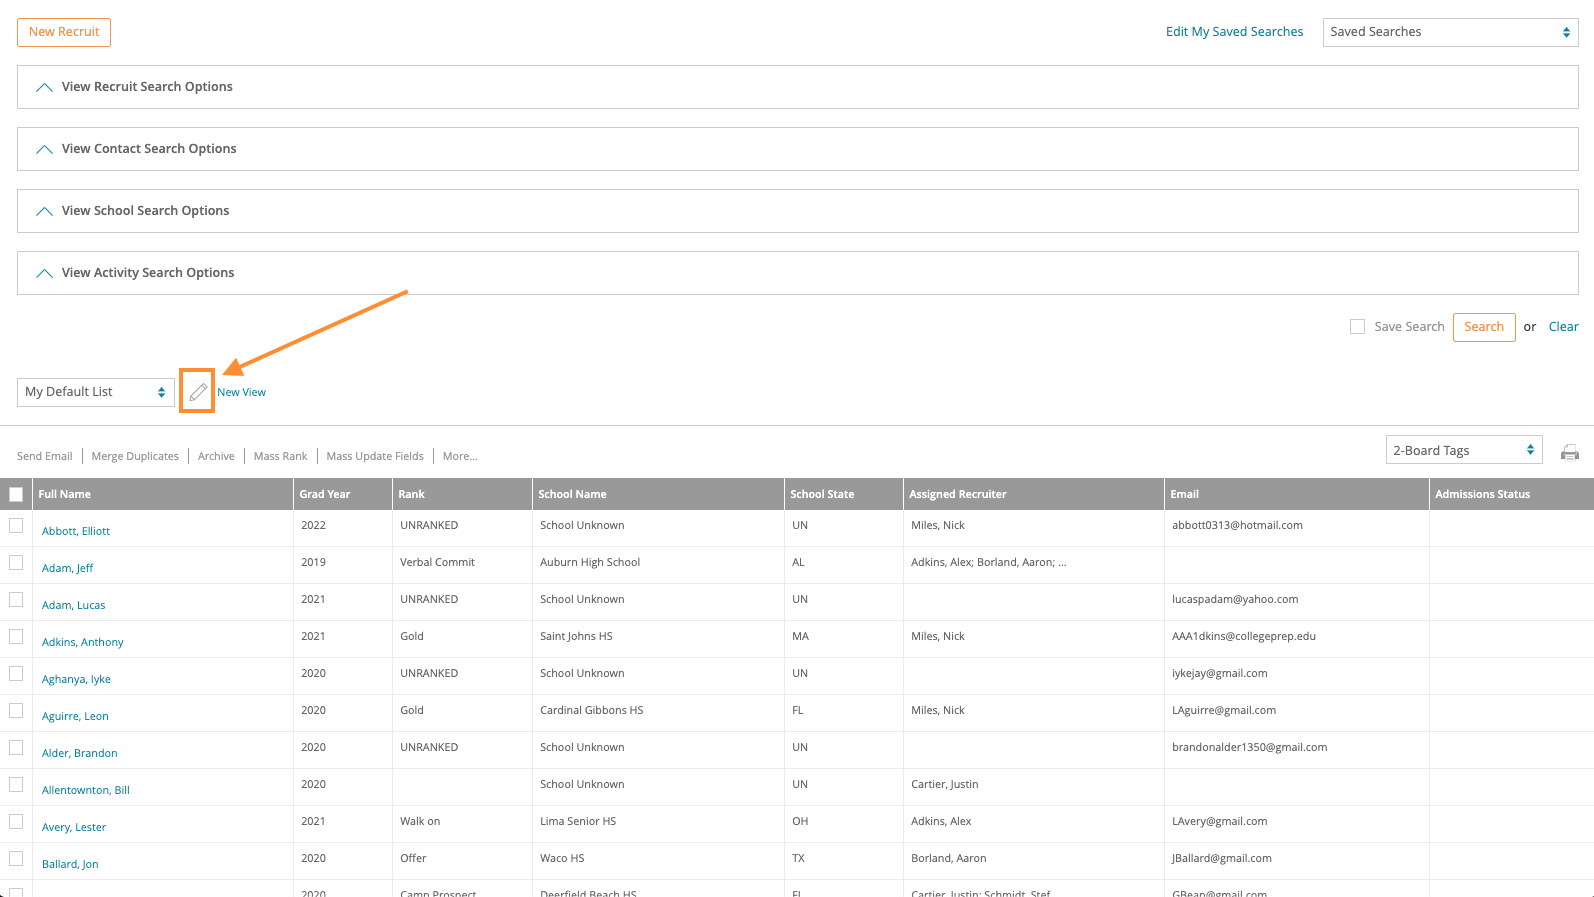
2. Click on the Pencil Icon to edit the view you are currently on or to the left of that list you will be able to select which view you would like to change from the dropdown list. Once you have clicked on the pencil icon a pop-up window will appear.
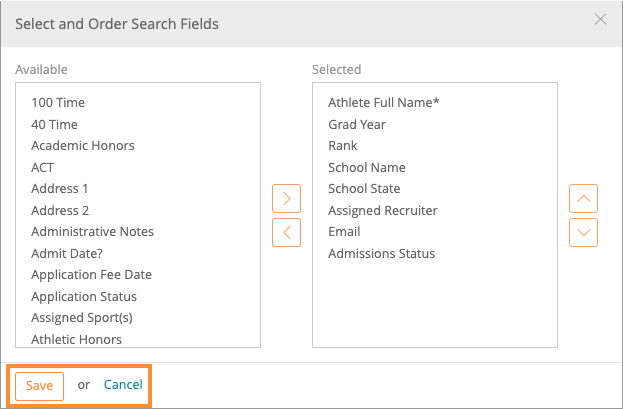
3. In order to add columns to your current view, select the column name or names from the Available List and click the top arrow pointed towards the right to move it to the Selected List.
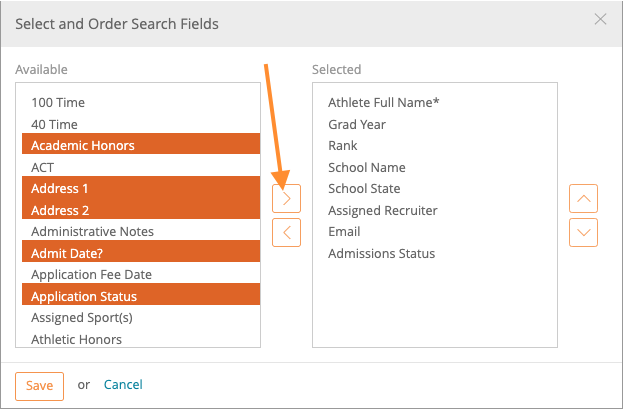
4. In order to remove columns from your current view, select the column name or names from the Selected List and click the bottom arrow pointed towards the left to move it to the Available List.

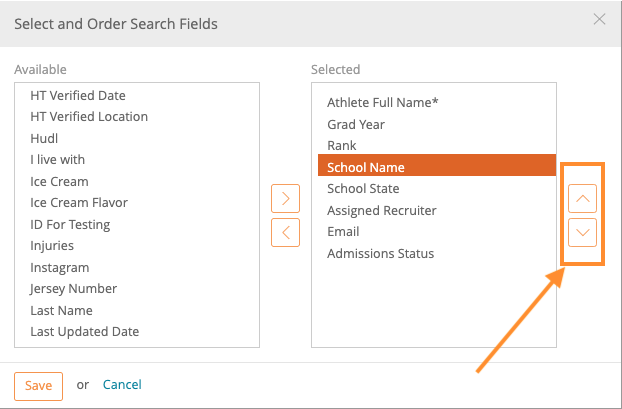
5. You can also decide which columns will appear first on your list. You can use the up and down arrows on the far right of the page to toggle the column names.

6. Once you have made all of your changes. Click the Save button to update your list view or the cancel button to revert back to your list.

Creating a New List View
1. Click on the Desired Tab at the Top of the page
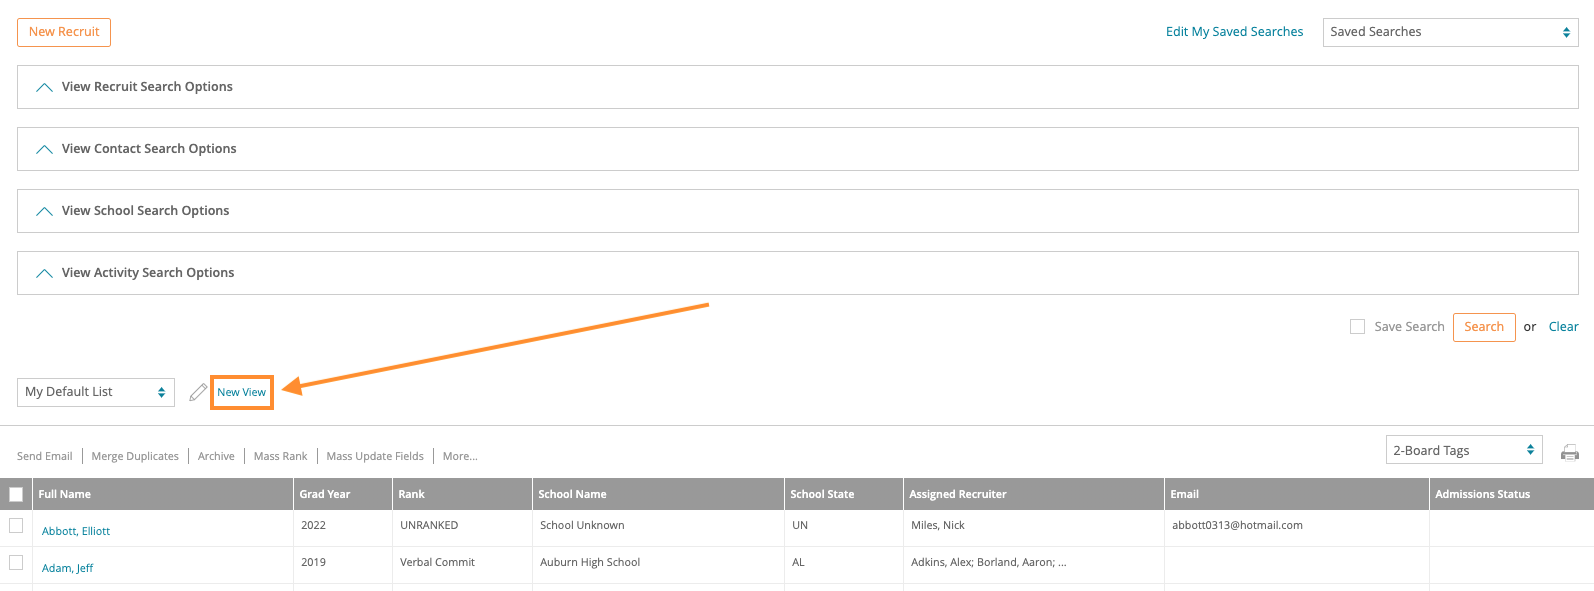
2. Click on the New View button to create a new view
3. You must title your view and then click the Save button to proceed or the cancel button to delete your new view.

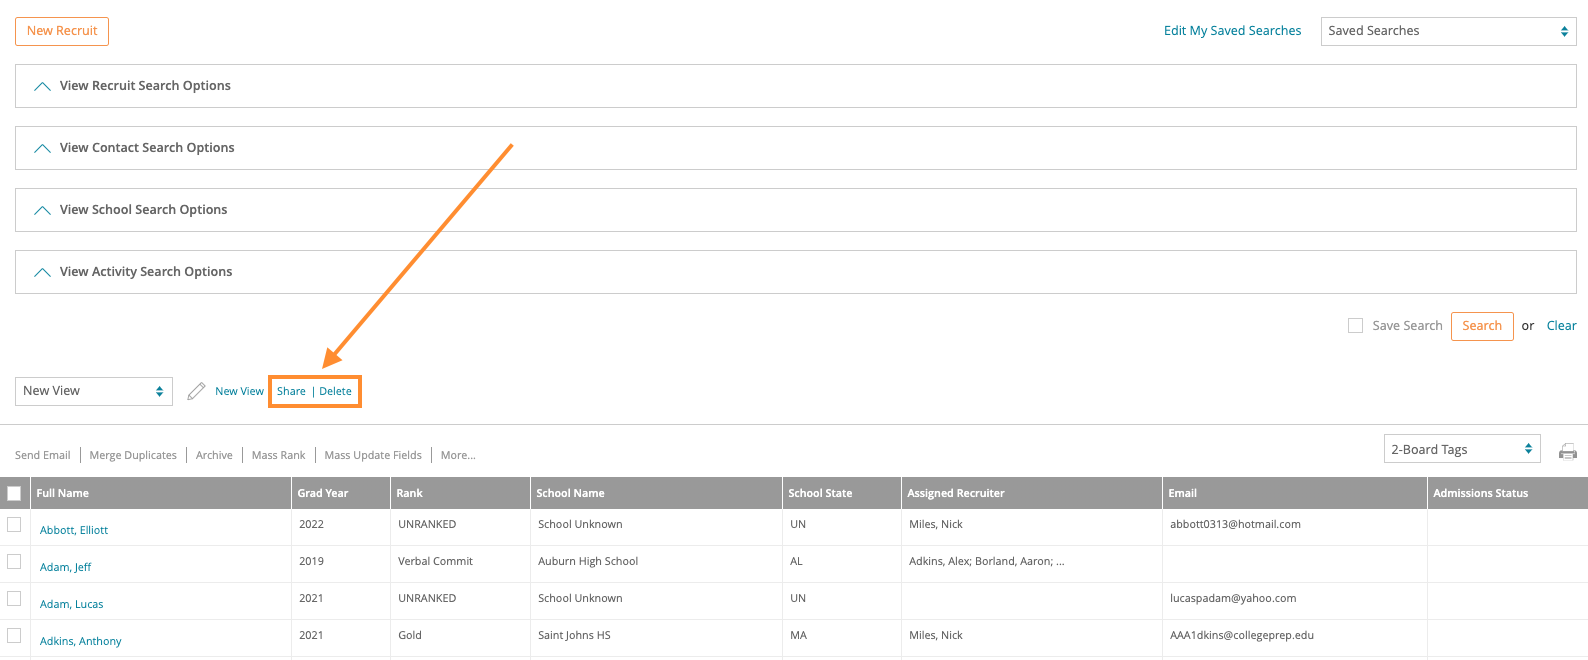
4. Next, you will be able to either Share your view with other staff members or you can delete this particular view.
5. Select one or multiple users that you would like to share this list view with. Once you have made your selection you must decide if you would like for them to have this view across all of the sports that they have access to. Click the Share button to distribute this view based on your selections. You can also hit the cancel button to exit without sharing.
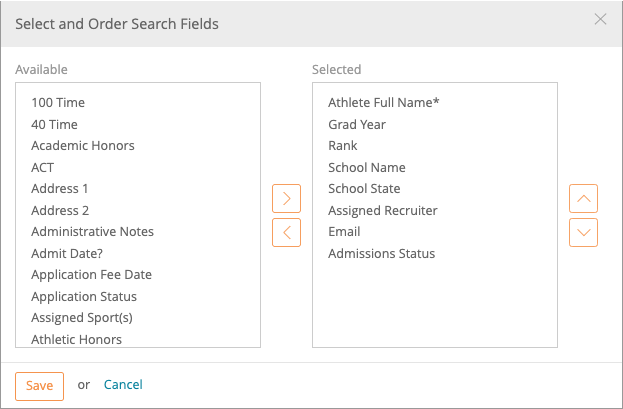
6. In order to add columns to your current view, select the column name or names from the Available List and click the top arrow pointed towards the right to move it to the Selected List.
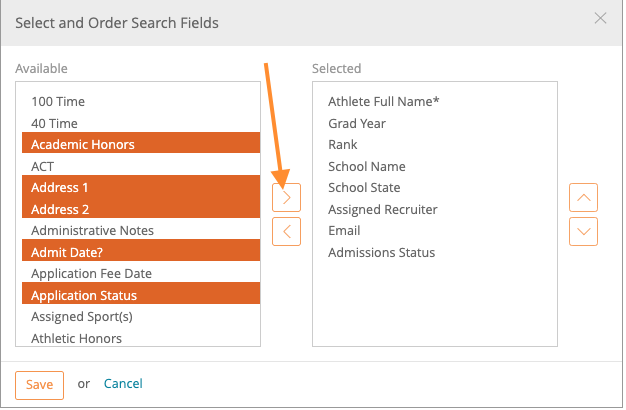
7. In order to remove columns from your current view, select the column name or names from the Selected List and click the bottom arrow pointed towards the left to move it to the Available List.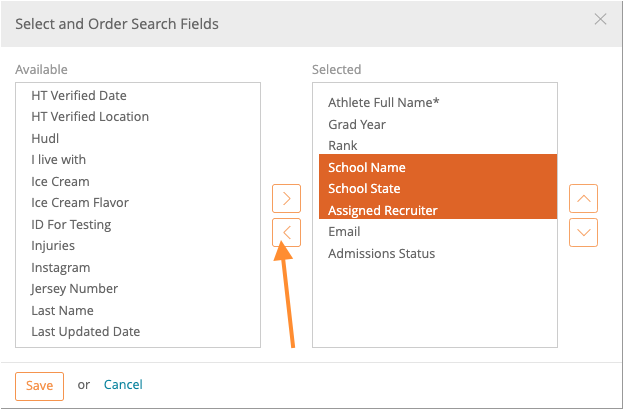
8. You can also decide which columns will appear first on your list. You can use the up and down arrows on the far right of the page to toggle the column names.
9. Once you have made all of your changes. Click the Save button to update your list view or the cancel button to revert back to your list.