Managing athletes just got easier! An overview of the new features and functionality is outlined below.
Video
Overview of the New Athlete Module
Same feature, new place:
Now, when completing bulk actions to your selected list of athletes, this is done at the top, where your options are presented in a horizontal bar, along with how many athletes you have selected.

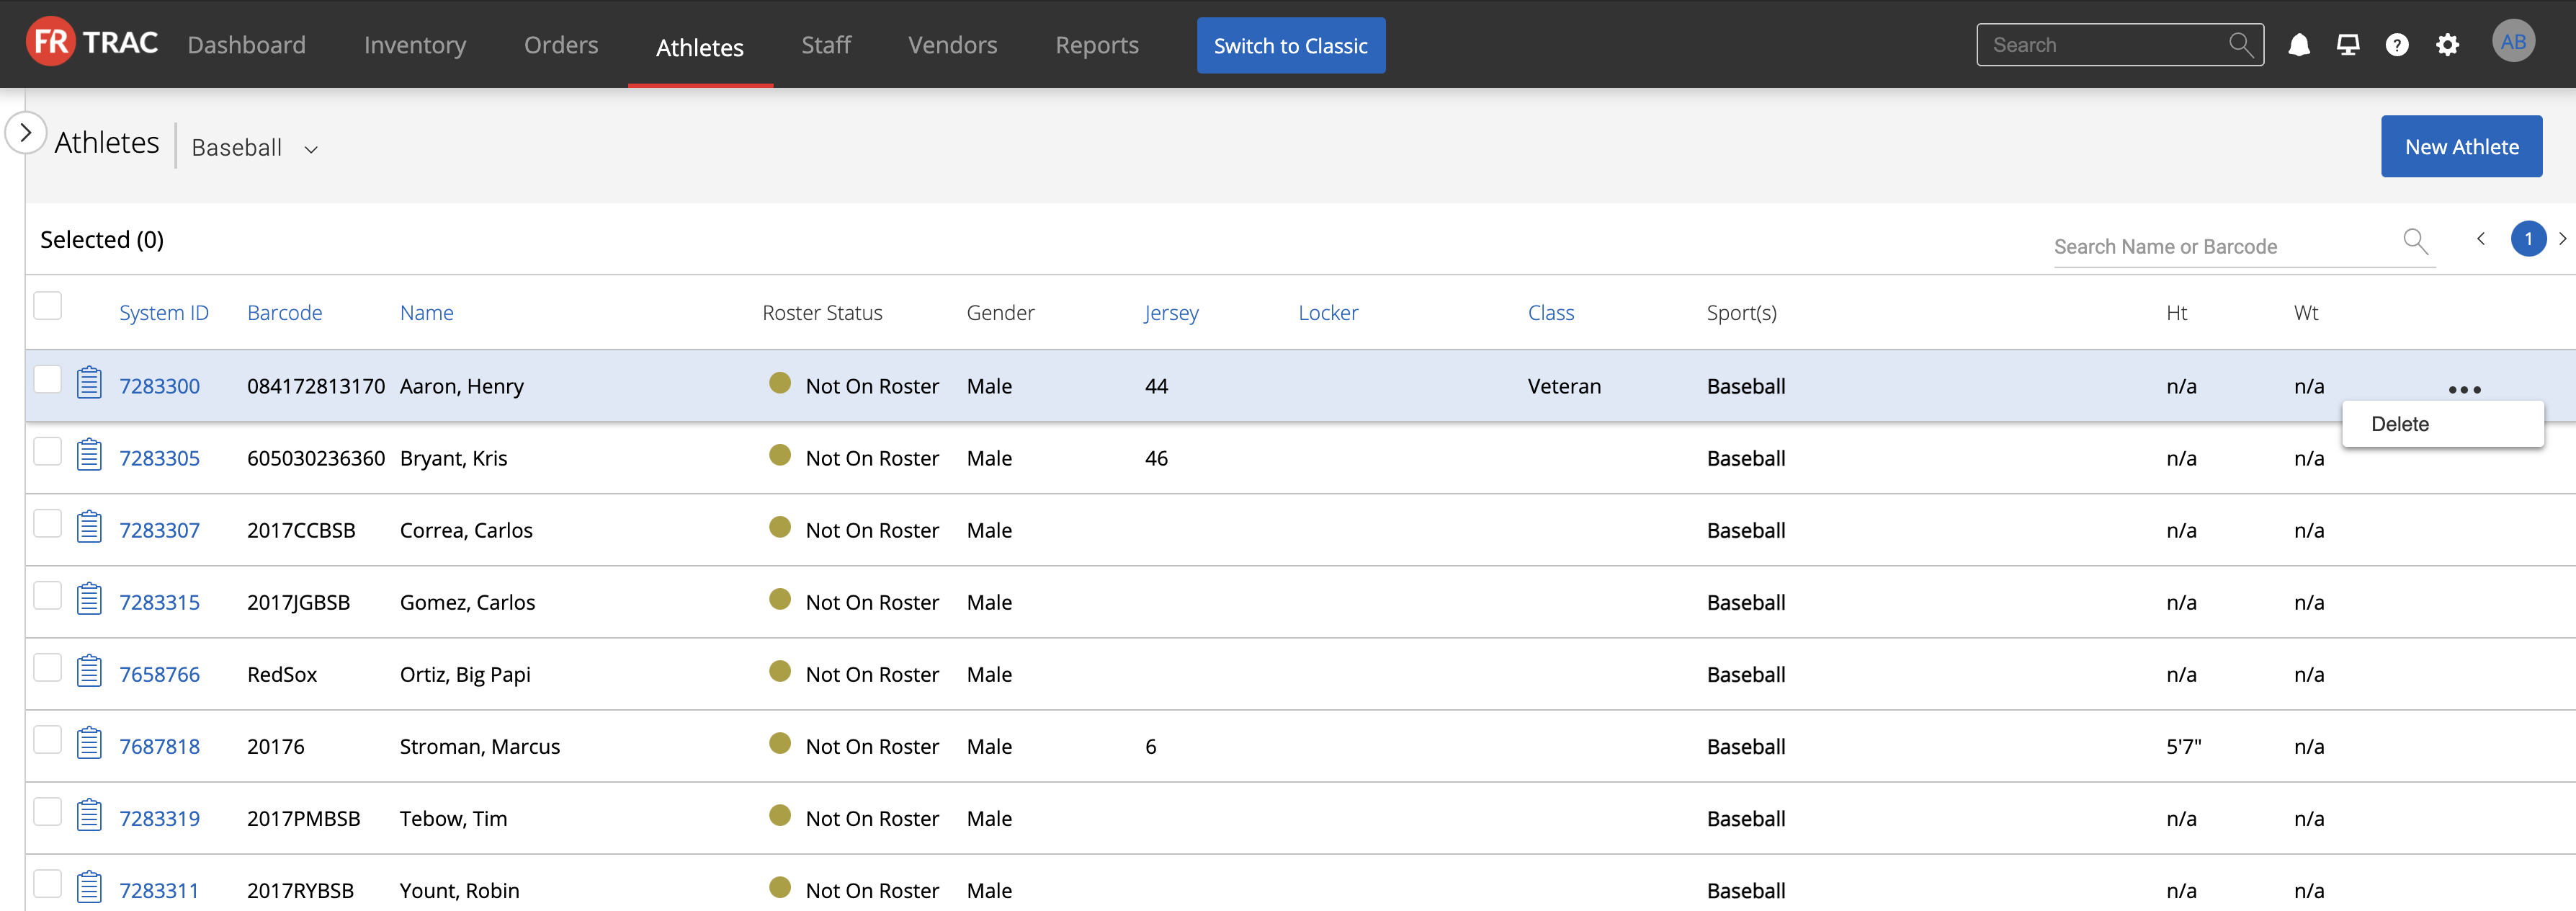
Row actions are found by selecting the three dots on the right side of each row, pictured below.
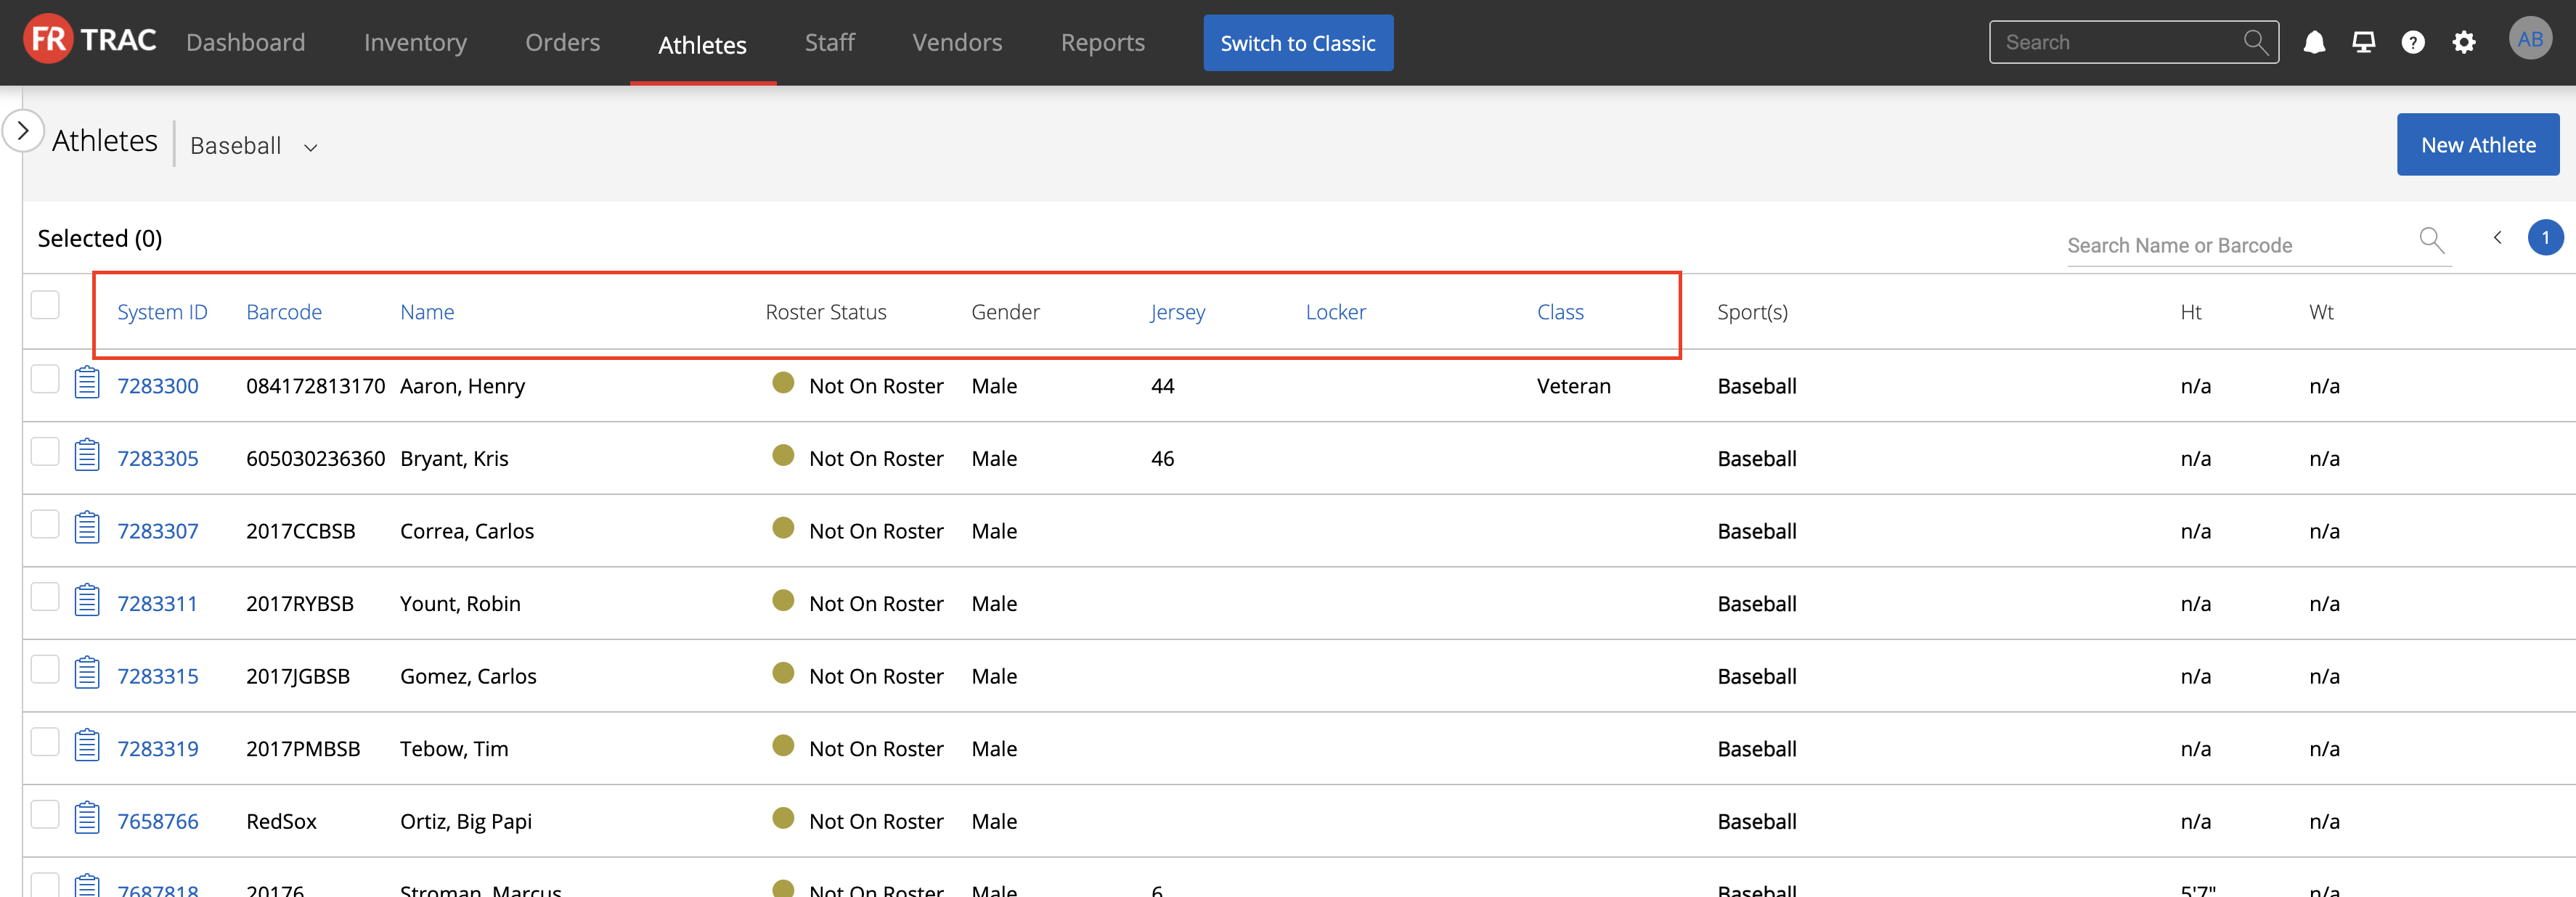
You can also still quickly sort through your athlete list by clicking the headers of each column which has blue text in the heading, circled below, to organize your athletes based on that heading.
New Features:
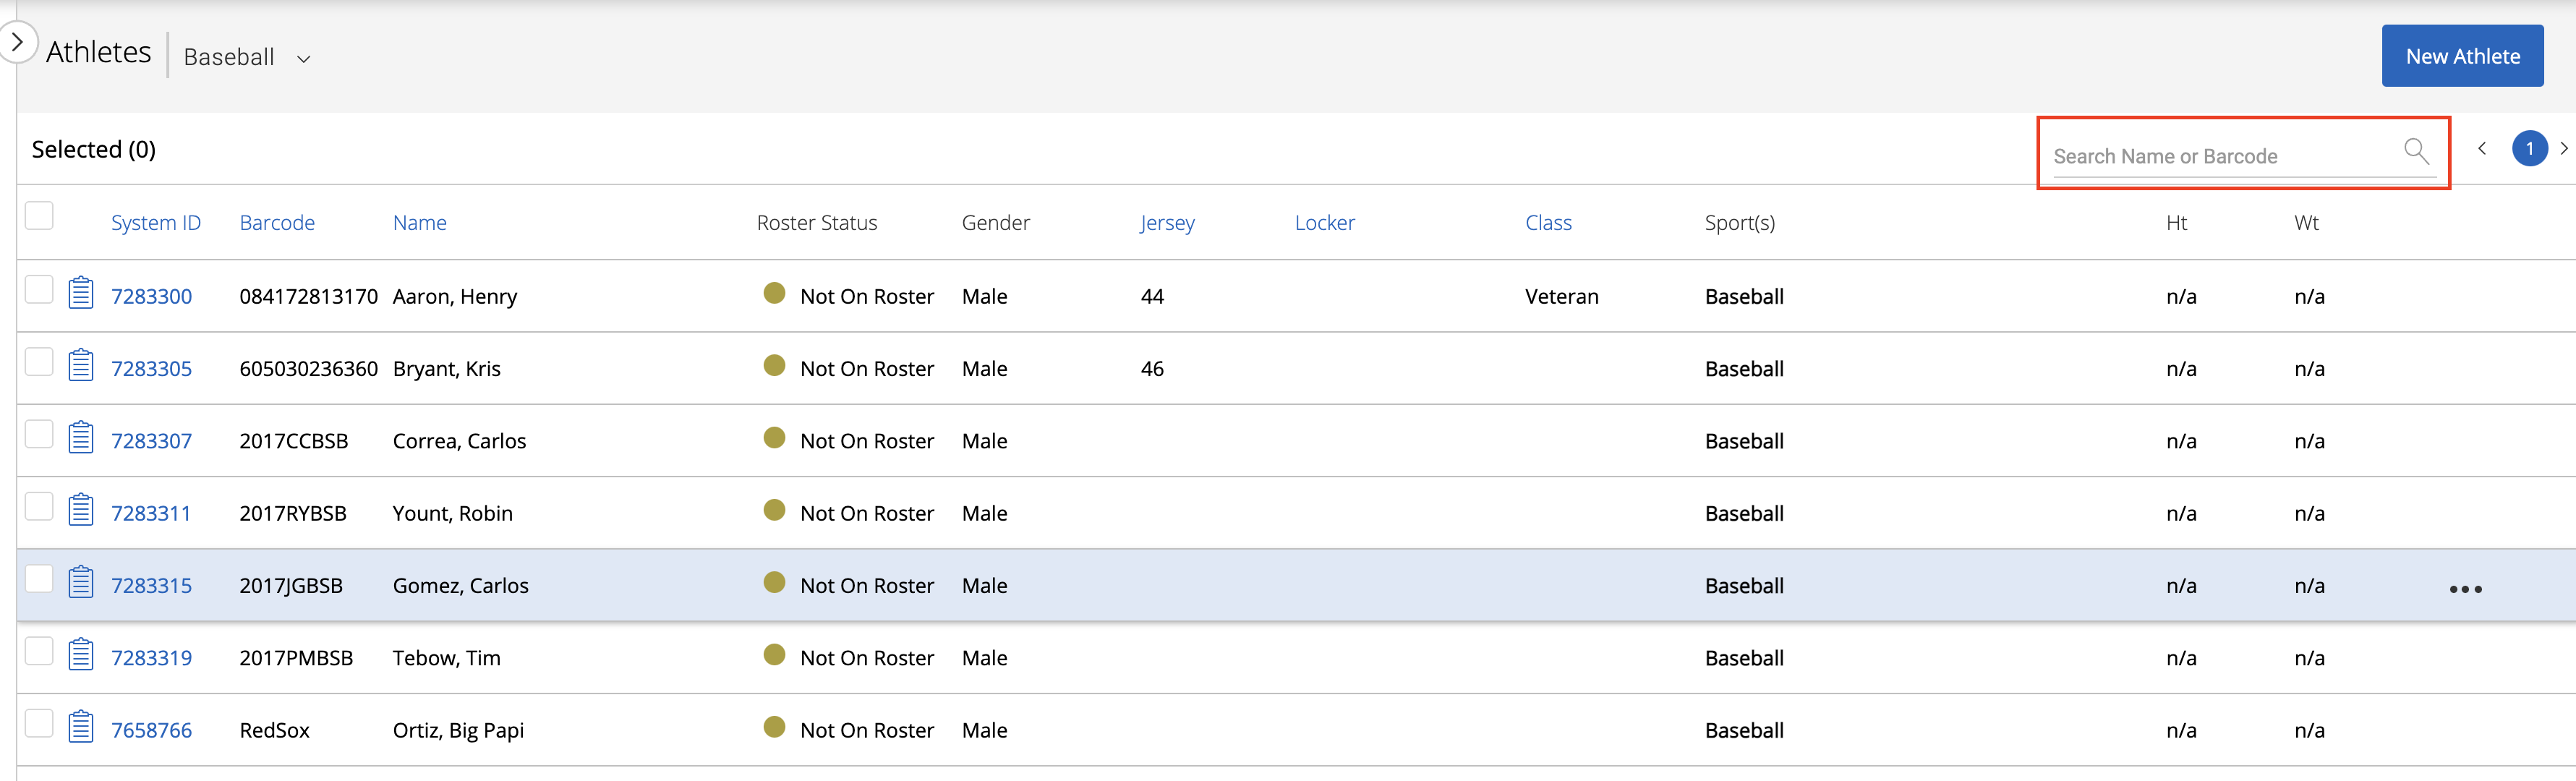
There is now a quick search bar that allows you to search by Athlete name or barcode. It automatically looks for whatever you search in the athletes' names and provides you with a list of corresponding athletes, even if you only search one letter!
Now in the new athlete creation process, the site will give you a message telling you if the athlete ID you have inputted is unique, or it will tell you who it is and automatically fill in their information as seen in the second photo below. This is great for multisport athletes as it allows for their barcode to be scanned in and then a sport can be added to their profile or taken away much more efficiently than before.


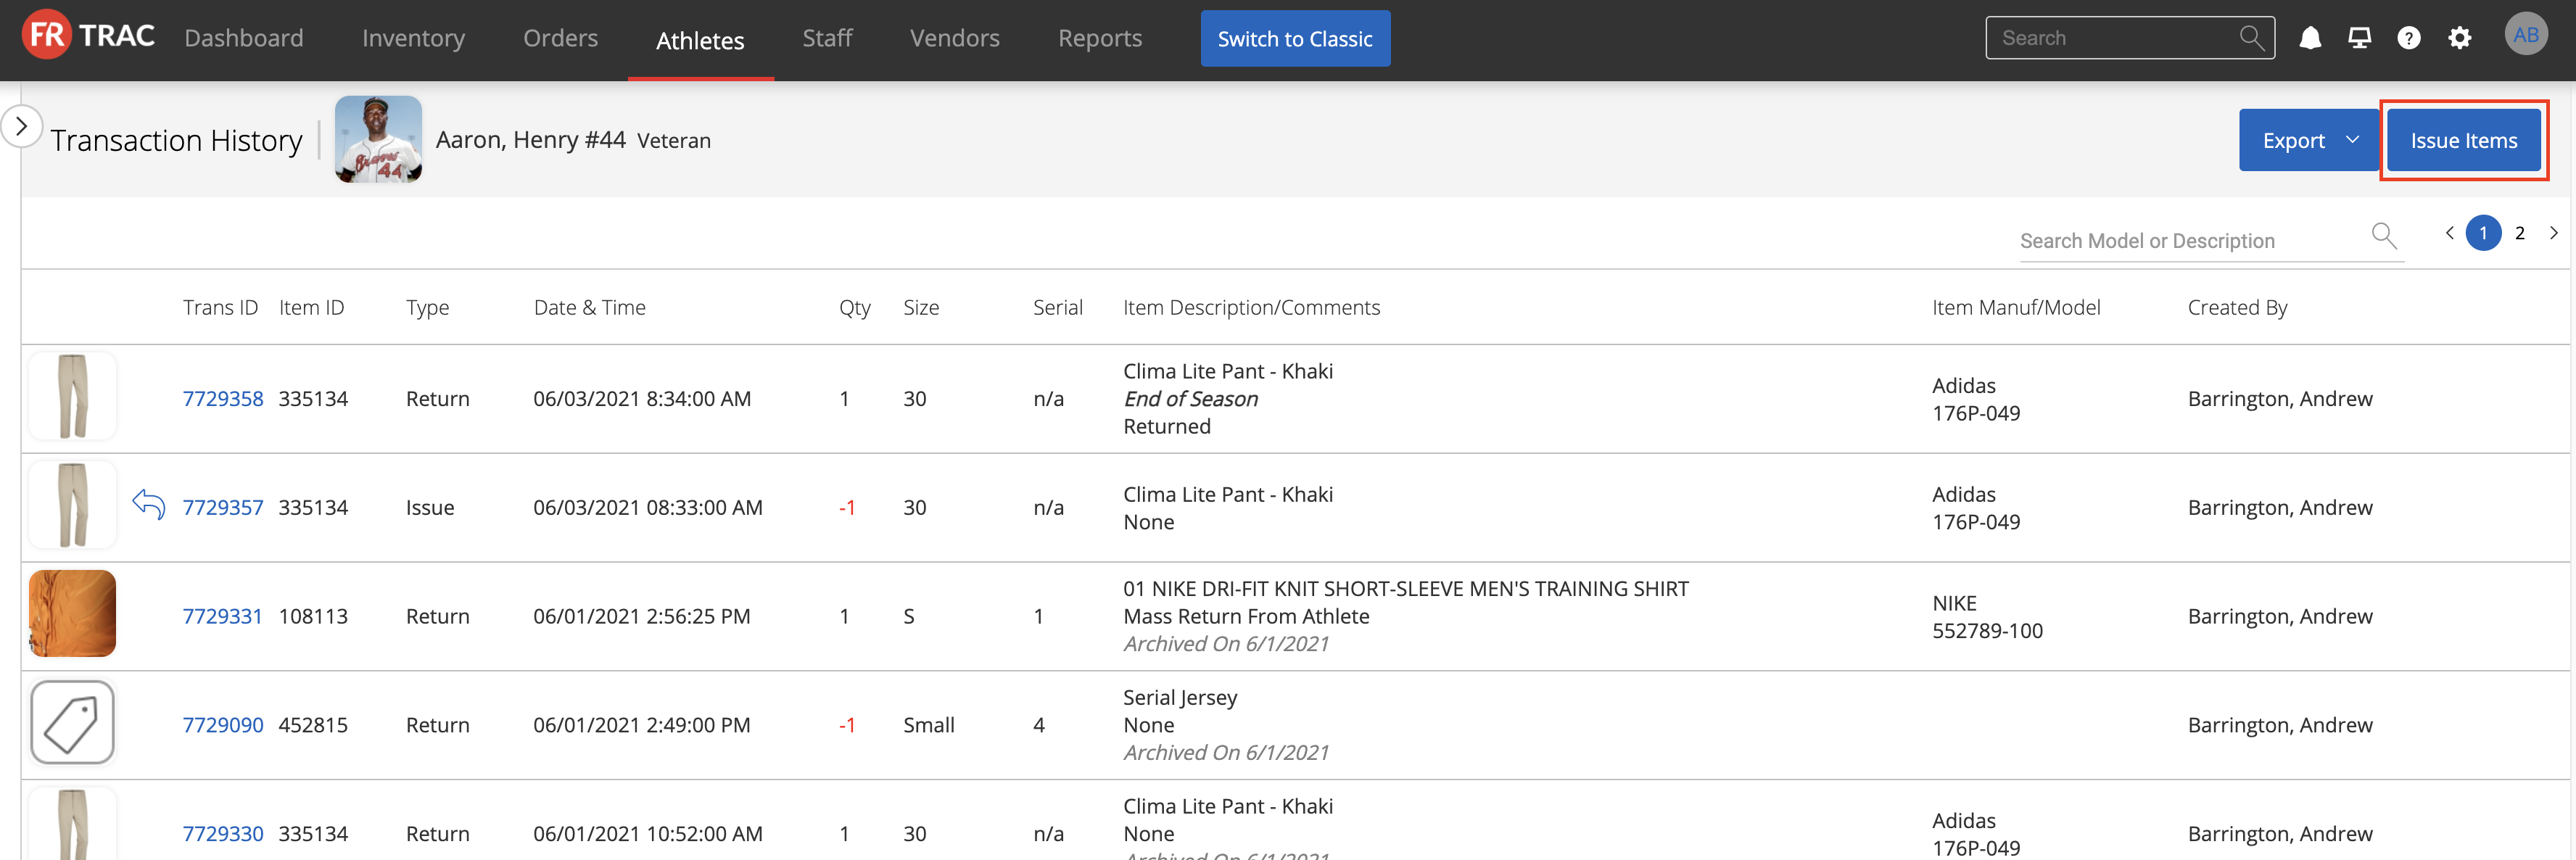
Transaction history has had a complete overhaul, it is much simpler, you don't need to leave the screen, you can search by model number or description in the search bar circled below, and it allows you to quickly filter transactions further and then export a report directly from the export button also circled below on transaction history page. This allows for data to be pulled quickly and easily for one athlete as you don't need to go to the reports section.
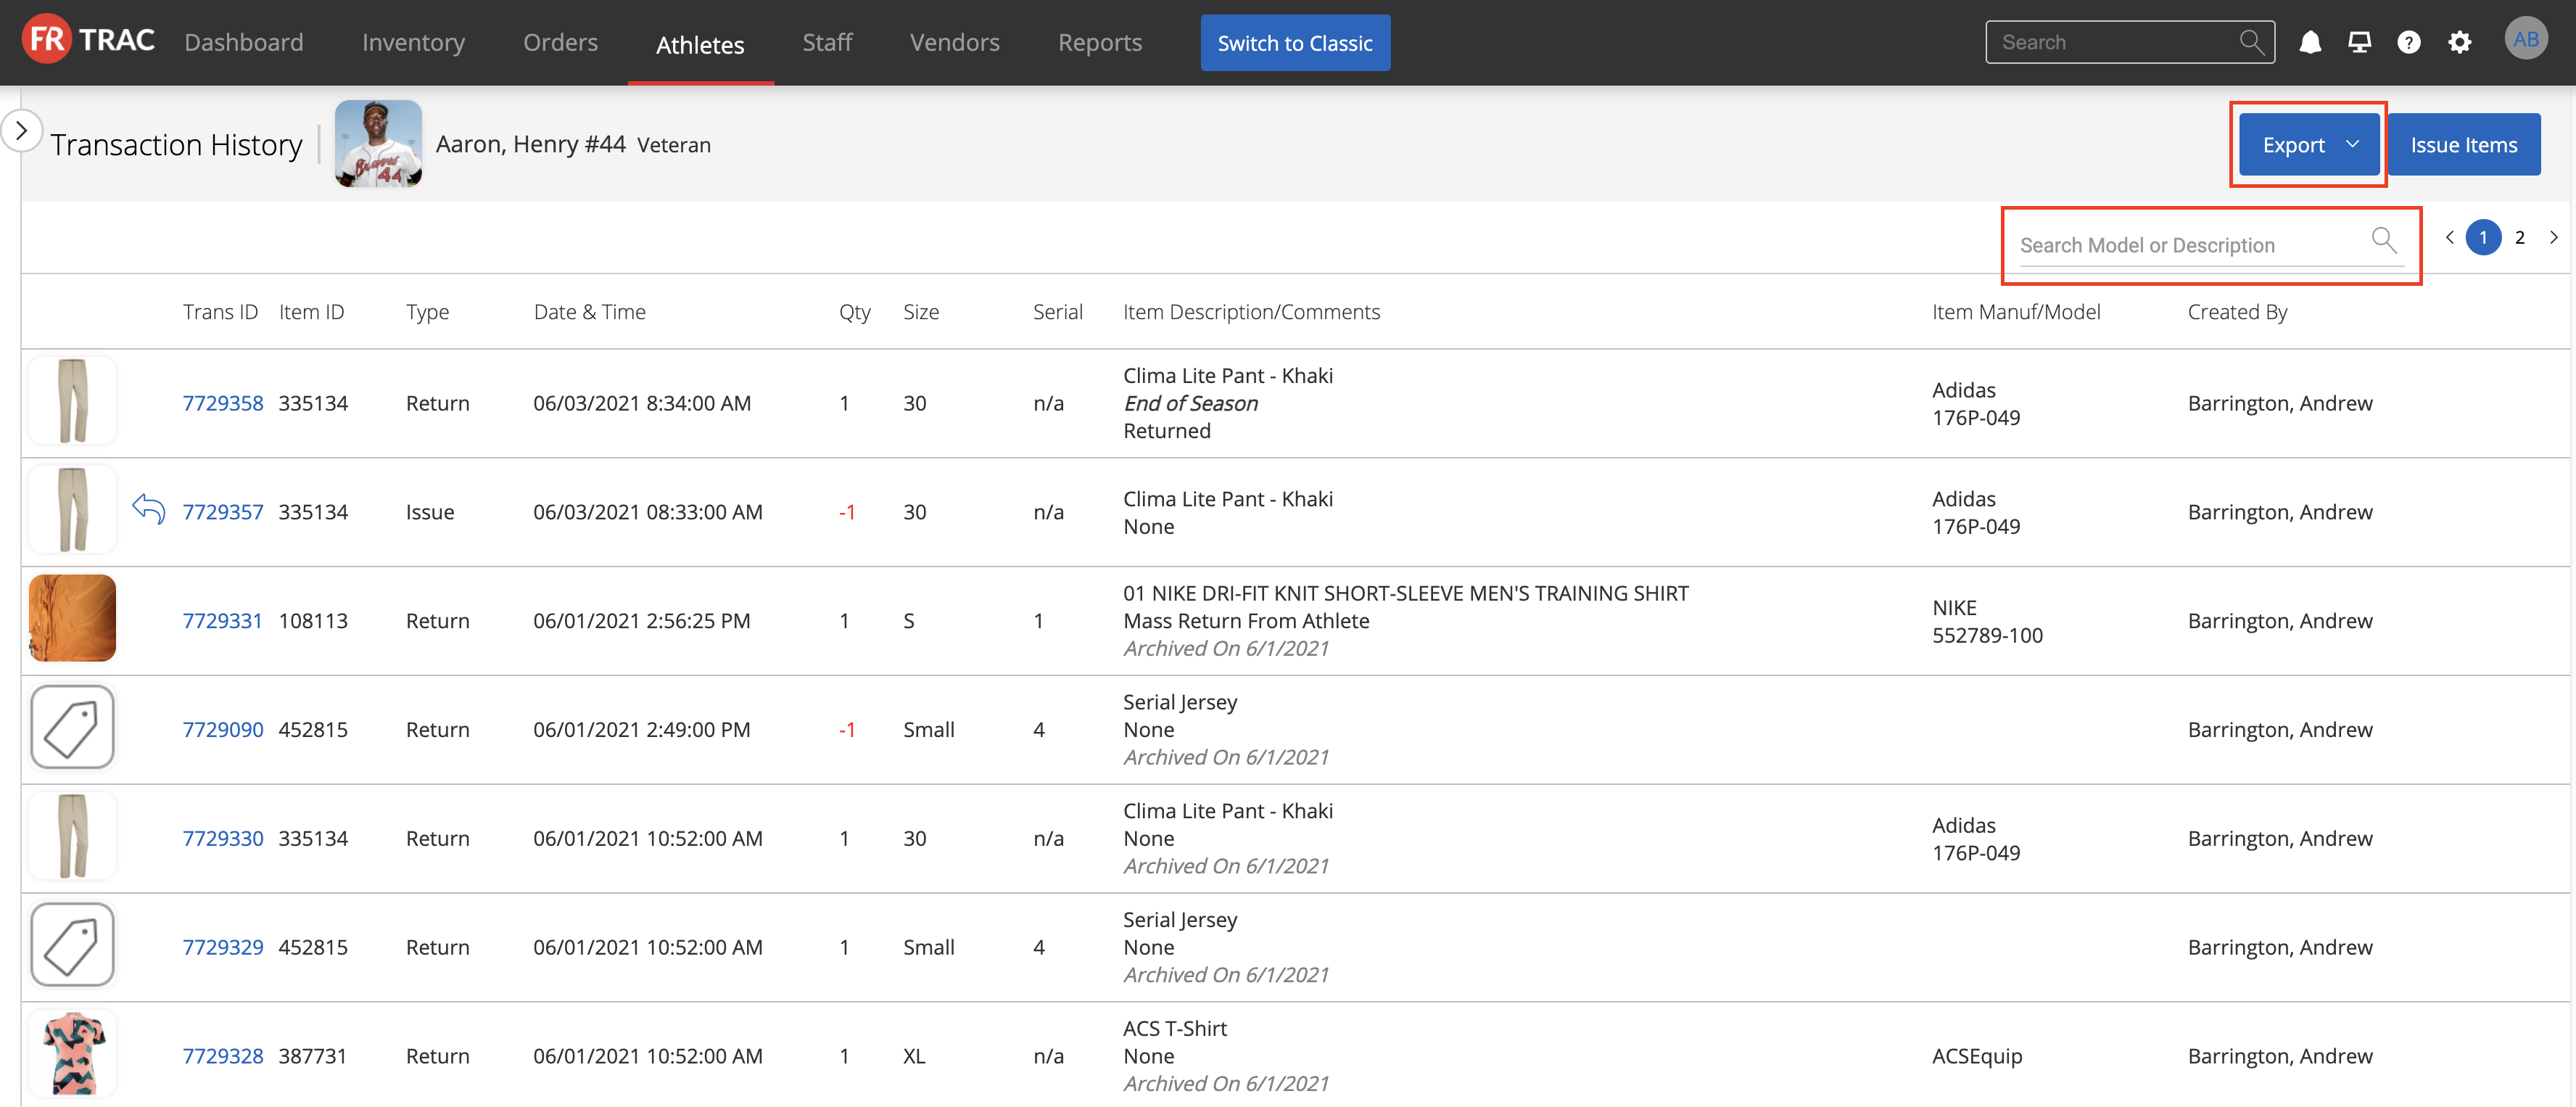
You can also quickly hit the issue items button which is circled below, and that will take you directly to the new kiosk.
The kiosk shown below will automatically open to the athlete which you were just in, and you can quickly use the search bar circled below to assign an item and close the kiosk. This will take you right back to the transaction history page you were just on.

If you want to, say, return the item you just assigned, you can go back into the kiosk, by hitting the issue item button, or can hit the arrow symbol on the left side of the item row, and select return.
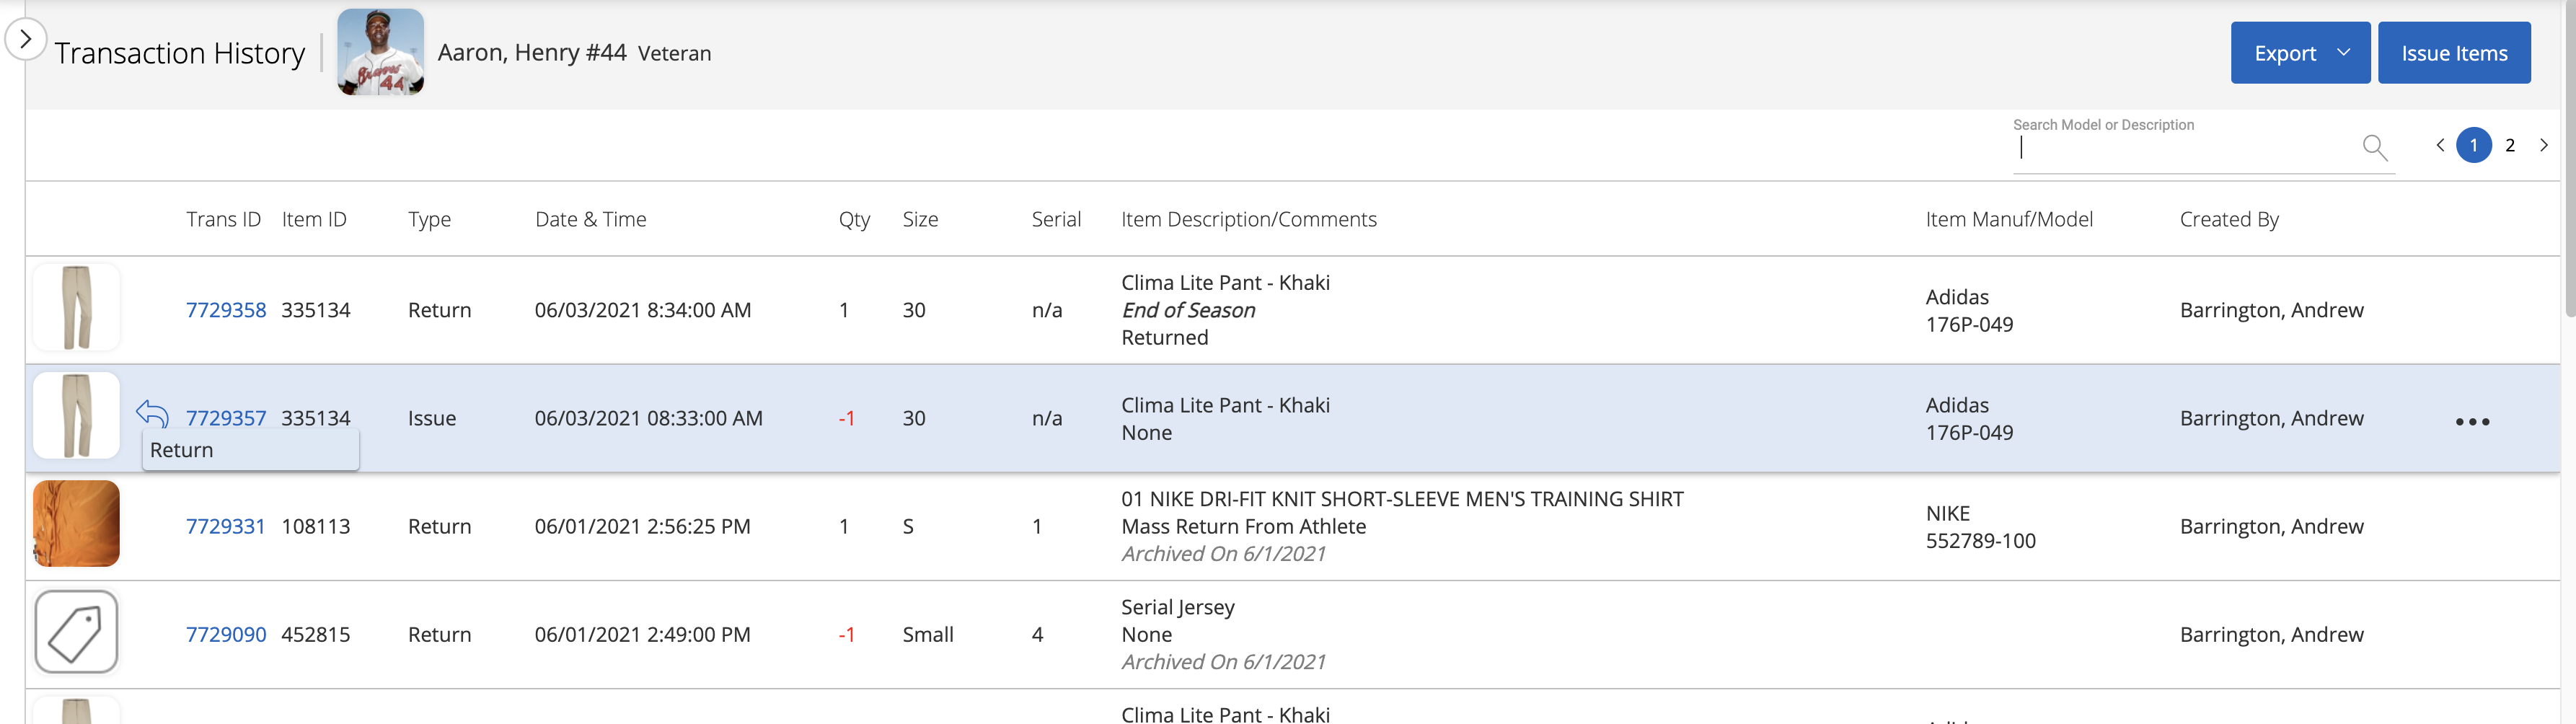
From here you can write up a quick comment if you would like, add the reason for return in the comment type, press save, and your transaction is done!
